
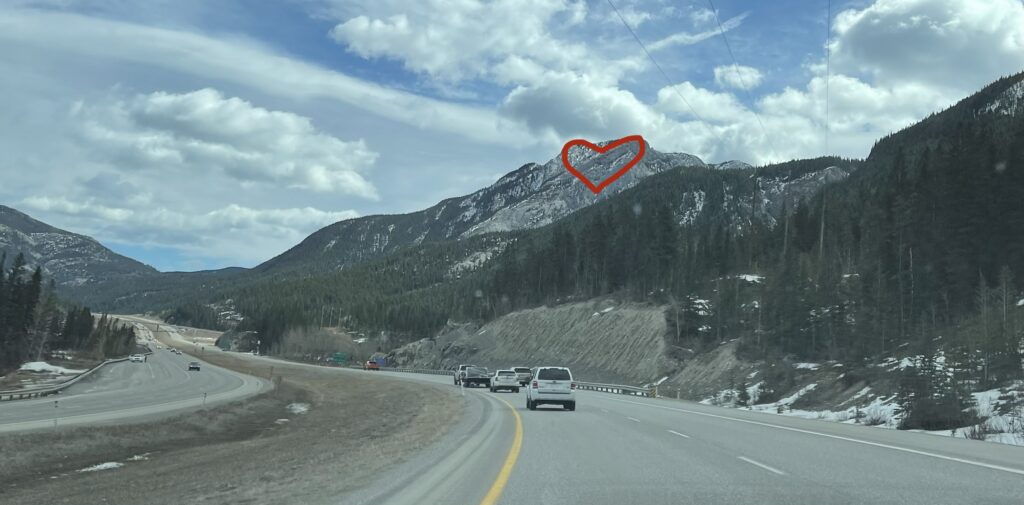
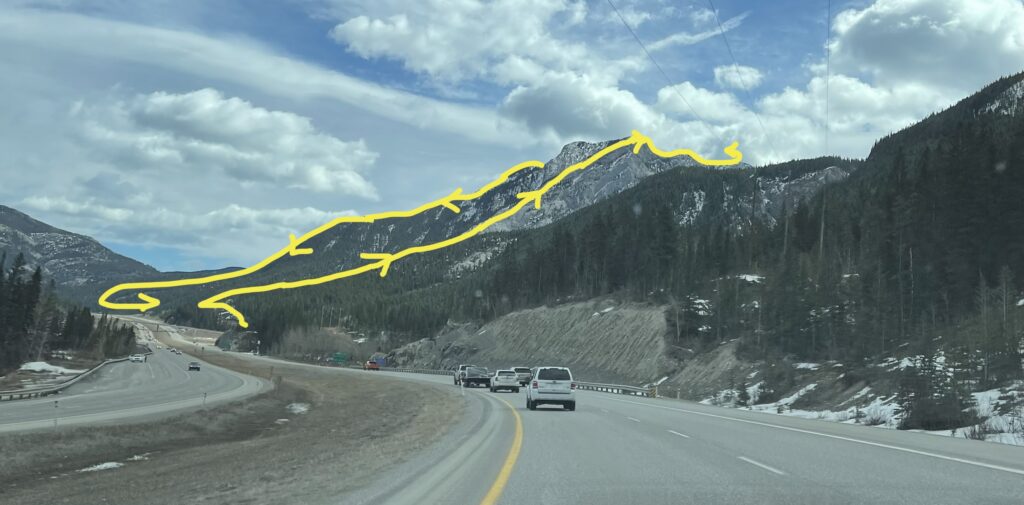
Heart Mountain is visible from the TransCanada highway and allegedly looks like a heart if you glance at it the right way, though I personally can’t figure out how to see it. However, summiting Heart Mountain does make for a fun scramble adventure, and can be done in any season.
Additionally, once you’re at the top of Heart Mountain, you can continue along the ridge and bag two more summits and finish your hike as a loop instead of heading back down the way you came up, which I’d highly recommend.
If you’re looking for a short but exciting scramble adventure with options for shorter or longer alternatives, Heart Mountain might be right for you!
Heart Mountain Quick Stats
- Distance – 8.2km / 5.1mi to the summit and back, or 12km / 7.5mi for the full loop
- Elevation Gain – 926m / 3038ft to the summit, or 985m / 3231ft for the full loop
- Approximate Time – 4-5 hours to the summit and back, or 6-8 hours for the loop
- All Season Hike? Yes, but only for experienced adventurers in the winter
- Dog Friendly? Not recommended due to scramble sections
- Kid Friendly? Not recommended due to scramble sections
- Beginner Friendly? No
- Cell Service? Likely service throughout
- Wildlife Encounters? Possibility of bears and Bighorn Sheep in the area
- Access to Water? Possibly a small stream at the beginning, but not present in all seasons
- Bathrooms? Outhouses at the trailhead
- Chance of getting lost? Moderate
Driving Directions & Where to Park for Heart Mountain
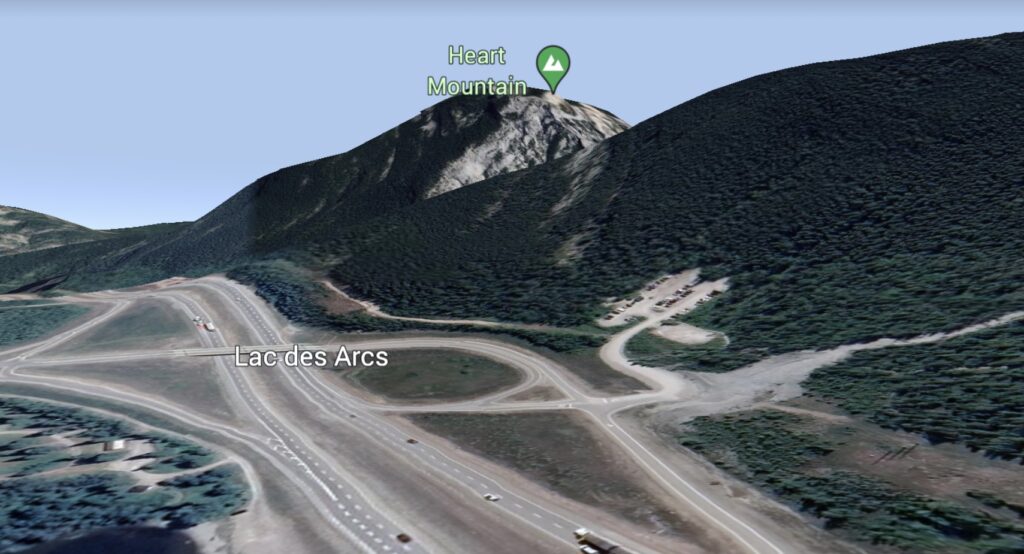
Drive along Highway 1 and take the exit heading south at Lac Des Arcs. This exit is a 1 minute drive up a dirt road to a large parking lot. This is where you should park to hike up Heart Mountain.
This parking lot fills up quickly on weekends, and most days in the summer. Arrive early to ensure you have a spot!
Alternatively, if the main lot is full, you can park along the side of the TransCanada Highway just east of the Lac Des Arcs parking lot. There is a faint dirt road leading off the highway, mainly used for construction access. Park at the end of this road.
If you use this alternative parking, hike up the small grassy hill directly in front of Heart Mountain, down into the gravel pit, then back up the other side. There will be a sign indicating the start of the Heart Mountain trail, which begins immediately uphill behind the sign. (Don’t walk along the highway to the main lot!)
How to Get to the Heart Mountain Trailhead
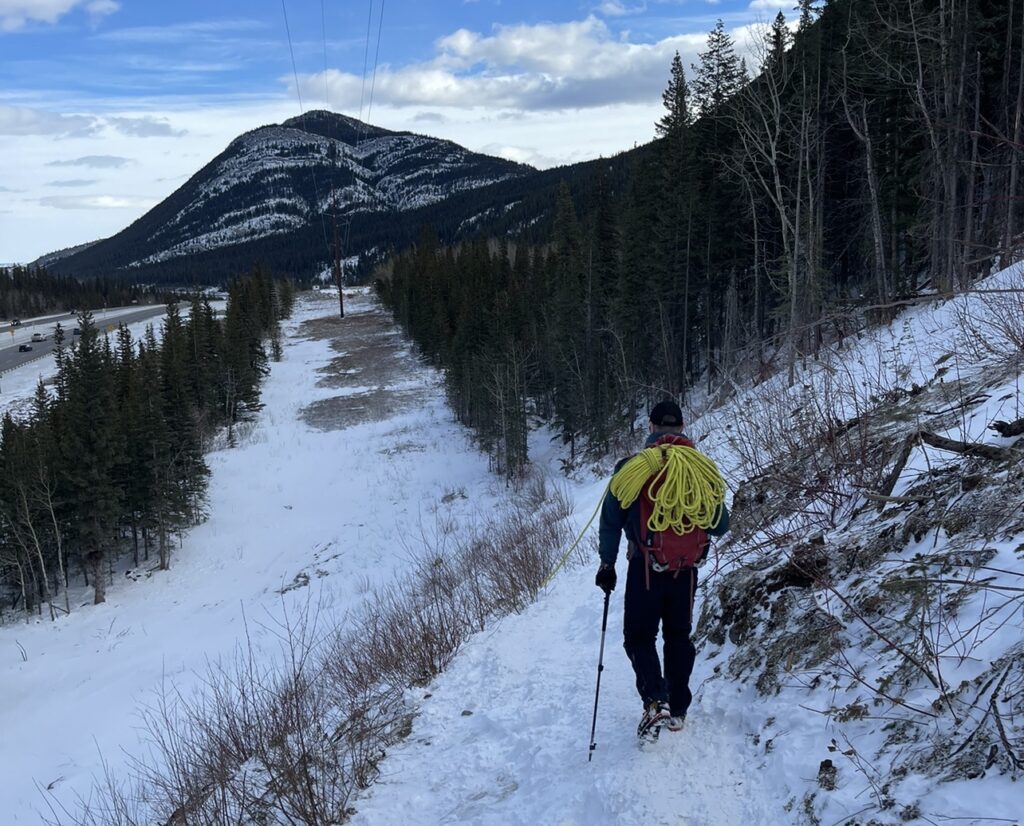
From the Heart Creek parking lot, head behind the outhouses to the Heart Creek trail, marked with a large sign. Follow the obvious trail up a small hill and down a powerline towards the creek.
Cross the creek on the trail via a small bridge, then keep your eyes open for a small sign indicating where to turn to leave the Heart Creek trail and to get on the Heart Mountain scramble trail. You will be making a lefthand turn at this sign.
This sign is the official start of the Heart Mountain hike.

How To Hike Heart Mountain Successfully
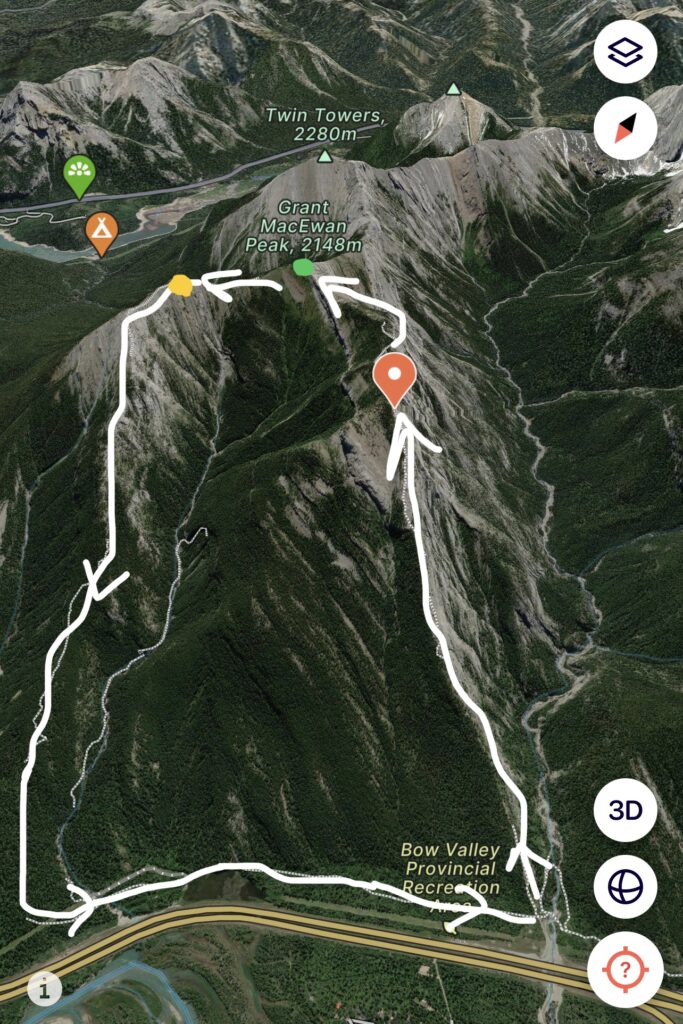
This hike is most often done as a loop, which I would recommend since completing the loop adds distance but very little elevation gain. Also, completing the hike as a loop prevents you from having to downclimb the scramble sections.
Here, I’ve laid out the trail in segments as you will encounter them along the loop.
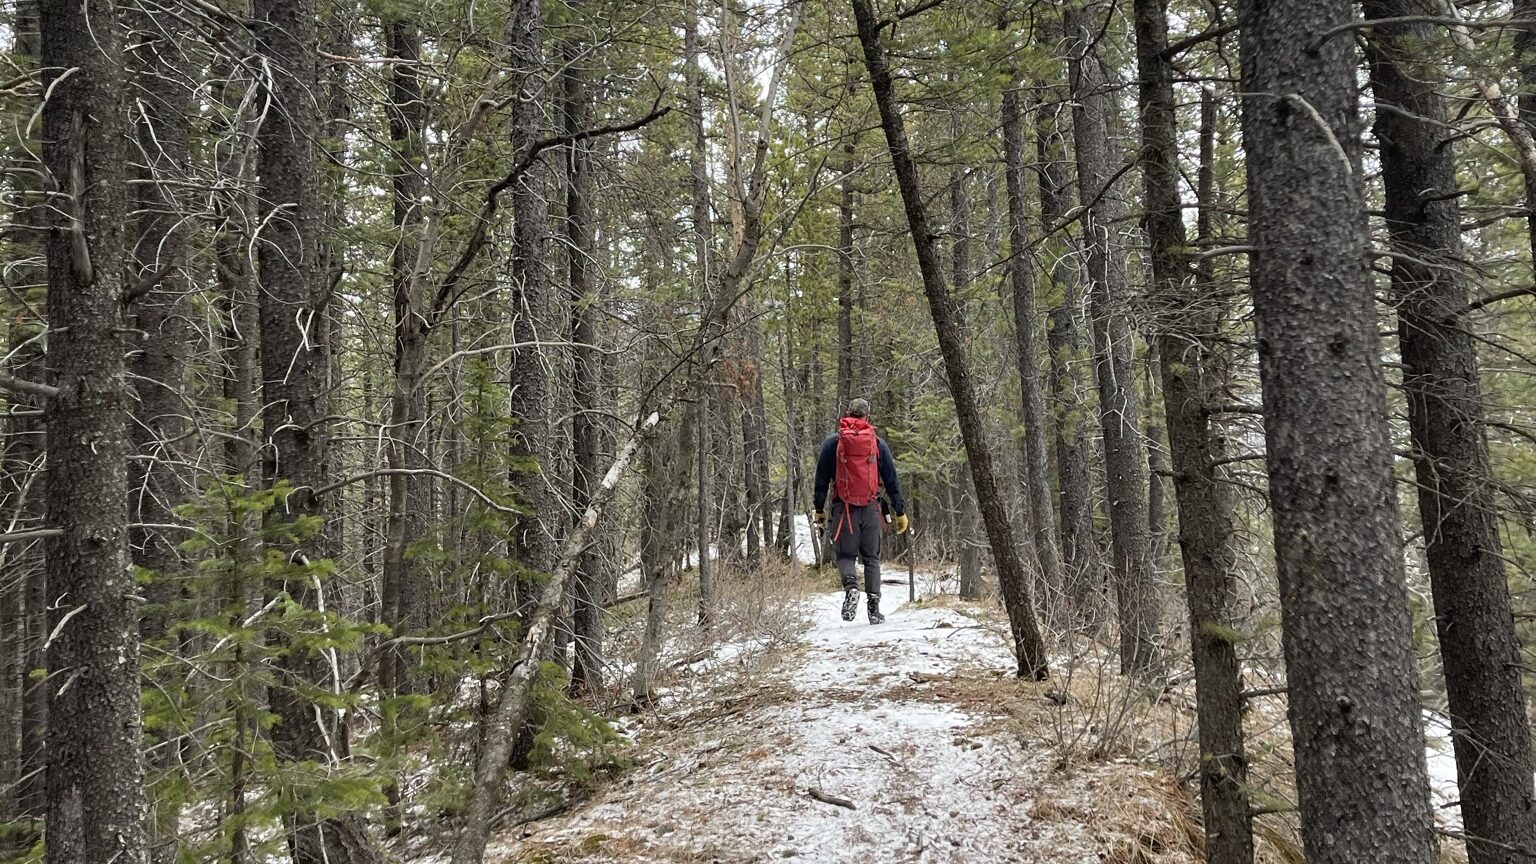
1. The Heart Creek Trail
The Heart Creek Trail is a family-friendly trail and is what you follow to start this hike. The trail itself is wide and obvious.
Follow the Heart Creek trail up a small hill, then down a cleared powerline until you eventually cross the actual creek on a wooden bridge. This is the only opportunity for water along the hike.
Once you’re across the bridge, keep your eyes open for an obvious sign on the left indicating different trail directions. The sign is a one-minute hike past the bridge, and is a laminated paper tacked to a pole. Follow the sign and take a left at this intersection to leave the Heart Creek trail and start the Heart Mountain trail.
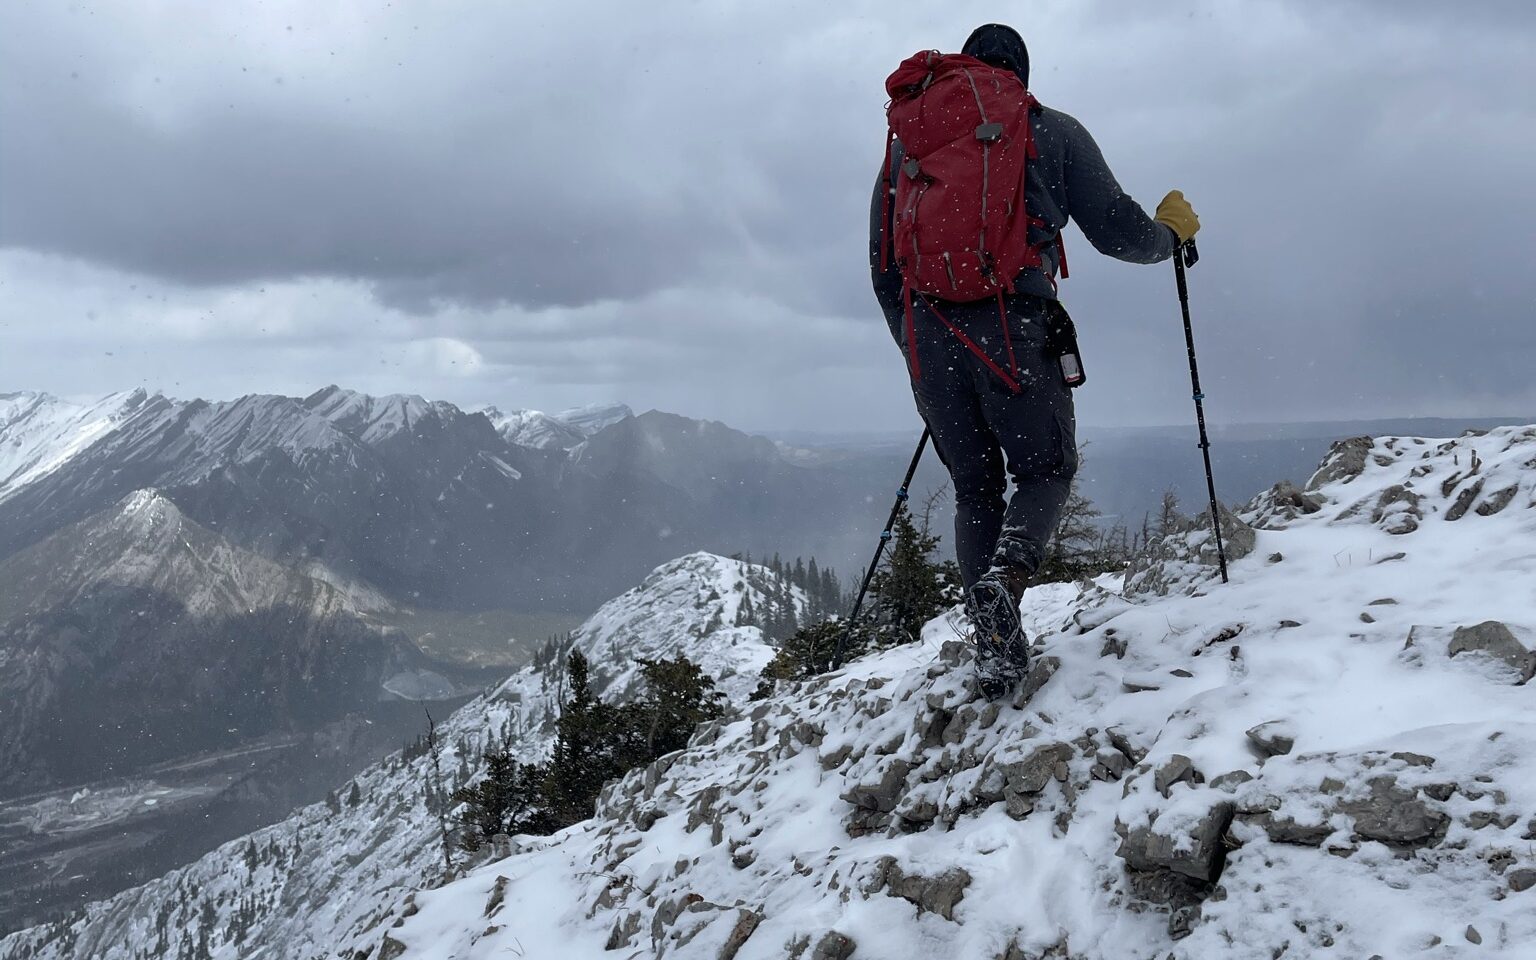
2. The Uphill
Once you leave the Heart Creek trail, the uphill grind starts. The trail essentially follows a ridge of the mountain straight up towards the peak. It is steep and unrelenting, and doesn’t offer much protection from sun or wind.
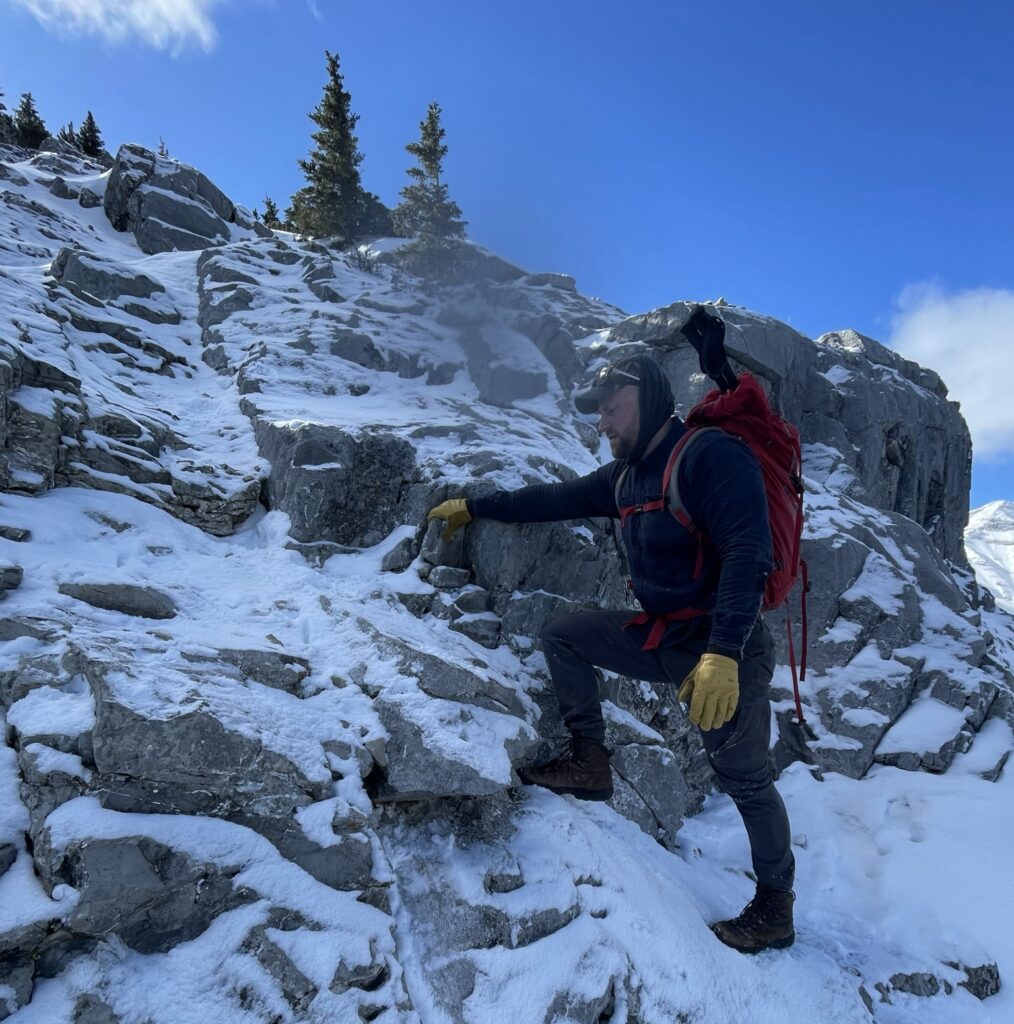
The trail in this section is faint, and often becomes less obvious as large rock prevents a dirt trail from being beaten in. You will have to use your hands occasionally to make your way up some rocky sections.
As well, the ground occasionally is large flat rock (known as slab) that you need to hike up. On dry days, the rock has a lot of friction and you can simply walk up if your entire foot makes contact with the rock. If the ground is wet, take extra caution as slab can be slippery.
Because you gain elevation quickly with a steep hike, be sure to check out the view behind you to realize how much progress you’re making!
3. The Scrambles
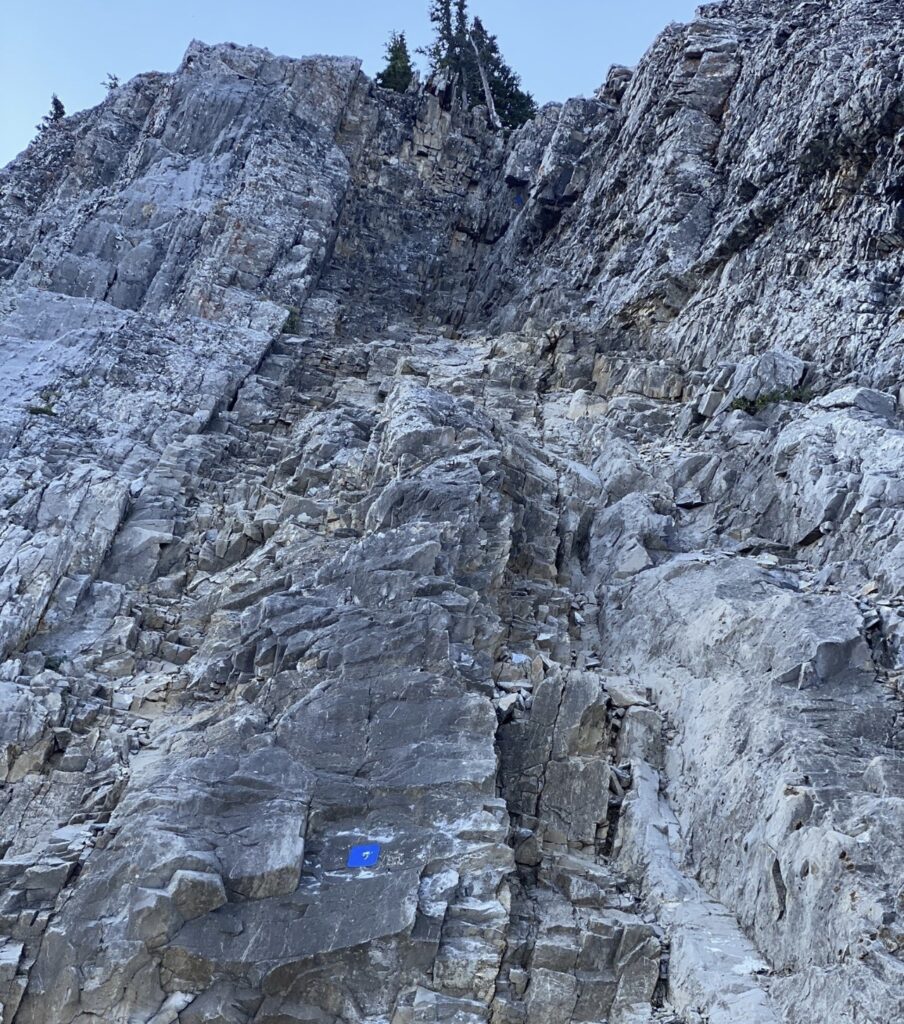
There are two defined scramble sections on this hike, marked with small blue squares and arrows bolted into the rock. The hiking trail will lead up to the first scramble section, and the blue square will be on the rock to your left. Keep a look out for this square, as it is just slightly larger than a post-it note.
When you see this blue square, you need to scramble up that rock!
The most common mistake is hiking past this blue square because it looks like the trail continues alongside the rock. Don’t be fooled! You need to scramble up the rock to avoid going the wrong way and getting into dangerous terrain.
Although the scramble sections might appear daunting, the rock is stable and functions much like small steps. I found the first scramble section to have a tough bulge to start, but once above that, it was very manageable terrain.
The second scramble section looks more like a wall, but is actually fairly straight-forward to ascend as there are several places to put your hands and feet. Take your time with these sections and ensure you would be capable of coming down this way before committing to scrambling up.

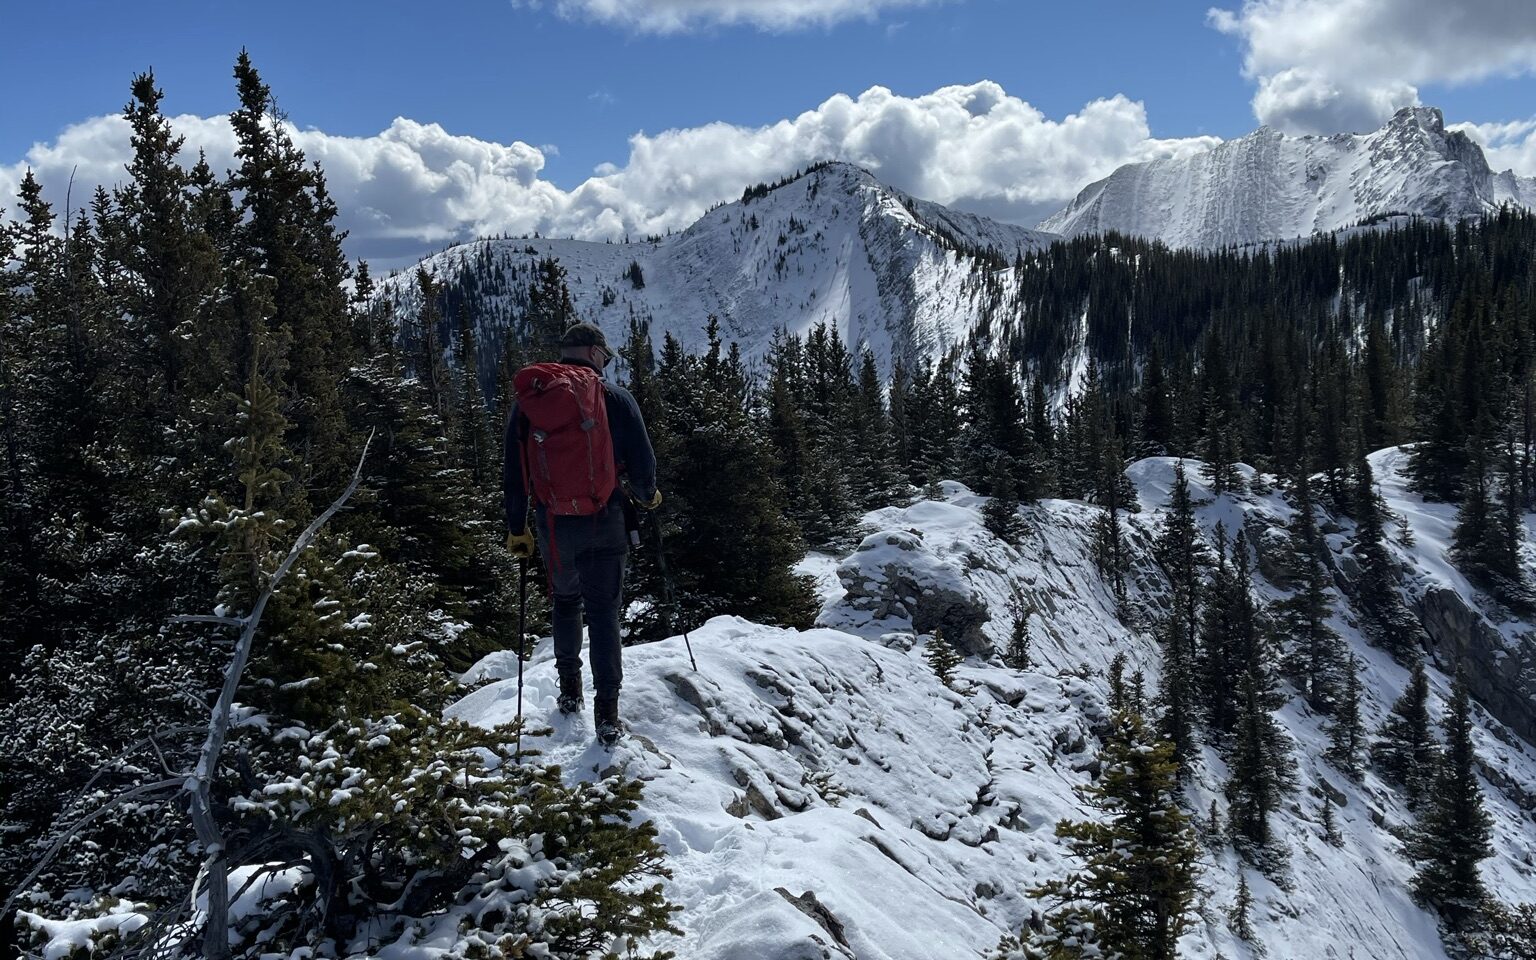
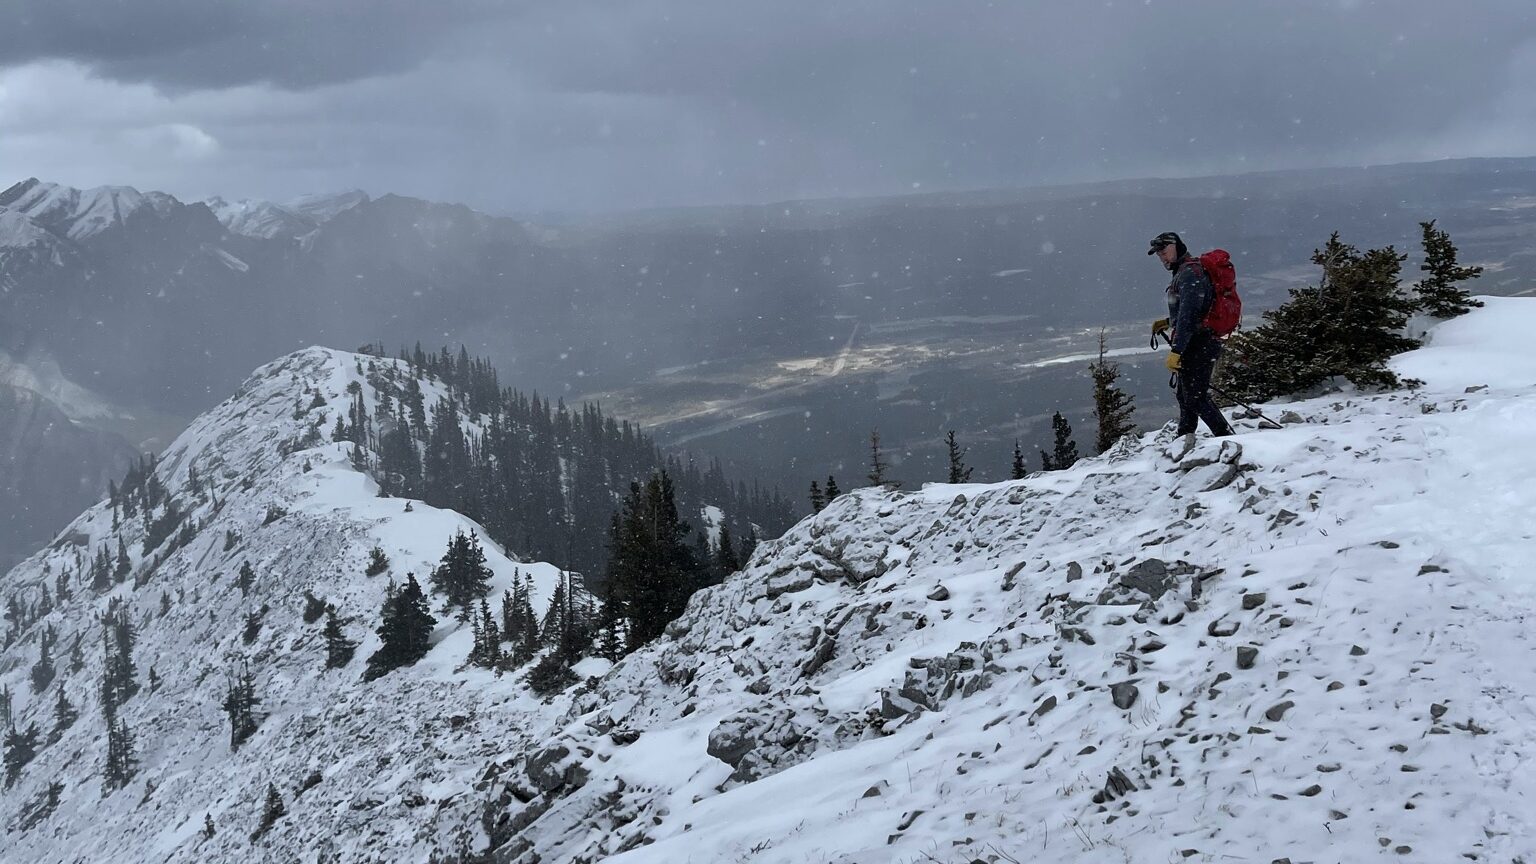
4. The Summit and Ridge
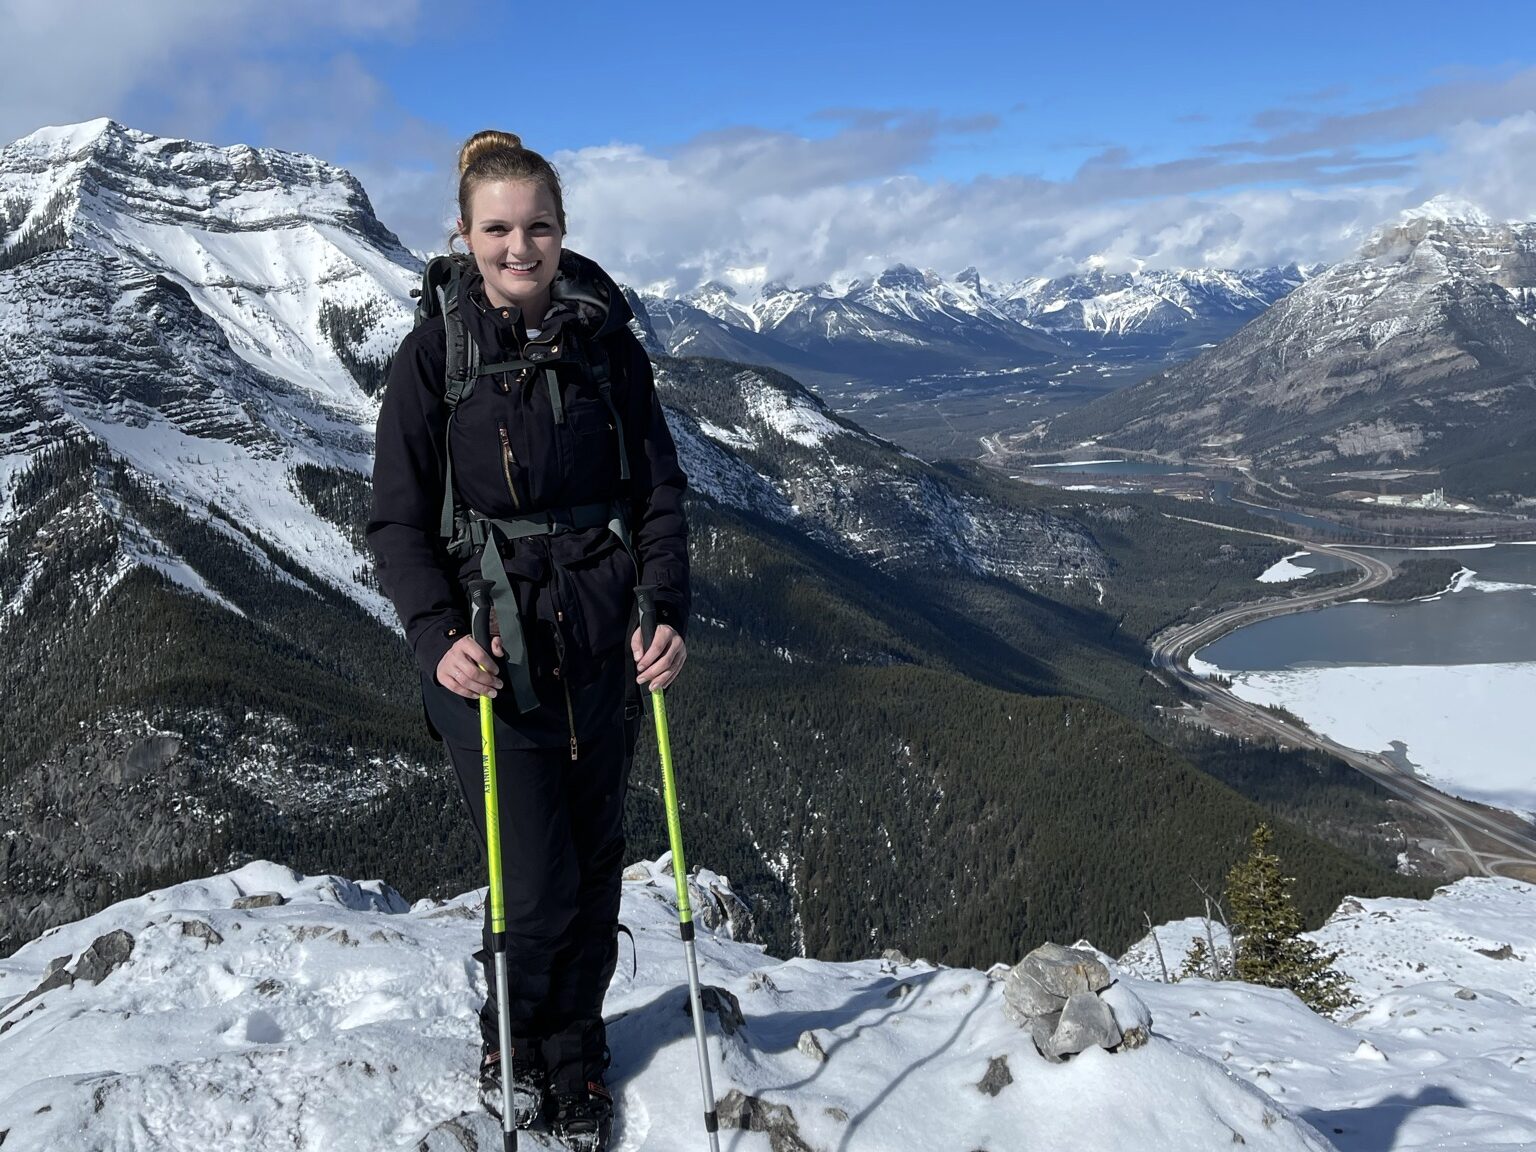
Once you’re above the scramble sections, you will be able to see the summit in the distance. A short uphill hike will get you to your goal, and the grade isn’t nearly as steep as the majority of the hike.
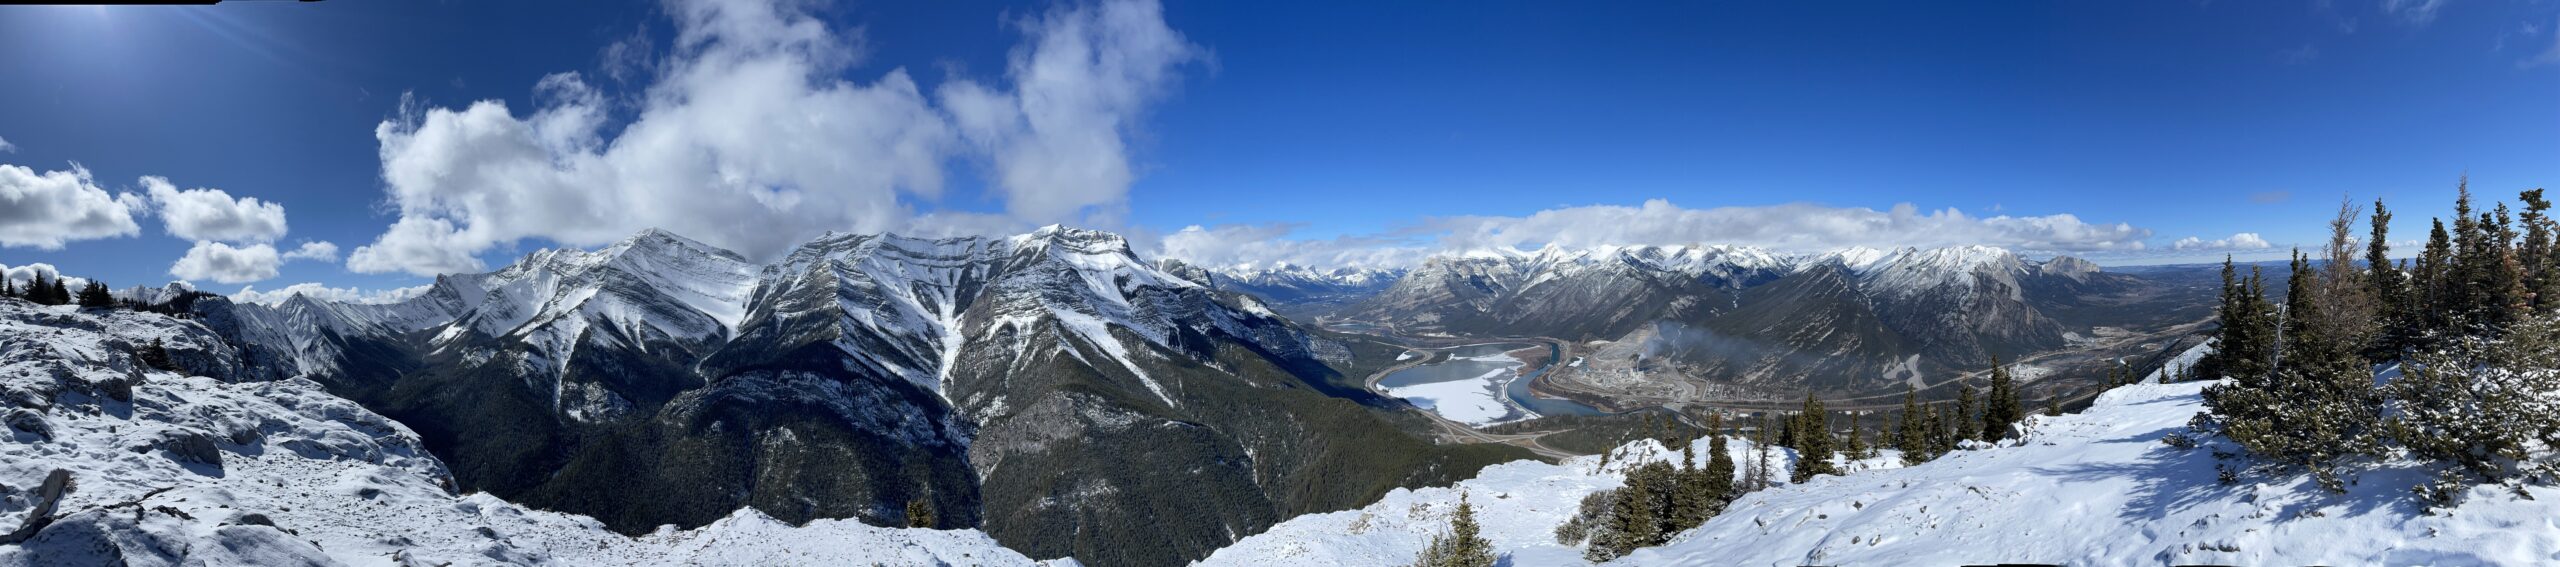
The summit itself is nice, albeit not overly impressive because you never break the tree line. There are nice views looking west, and you will be able to see the end of the horseshoe loop if you look east.
The shortest way down is the way you came up, though it involves downclimbing the scramble sections. The horseshoe loop is a much easier way down, but adds a lot of distance and can be tedious. Take group comfort, time, conditions, weather, and daylight into consideration.
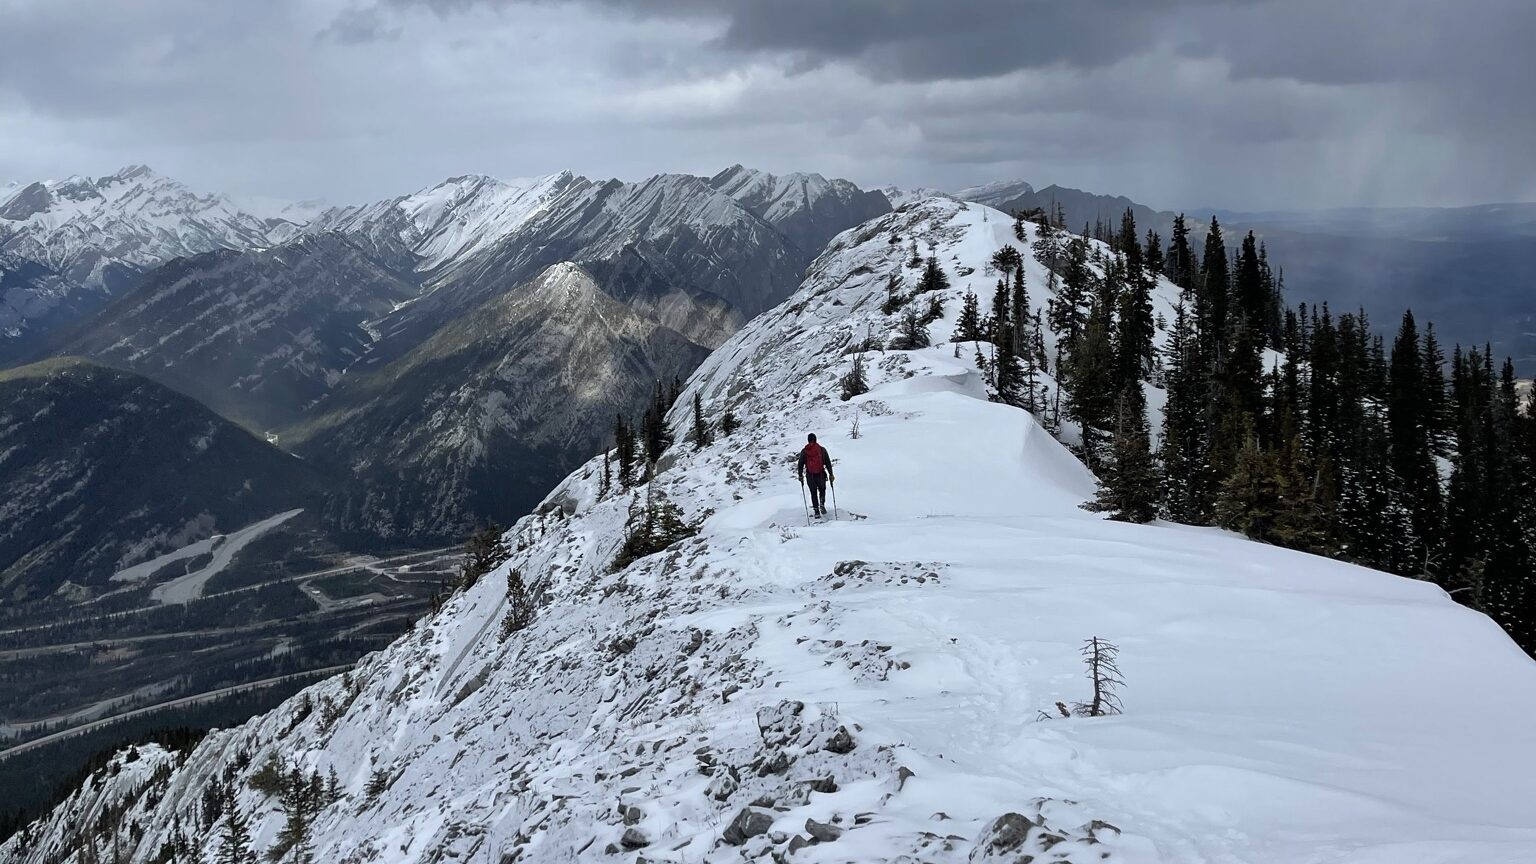
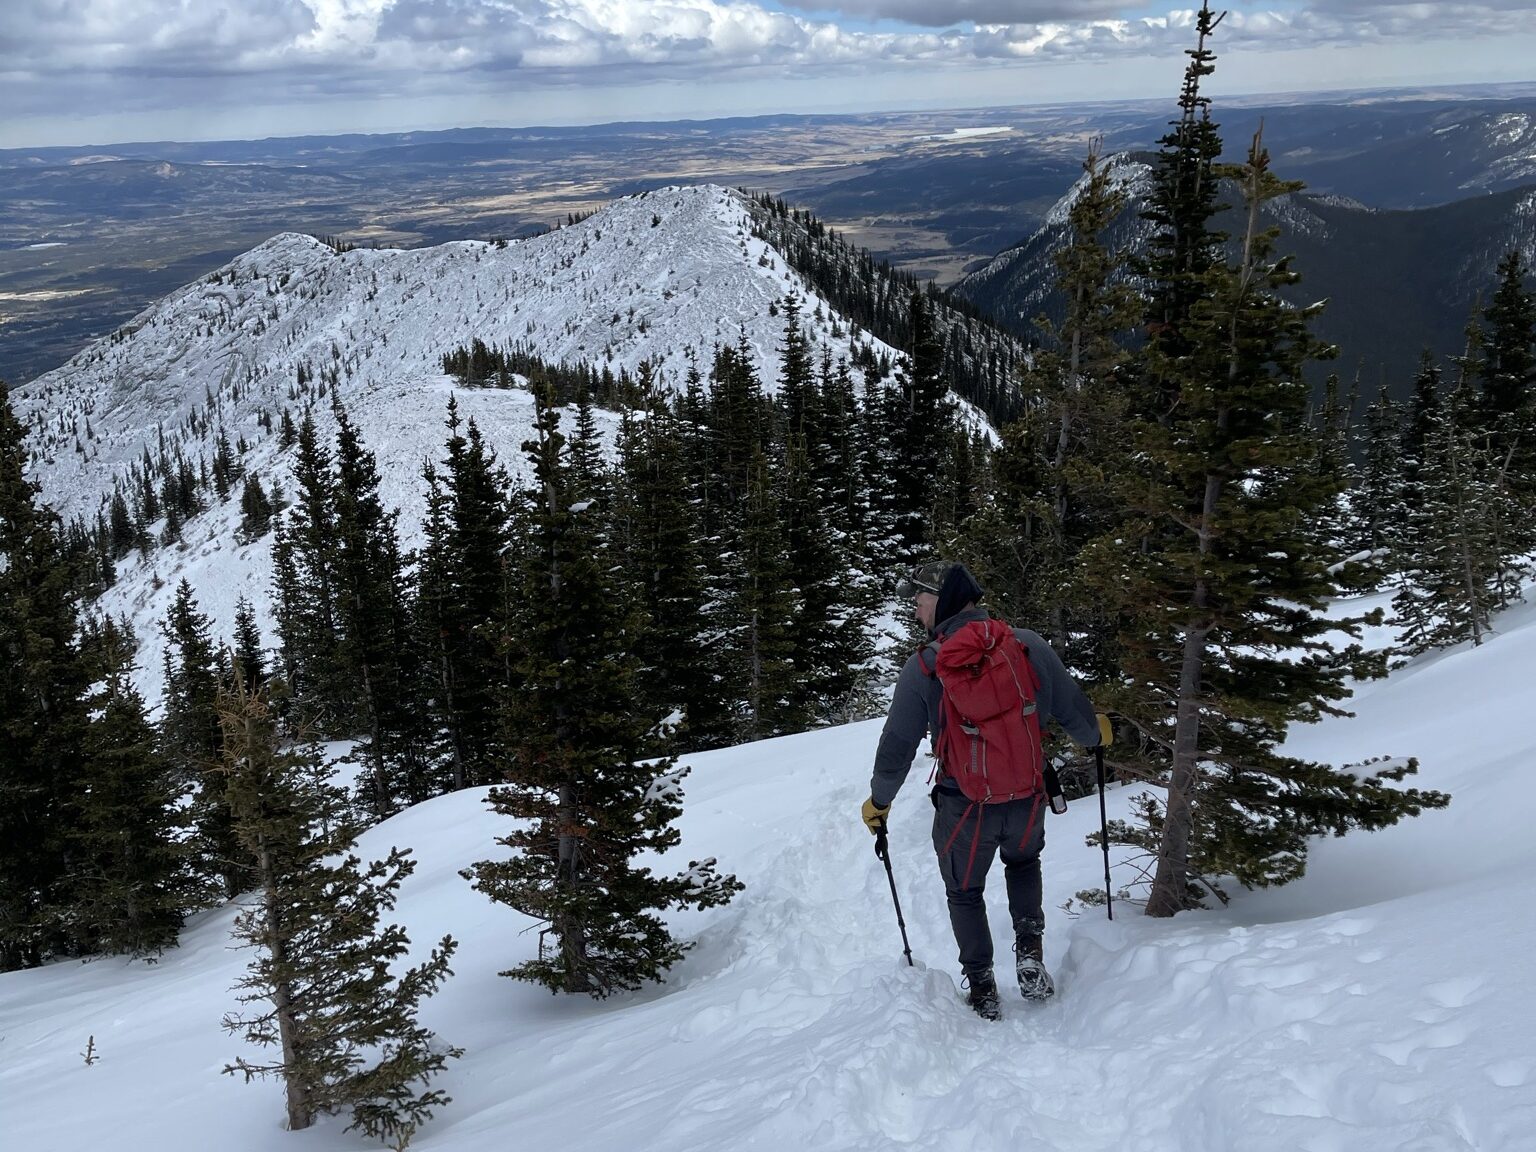
To continue along the ridge, you will wander through the trees along rocky terrain. There is no scrambling, but the ridge can be a little narrow in parts as you head towards the next summit (Grant MacEwan Peak). The path along the ridge is obvious and easy to follow.
5. The Horseshoe Loop
The loop is simply a continuation of the ridge from the summit. As you wander along, you will also summit Grant MacEwan Peak (which is 13m higher than Heart!) and another unnamed peak which kind of just feels like a knob or a hill. However, it’s exciting to “bag” (achieve) so many peaks in one adventure!
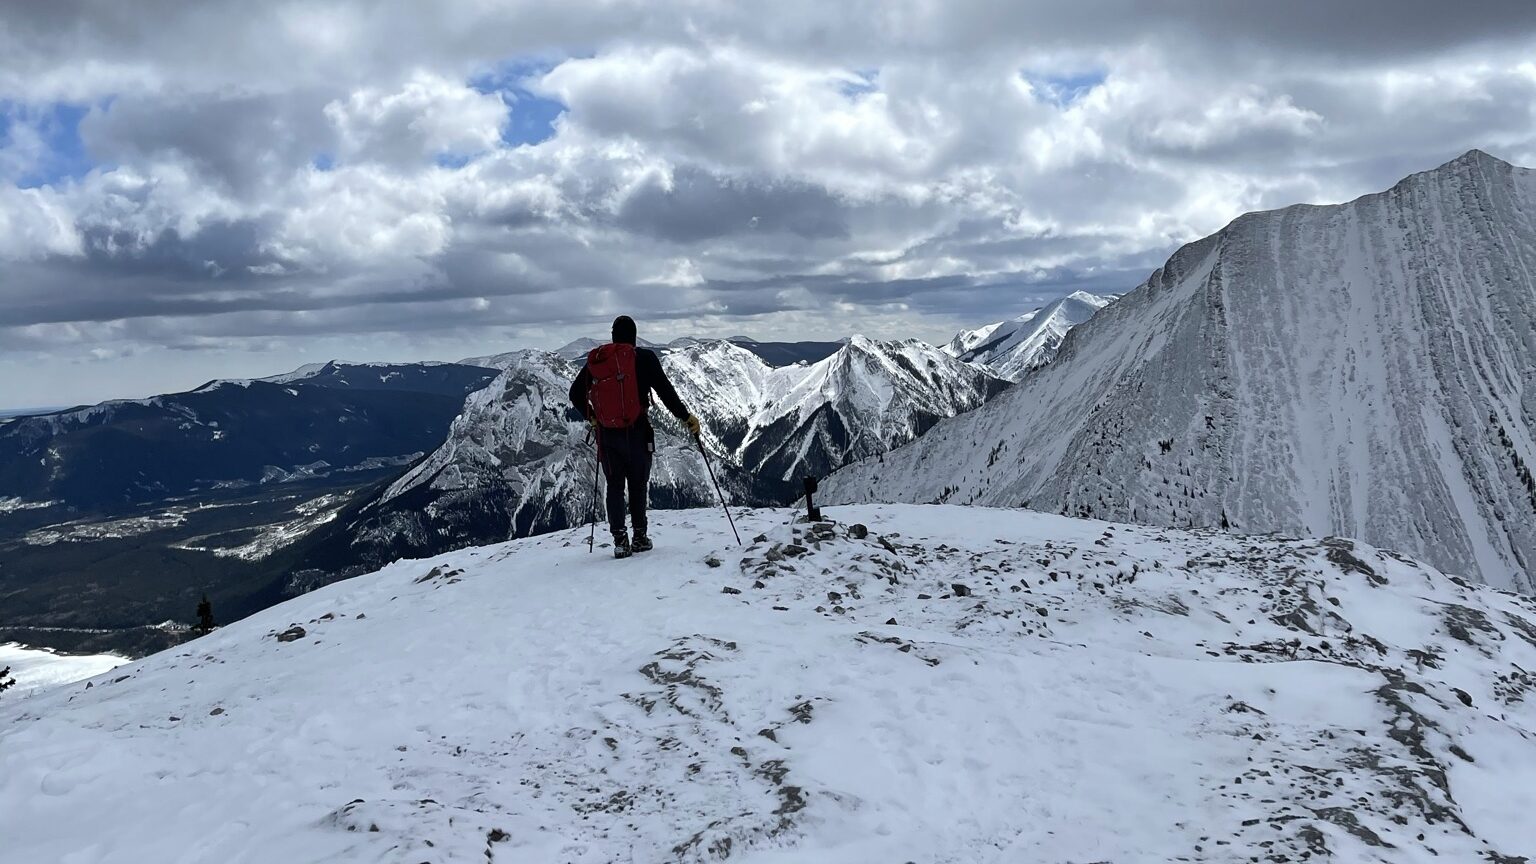
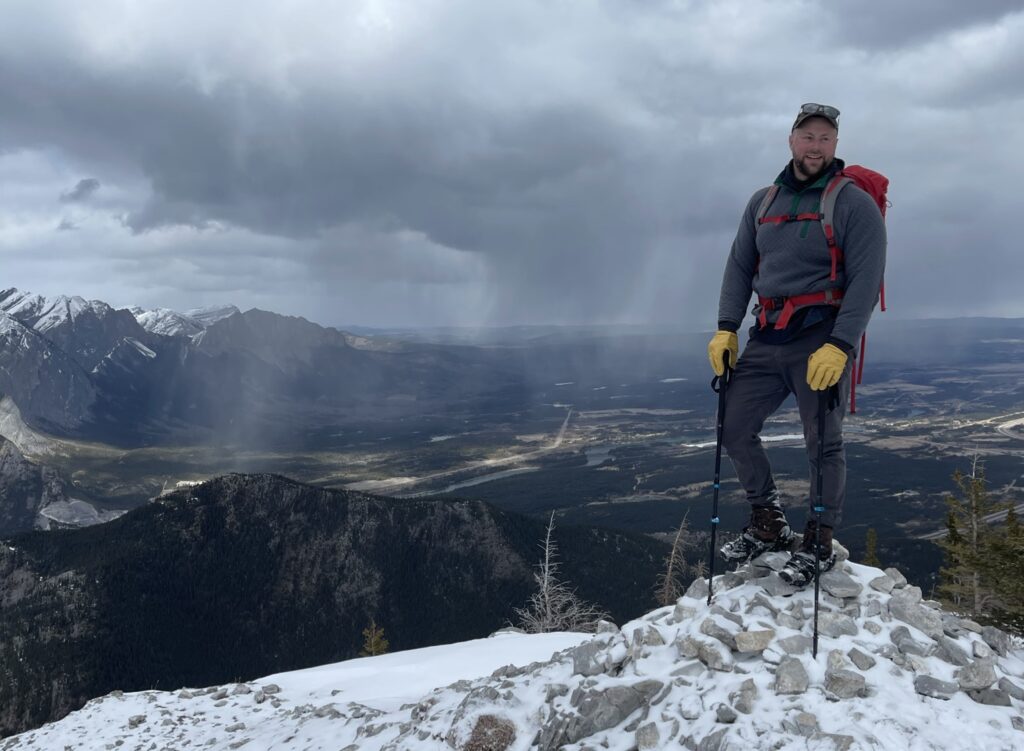
Grant MacEwan Peak is bald and flat, which makes a lovely spot for a break. There is usually a summit register here, where you can write your name in a little book as a way of commemorating your accomplishment. Grant MacEwan Peak is the highest point in the hike.
From this peak, it is important to head east along the ridge. Continuing to head south will lead you towards the Twin Towers, which involves an extremely difficult downclimb. The horseshoe loop should not feel difficult and does not involve scrambling.
The ridge will wander down a hill and back up to the third unnamed peak before continuing around to the far side of the loop.
The far side of the loop also offers my favorite views of the hike. Although the view of the Bow Valley below you remains the same, I love the views to the east of the prairies and foothills. I find it so special seeing the mountains rise sharply from the ground, which you cannot see from Heart Mountain.
6. The Horseshoe Hike Out
In all honesty, the hike out is tedious and boring. It starts out a little steep, but quickly goes into the trees and the steep grade levels out. You’re then left wandering through the forest for a long distance. The trail is obvious, but there are no views to keep your mind occupied.
The benefits are that the trees offer protection from the sun and wind, and the hike out from the horseshoe is much easier than trying to downclimb the steep sections on Heart Mountain.
Follow the trail down the ridge, and alongside the highway until you meet back up with the Heart Creek trail.
What to Bring When Hiking Heart Mountain
It’s pretty typical to always carry the same items when hiking, including warm layers and bear spray. However, some extra supplies should be considered when hiking heart mountain:
- Scrambling Gloves – There are a few sections where you will need to use your hands to get up and over some rocky sections. Having a layer of protection on your hands might help you feel more secure hanging onto sharp or cold rocks.
- Grippy Shoes – Some people hike in flat casual shoes, such as Converse, and to that I say “you do you”, but this isn’t the hike for it if you can help it. Having good tread on the bottom of your shoes will help you get up the slab and scrambles more easily.
- A GPS – I have seen many groups miss the first scramble section and head into dangerous terrain. The possibility of getting “cliffed out” and having to downclimb to get back on track is a legitimate risk. Mitigate the risk by using and following a GPS track. I recommend AllTrails.
- A Helmet – Depending on how comfortable you feel scrambling and how large your party is, you might want to consider wearing a helmet for the scramble sections. People scrambling above you can knock loose rock on you, and having extra protection is never a bad thing.
Heart Mountain Tips To Get The Best Experience
- Hike Counterclockwise – You want to ascend Heart Mountain first if you plan on doing the loop. This way, you’re scrambling up the steep bits instead of having to downclimb the scramble sections. Downclimbing can often be hard and scary, and requires time and attention.
- Complete the Loop – Although the views of the Bow Valley don’t change from one end of the loop to the other, it’s much easier to descend the hike from the loop than it is to hike down the steep Heart Mountain side. As well, it’s very neat to see how far you’ve walked along the ridge.
- Avoid Precipitation – This hike can be done in any season, but I’d strongly recommend going on a day with visibility and dry rock. It’s important to be able to see where you’re going and to decrease the chance of a slip in steep terrain.
- Go Prepared – This isn’t a hike you should do without having prior scrambling experience and preparation for the conditions. It is possible that given weather conditions or group comfortability, you might not be able to complete the loop. Downclimbing or descending steep terrain might be necessary.
- Consider Twin Towers – If you’re a rock climber or feel extremely comfortable and confident scrambling, you can extend the hike from Grant MacEwan Peak to Twin Towers. However, the connection requires downclimbing a 30ft section on loose rock.
- Bring a GPS – Many people have missed the scrambling sections and have gone the wrong way. I strongly encourage you to follow a GPS track to ensure you’re on the correct trail.
Frequently Asked Questions
How Hard is Heart Mountain?
Heart Mountain is a hard hike with some easy scrambling. It should only be attempted by hikers with route-finding skills or a GPS, as well as those with previous scrambling experience.
How High is Heart Mountain?
Heart Mountain is 2135m (7004ft) high. You have to hike up 926m (3038ft) to reach the summit.
Do I need a Kananaskis pass for the Heart Mountain hike?
Yes, you do need a digital Kananaskis pass for the Heart Mountain hike if you plan on parking a car. To purchase a park pass, check out Alberta Park’s website, or click here.
Recommendations From My Experience
- I have seen people take their dogs on this hike, but I wouldn’t recommend it. There are several other hikes in the area that are more dog-friendly. The amount of rock and scrambling on this adventure alone should be enough to dissuade dog parents who aren’t used to boosting or carrying their pups.
- Follow a GPS. I’ll say it over and over again. You might be able to navigate without one, but heading the wrong way can get you into dangerous terrain. Don’t risk it. I saw people trying to rock climb a cliff face thinking it was the scramble section. Yikes.
- I hiked Heart Mountain in shoulder season (April) and there was a surprising amount of snow up on the ridge. I liked that there weren’t many people on the mountain, but the rock was very slippery with ice and runoff. I would recommend hiking in summer if you’re not prepared for winter conditions.
- The ridge was so fun on the horseshoe loop! Consider bringing food for a picnic lunch on top and just enjoying the day up there! Just before you head back down into the trees, make sure you look back along the ridge and notice how far you’ve come!
Other Questions?
Were your questions left unanswered? Drop a comment below and I’ll get back to you! Also, if you’ve hiked Heart Mountain or the horseshoe loop, leave a review below for others to see!
Looking for something similar to this hike? Check out Door Jamb and Loder or East End of Rundle for a similar experience but a shorter day (compared to the full horseshoe loop of Heart Mountain).
For all you scrambling enthusiasts, check out Big Sister for a more challenging day, or Gap Peak for a ridge walk with scrambling!
Want something a little more low-key? Consider Miner’s Peak for an easier objective!
Happy trails!