

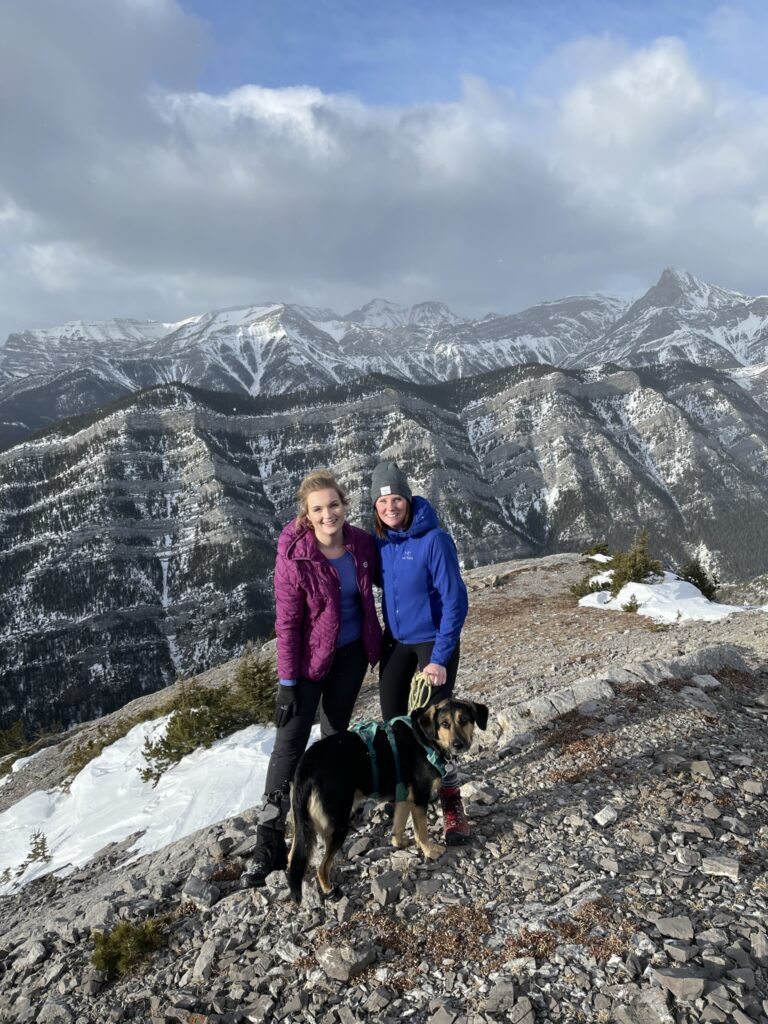
Door Jamb Mountain and Loder Peak are two high points on “Old Goat Mountain” that are visible from the #1 highway and offer stunning views of the foothills and the Bow Valley.
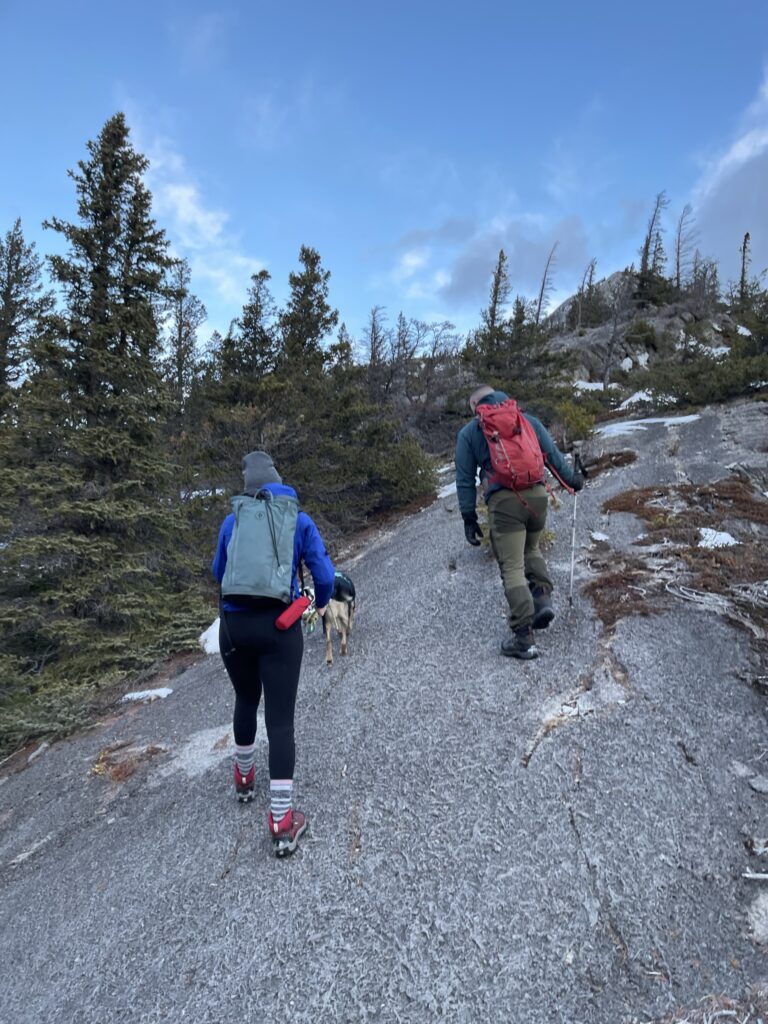
Ascending along a ridge towards these summits, you quickly gain elevation and views, though you’re busy scrambling up some steep slab which can keep your mind engaged. This hike sees a lot of sunlight which makes it an excellent shoulder-season hike while you’re waiting for summer to come.
If you’re looking for a short but engaging scramble with great views, or you’re looking for a quick way to bag two summits, Door Jamb and Loder Peak might be the hike for you!
Door Jamb and Loder Quick Stats
- Distance – 6.1 km / 3.8 mi
- Elevation Gain – 760 m / 2, 493 ft
- Approximate Time – 3-5 hours
- All Season Hike? Yes, but only recommended for experienced adventurers in the winter.
- Dog Friendly? No
- Kid Friendly? No
- Beginner Friendly? No
- Cell Service? Yes, throughout
- Wildlife Encounters? Possible bighorn sheep, bears
- Access to Water? No
- Bathrooms? Outhouses at the west parking area
- Chance of getting lost? Moderate
Driving Directions & Where to Park for Door Jamb and Loder
From Canmore
Drive east along Bow Valley Trail which turns into Highway 1A. Alternatively, drive east along Highway 1 and take the Highway 1A exit to get on the same road.
Follow Highway 1A past the hamlet of Exshaw (with the large Baymag plant) paying attention to the frequent speed changes along the highway and keeping an eye out for Bighorn Sheep which often conglomerate on the road.
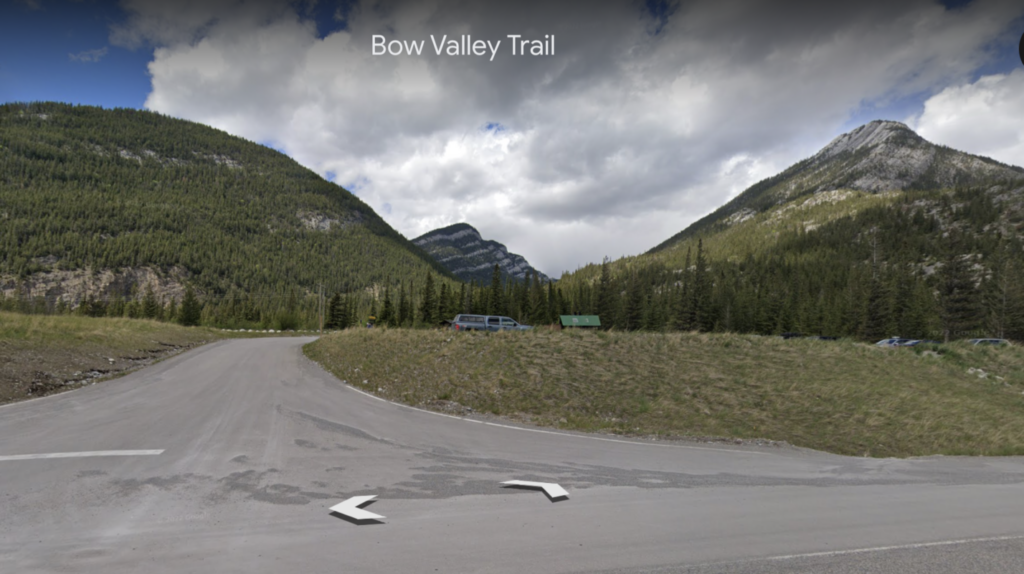
2 minutes past Exshaw there will be a small paved parking area on the left, marked with a tiny outhouse building. This is the recommended parking area for Door Jamb and Loder.
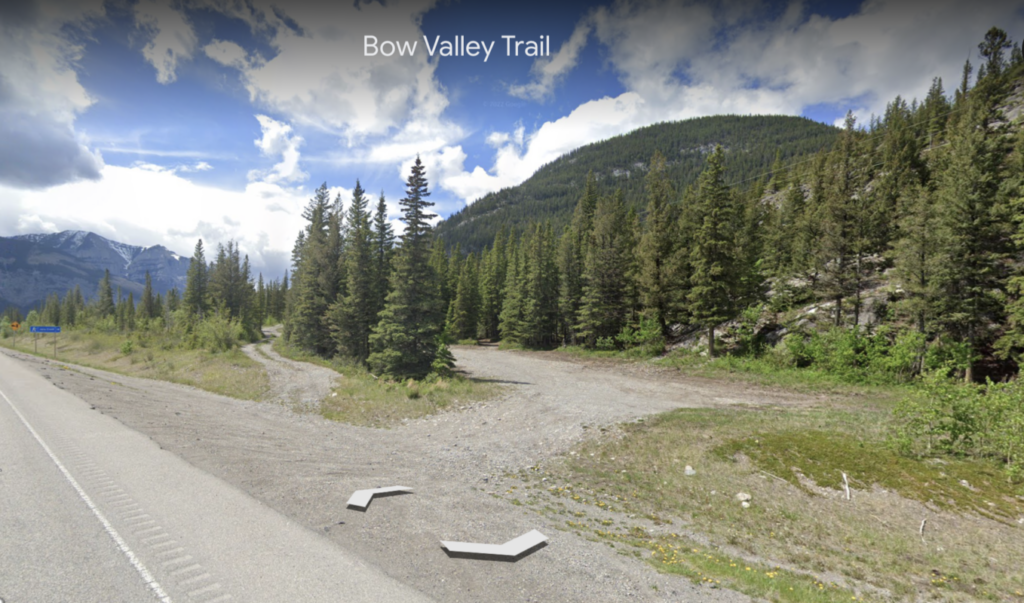
Alternatively, 30 seconds past this lot is another dirt pullout, though it is smaller and much more discreet. Driving into this lot is a steeper incline, and can be difficult for low vehicles to not scrape the undercarriage of the car. As well, in winter, it can be difficult to get traction in and out of this lot without all-wheel drive.
From Calgary
Drive west along Highway 1 past the Casino and Esso, then take the Seebe exit (Highway 1X) heading north. Follow this highway until the end of the road where it comes to a t-intersection. Turn left onto Highway 1A.
Follow highway 1A until you see the Graymont-Exshaw plant peeking above the trees on your left. When you can see this plant, keep your eyes open for a small dirt pullout on the right, just before a blue “Jura Creek” sign. This is the closer lot, though it can be difficult for small cars to access.
A larger paved lot with an outhouse is located 30 seconds further up the road on the righthand side, just past the “Jura Creek” sign. This lot is marked with an outhouse and is the recommended parking area for Door Jamb and Loder.
How to Get to the Door Jamb and Loder Trailhead
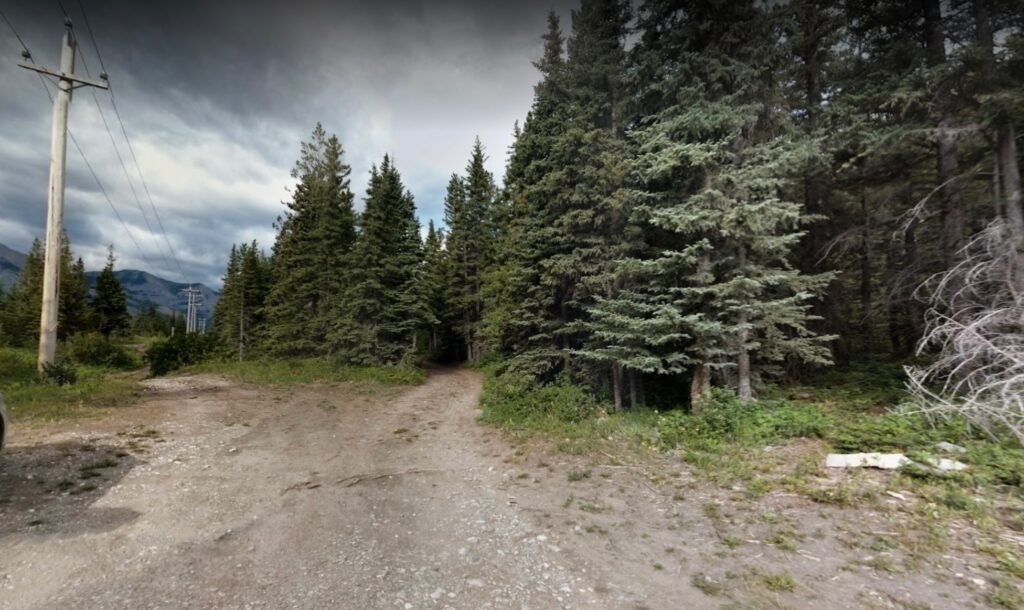
There is no official trailhead or marker for the start of this hike.
To locate the correct trail, head east from the paved lot along an obvious trail. (The highway should be on your right). This is the start of the trail, though a GPS track is recommended to follow as there are a few different trails up the mountain.
From the dirt pullout, there are two trails which both appear to head west. Take the righthand trail which leads more “up” towards the mountains. When you come to an intersection, turn right. This is the start of the trail for Door Jamb and Loder.
How To Hike Door Jamb and Loder Successfully
The majority of this trail is a steep ascent up the ridge of the mountain. It quickly exits the trees and what little trail there was disappears quickly.
I highly recommend following a GPS track (like AllTrails), but it’s also important to remember to stay right on the way up (known as climber’s right).If you head left, you will enter steep cliffs and technical climbing terrain.
1. The Start
The start of the hike is essentially straight uphill from the parking area. A faint trail is present from the parking lot, and will direct to towards the ridge of the mountain. From here, you will walk the ridge all the way until both summits.
The trees quickly become sparse and the wind will likely pick up. A wind layer and possibly scrambling are recommended.
You will gain elevation quickly, and the views behind you continue to get better and better.
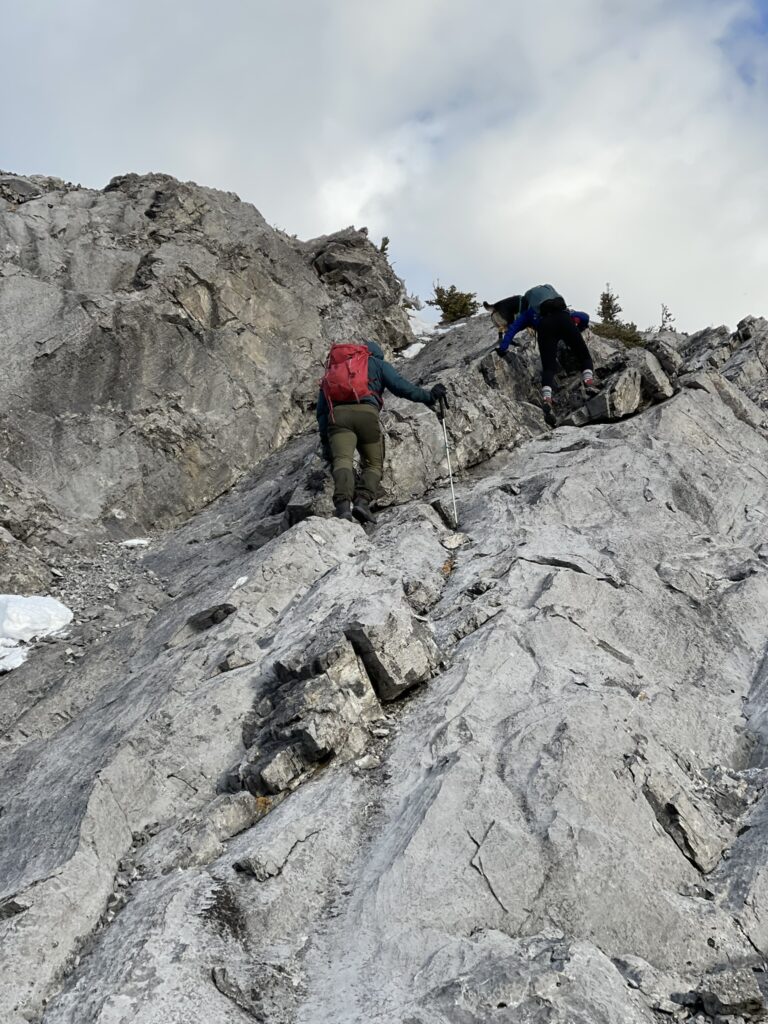
2. The Slabs
About 15 minutes into the hike, you will likely start to encounter some slabs. Slabs are large chunks of flat rock at an incline. Here, you will have to hike up steep slab several times throughout the hike.
The key to being successful on slab is friction. The more surface area of your foot has contact with the slab, the greater the friction. You will be able to simply walk up these slabs because the rock is textured and “grippy”. Trust your feet!
The slabs increase in frequency with the hardest section being right before the summit of Door Jamb. These sections might be hard in wet or icy conditions.
3. The Scrambles
A handful of times on the way to Door Jamb, you will need to use your hands to scramble up some rocky sections. The amount of scrambling you need to do will change depending on your comfort level, but hand use will be needed at various times throughout the hike.
These sections are short, usually requiring only a few scramble moves before you can stand upright and continue hiking normally.
Since there is no official trail, you can choose whichever path up suits you best. There will be easier scrambling options and harder scrambling options. Whichever route you take, ensure you feel safe and are able to reverse the decision on the way down.
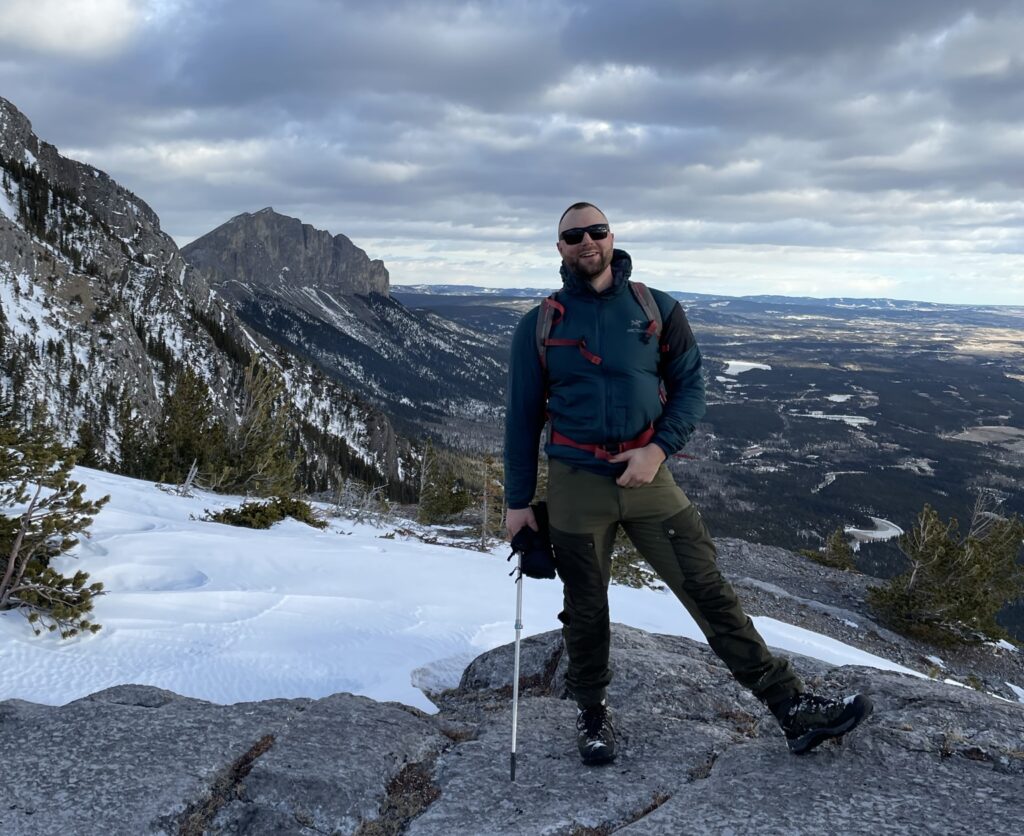
4. The Door Jamb Mountain Summit
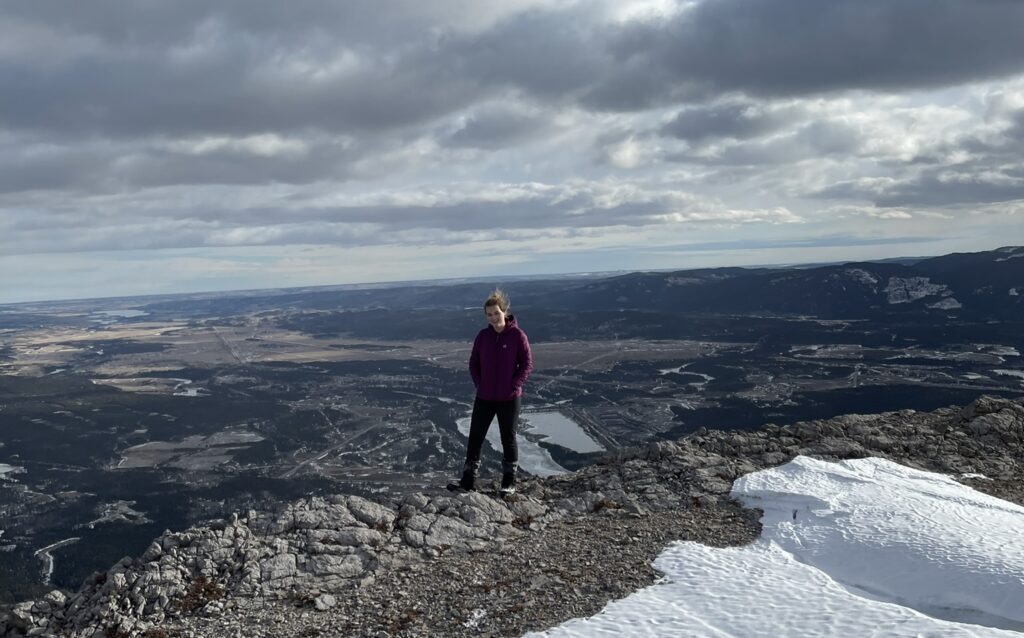
The summit of Door Jamb is a small rocky area, often marked with a pile of rocks (known as a “cairn”), and sometimes a summit register that you can write your name in as well.
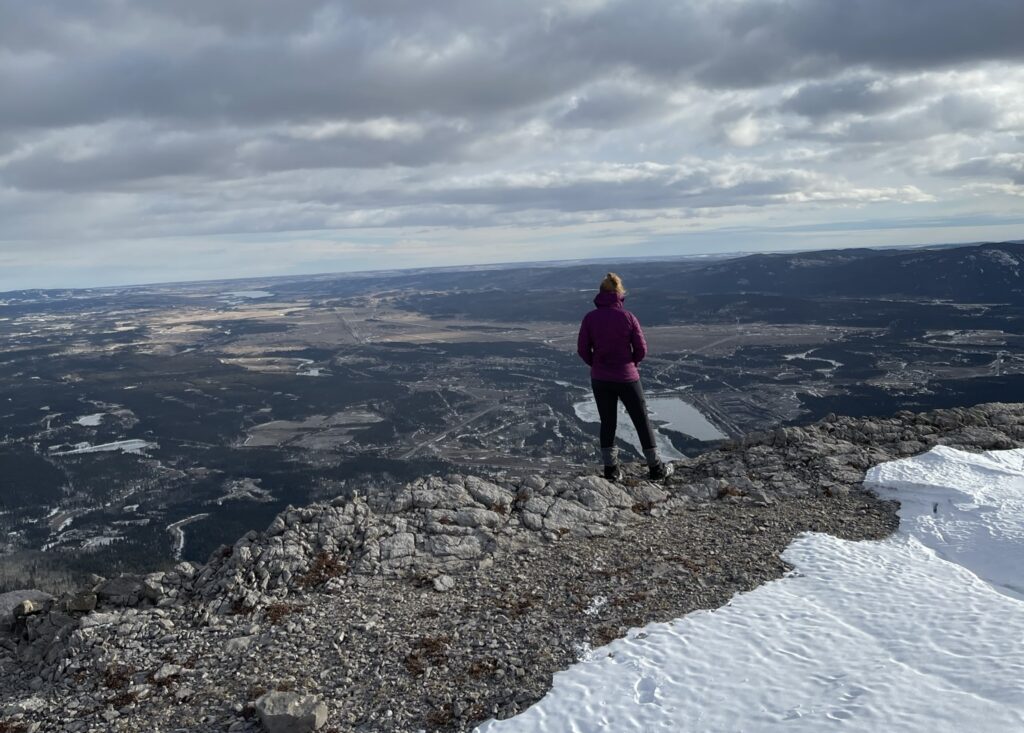
Door Jamb is far enough back from the highway that you won’t be able to see the ugly concrete plant below you, which makes the hike feel more remote than it is. Loder peak should be visible via the ridge as the next highest visible point.
This is a good place to stop for a snack, and possibly turn around if the objective is feeling too committing or bad weather is approaching.
5. The Connecting Ridge
The path from Door Jamb Mountain to Loder Peak is mostly just a simple hike, with a little bit of slab thrown in to keep it interesting.
Don’t let your eyes deceive you: the summit of Loder Peak is only 700 meters away in terms of distance, and less than 100 meters of vertical elevation to go. It’s definitely worth the effort to head over to Loder Peak if you have the energy and stoke to do so!
The ridge connecting Door Jamb and Loder will feel much easier than the rest of the hike as the incline is less severe here. Enjoy the journey!
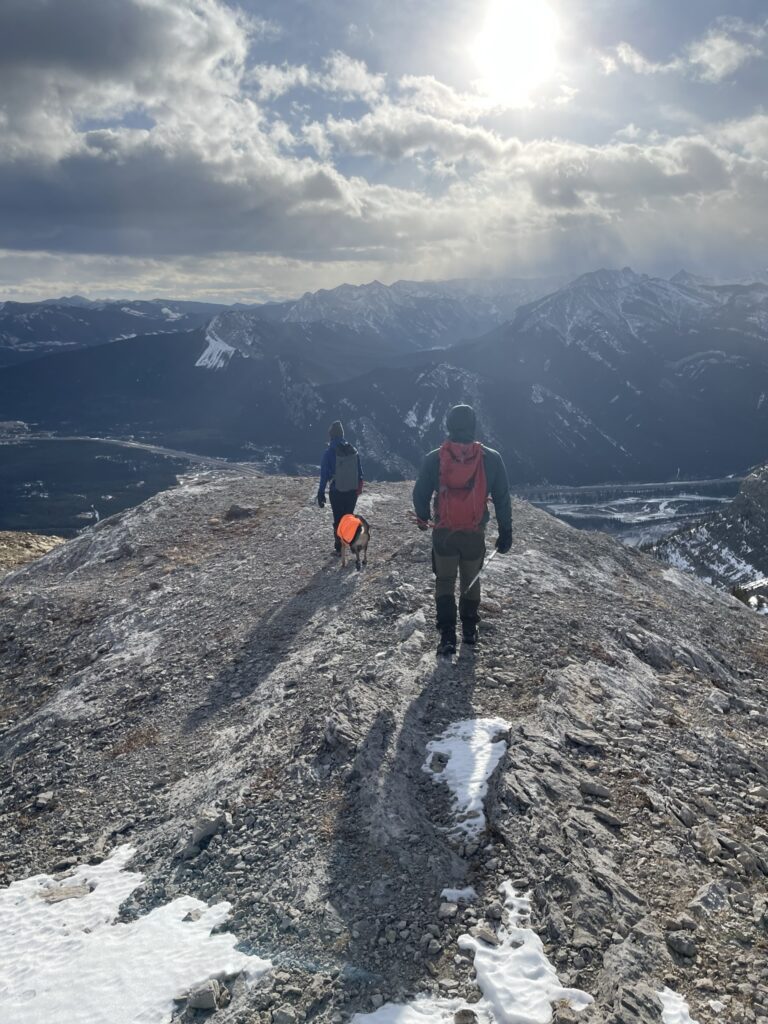
6. Loder Peak
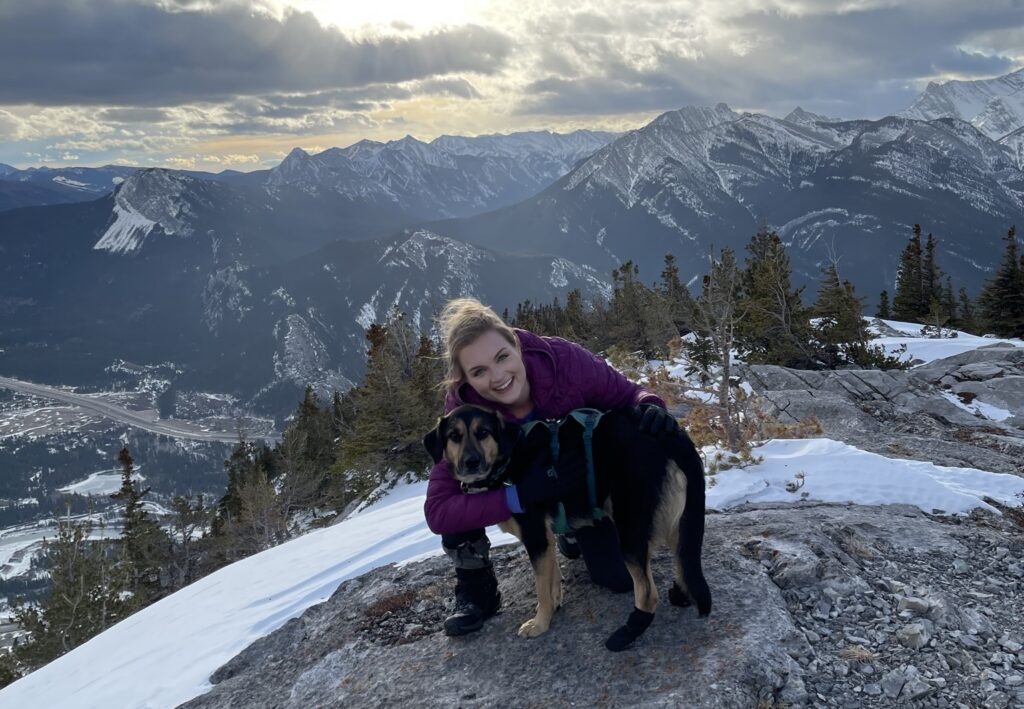
Loder Peak is similar to Door Jamb, but is slightly higher and larger. There are fewer bushes at the top of Loder Peak, which makes it feel more like a mountain summit. Enjoy the stunning views of the prairies to the east, and the Bow Valley directly below you.
Continue back the way you came, or head west down towards Jura Creek for a different adventure on the way out!
What to Bring When Hiking Door Jamb and Loder
Aside from the usual items, there are a few things I would ensure I’m bringing when hiking up Door Jamb Mountain and Loder Peak.
- Wind Layers – The entirety of the hike is on the ridge and is not sheltered by trees or natural features. This hike is known to be very windy. Come prepared with wind protection, and don’t forget about your hands and ears!
- Grippy Shoes – Being successful on this hike relies a lot on friction. It’s not the time to wear your favorite Keds or Converse. Pick shoes with grippy soles to feel secure while hiking up slab.
- Scramble Gloves – You will need to scramble to get summit these objectives. The rock on this hike is very textured, which can be rough on the hands. Bring gloves that can handle the rough textures of the rock and allow you to protect your hands while using them.
- Bear Spray – Although it is unlikely to encounter a bear on this trail, your safety is never a guarantee. You should always carry bear spray in Kananaskis, which can also be used in other encounters, such as with an aggressive ram.
Door Jamb and Loder Tips To Get The Best Experience
- Use a GPS – The most common error on this hike is route finding. It is easy to go the wrong way. Remember to keep heading right on the way up, but following a GPS track is highly recommended to prevent error.
- Hike During Shoulder Season – This hike is wind-affected and sees a lot of sun. That means that the ridge is often free of snow and ice sooner than other hikes in the area. This hike can easily be done in spring and fall. In fact, experienced adventurers summit these peaks all year ’round!
- Hike Out Jura Creek – Hiking a little north past Loder Peak then down the gully to the west will bring you down into Jura Creek for new views on the way out. Be aware that it is a steep descent into the creek, but it can save some of the downclimbing on the way out.
Frequently Asked Questions
Is Door Jamb and Loder a hard hike?
Yes, Door Jamb and Loder can be considered a hard hike, though it is considered an easy scramble. The entire hike is relatively short (6.1km out and back), but it is consistently steep and will be an effort.
Is Door Jamb and Loder a dangerous hike?
No, Door Jamb and Loder is not a dangerous hike as there is no exposure with the scrambling. The biggest risk is route-finding, followed by the odd twisted ankle or sore knees.
Do I need a Kananaskis pass for the Door Jamb and Loder hike?
Yes, you do need a digital Kananaskis pass to park a car at the Door Jamb and Loder trailhead. To purchase a park pass, click here.
Recommendations From My Experience
- When we hiked Door Jamb and Loder, I underestimated how unrelenting the hike would feel. There really isn’t much reprieve from the “straight up” feel, however, it did make the summits feel like they came quickly.
- Bringing a mountain-capable dog up to the summits was manageable, but the rough texture of the rock was very hard on his paw pads. I wouldn’t recommend bringing a dog up to the summit unless the dog is capable in mountain environments, has booties, and can be carried in an emergency.
- Even knowing that a lot of parties get off trail, I still found route-finding difficult on this hike, as the natural inclination is to go left, which is the wrong way. Following AllTrails GPS track was very instrumental in not getting lost.
- The way down felt longer than the way out, as it was not quick travel having to scramble down and friction walk down the slabs felt unnerving. Bring snacks and energy for the way out, or consider hiking down into Jura Creek to keep your mind engaged.
- The scrambling felt similar to what you experience throughout the EEOR hike, however, there are more sections of scrambling up Door Jamb and Loder compared to EEOR.
Other Questions?
Is there something I missed? Do you have some unanswered questions about the trail? Drop a comment below and I’ll get back to you as soon as possible!
For other summit ideas, consider Mount Lady MacDonald for a spicier scramble ridge, or Middle Sister for a longer day of no scrambling.
Happy trails!