
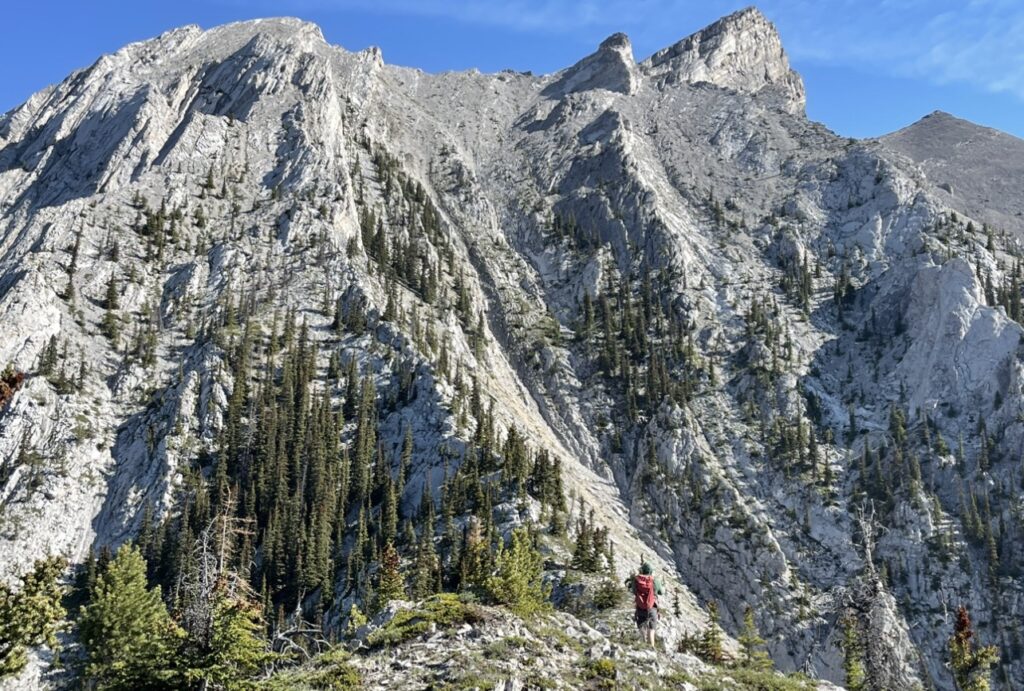
Princess Margaret Mountain lies on the west side of the mountains that line the north of Canmore. It’s face is made up of sharp jagged rock and looks almost impossible to summit from the highway.
Other blogs mention a rope and a rappel if you want to summit this mountain. However, I am here to confirm that you do not need either to conquer this beast! You do, however, need time and a lot of confidence in scrambling.
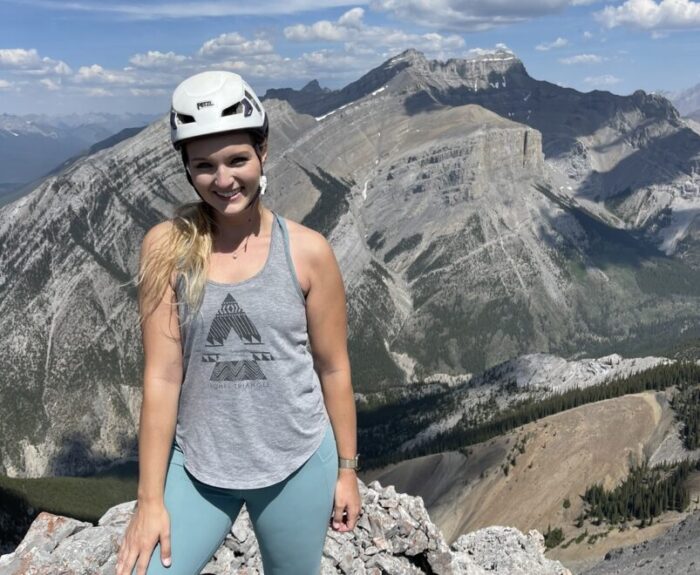
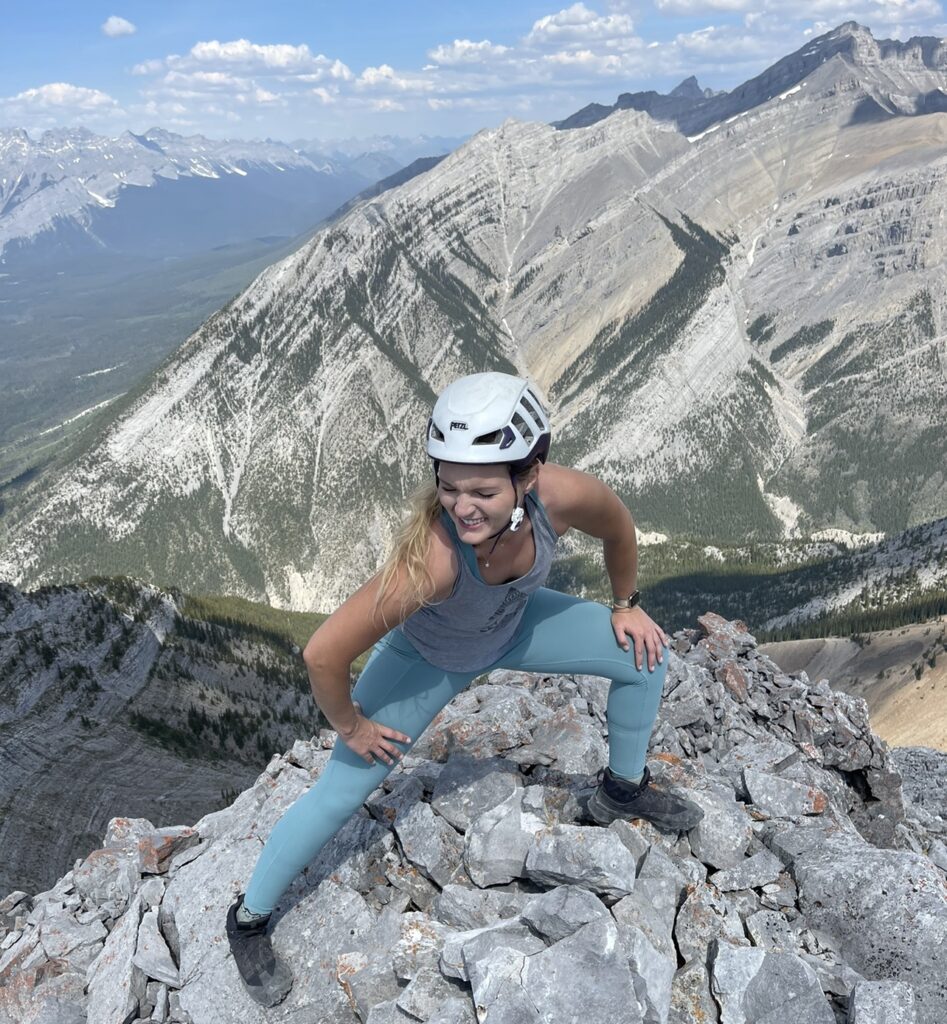
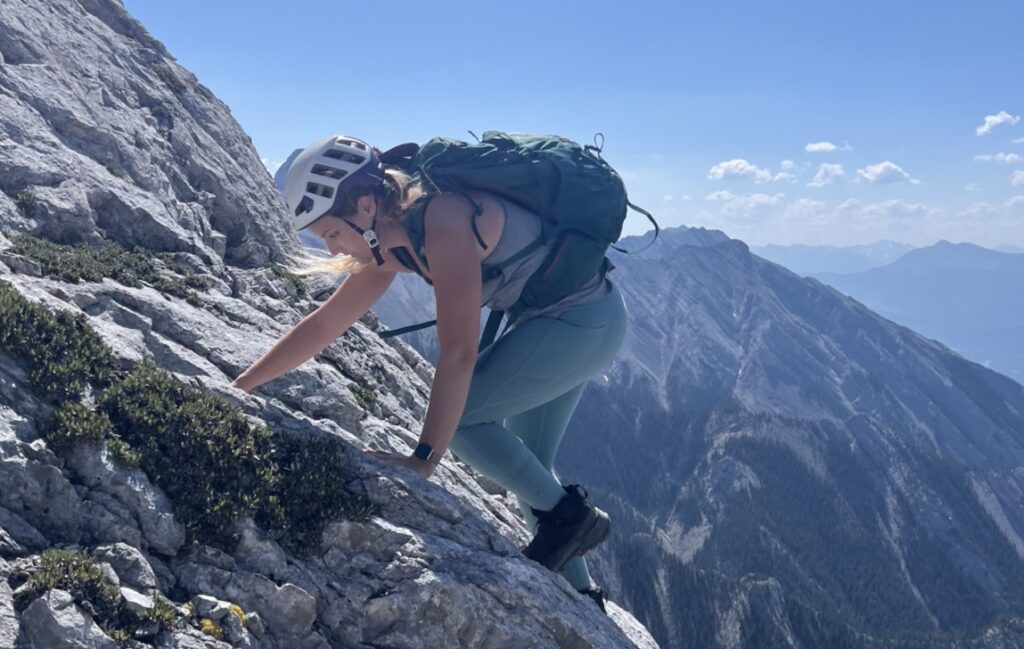
Princess Margaret Mountain is an excellent objective if you are confident in route-finding and scrambling. Close to half of this journey will have you putting your hands on rock, making for a fun and engaging day in the mountains!
Princess Margaret Mountain Quick Stats
- Distance – 9.0 km / 5.6 mi
- Elevation Gain – 1210 m / 3,970 ft
- Approximate Time – 6-9 hours
- All Season Hike? No, summer only.
- Dog Friendly? No.
- Kid Friendly? No.
- Beginner Friendly? No.
- Cell Service? Likely throughout.
- Wildlife Encounters? Possible bighorn sheep, bears
- Access to Water? Possible creek runoff at the quarry (early in the hike).
- Bathrooms? None.
- Chance of getting lost? Moderate chance of getting off-trail.
Driving Directions & Where to Park for Princess Margaret Mountain
Drive highway 1 and take the exit for Harvie Heights, just to the west of Canmore. (If you’re traveling from Banff, you’ll have to exit at Bow Valley Trail to get onto Harvie Heights Road.
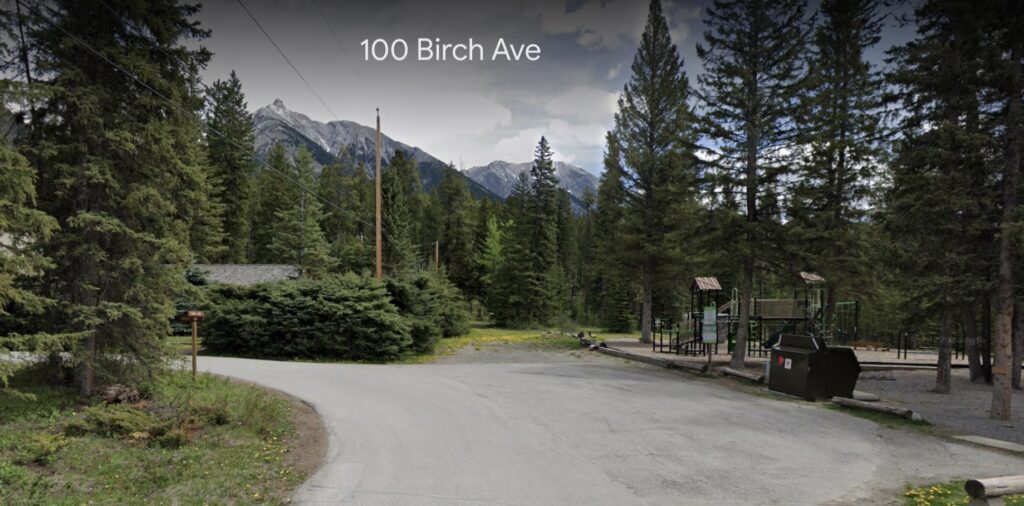
Turn up into the Hamlet of Harvie Heights, and turn right at the yield sign, followed by your first left 10 seconds later onto Birch Ave.
At the end of this road, there is a playground on your right. This is where you can park in the hamlet to access the trailhead.
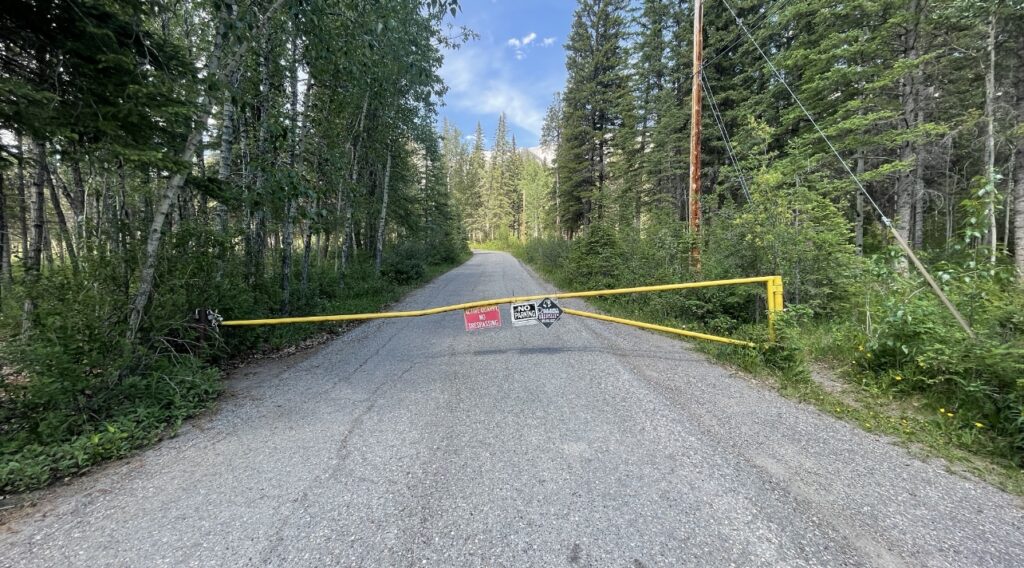
** Please Note: The start of this hike passes through private property, and you need permission from the owner to pass through the area. Call Louis Kamenka at 403-609-4050 to discuss travel plans before you set out!
How to Get to the Princess Margaret Mountain Trailhead
From the Harvie Heights playground, walk west along Spray Drive until the end of the road.
At the end of Spray Drive, turn left to walk down Grotto Road. Walk 1 minute downhill until you see a gate on your right with a “private property” sign posted on the fence.
This is the start of the hike, and there is no official trailhead marking your route. Please note that you need permission to access this area! (See above note).
How To Hike Princess Margaret Mountain Successfully
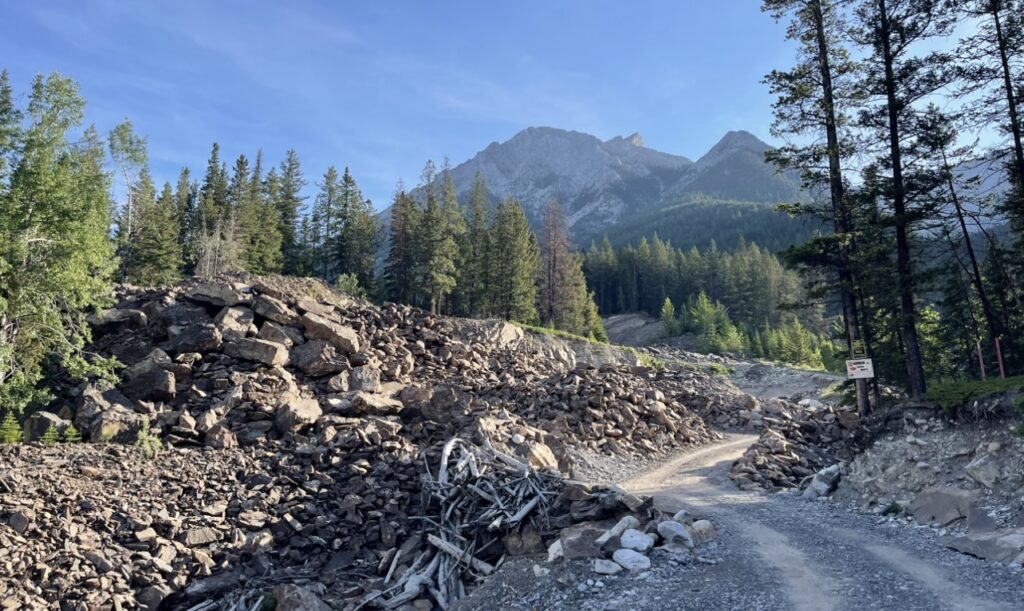
1. The Quarry
From the gate marked with a “private property” sign, continue walking up the road for 1.4 kilometers. The pavement will quickly turn to dirt, and the road will wind uphill through an obvious rock quarry.
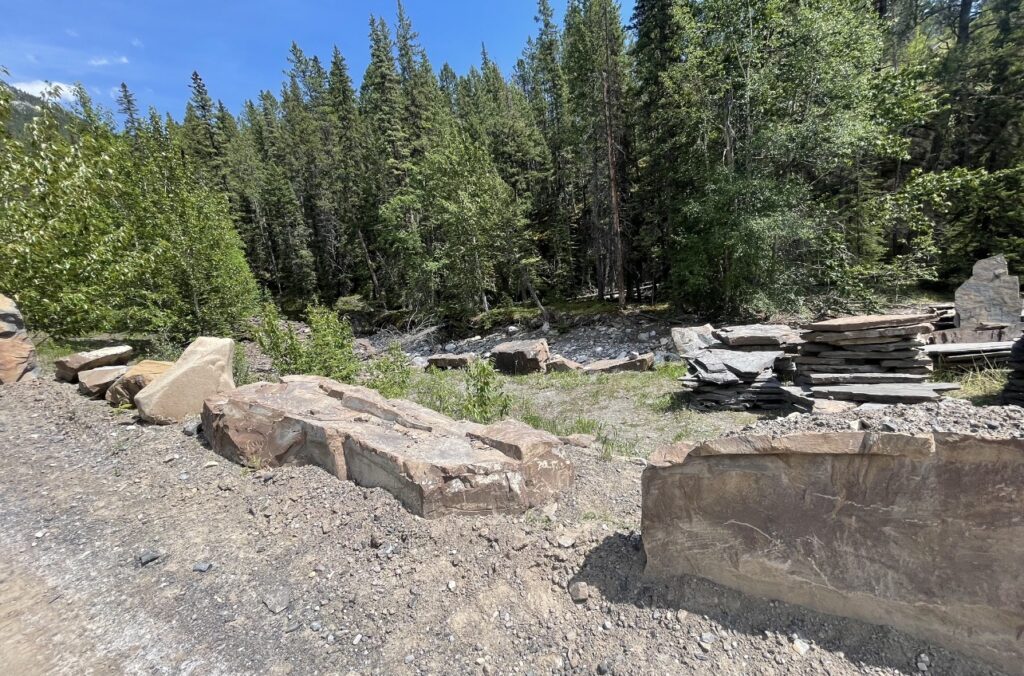
Just as the road begins to sharply rise uphill to your left, the quarry crosses a creek bed. Enter the creek bed at the most convenient location you can find – there is no wrong way about it.
Because this is private property, please do not disturb your surroundings through the quarry.
Walk up the creek bed for about 2 minutes until you reach a slab wall and you cannot progress further up the creek bed without scrambling. There may be running water here in early summer.
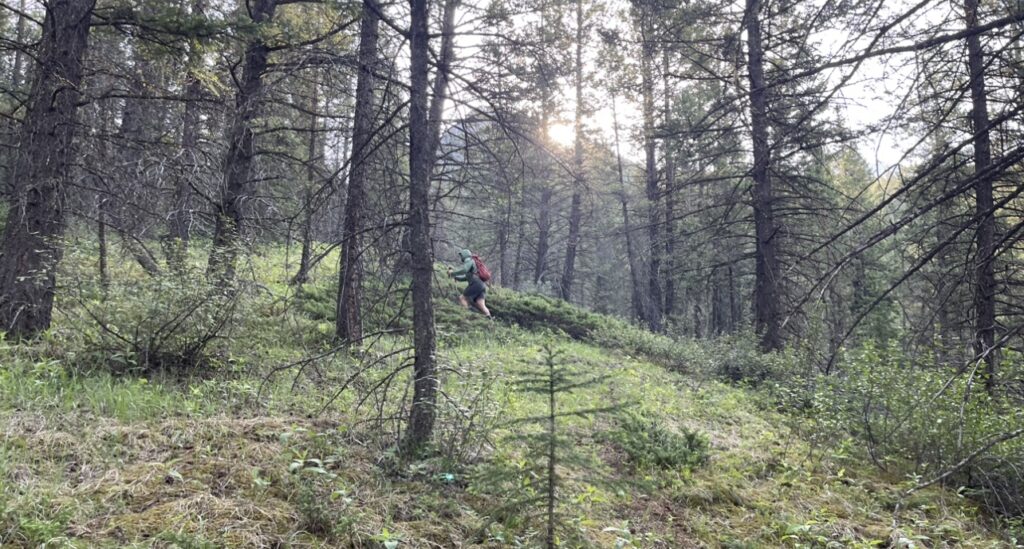
At this point, a faint trail should be obvious rising steeply into the trees on your lefthand side as you hike up. This is the trail you want to take.
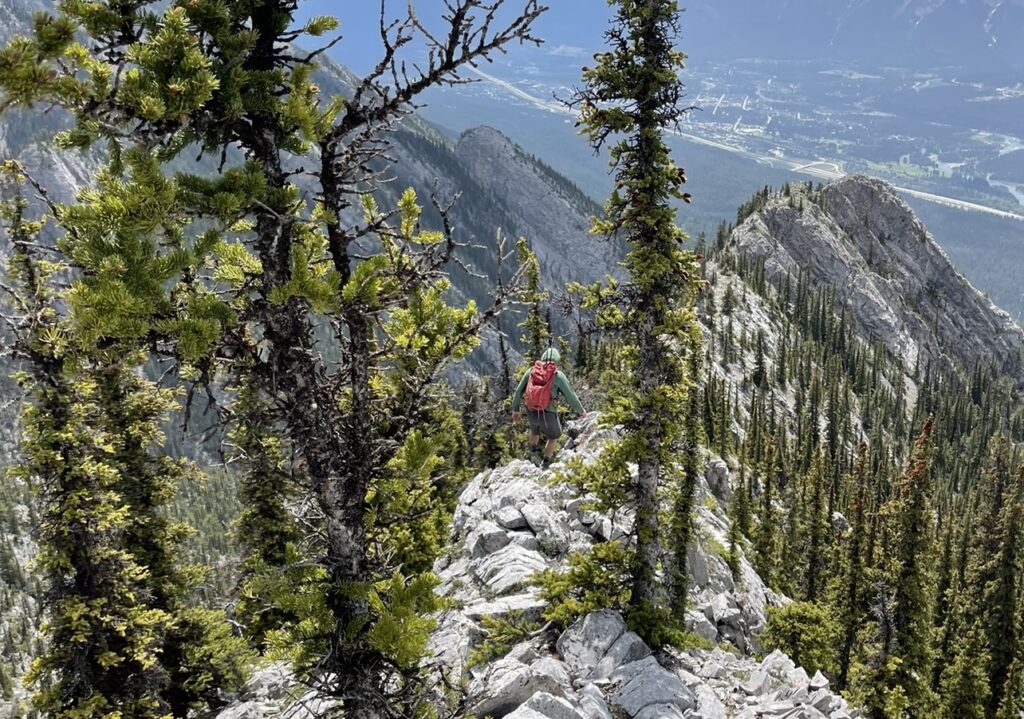
2. The Trees
Follow the faint trail through the trees as it mostly climbs straight up a small spine in the mountain. It quickly wanders into Banff National Park, which is marked with a large rock cairn.
The trail can be hard to discern at times, so following a GPS track is recommended. I found the AllTrails route to be very helpful.
There are a few steps up slab through the trees that I had to use my hands for, though it amounted to about 3-4 steps in total each time. Also, there are a few overgrown sections. Prepare to have your arms attacked by wayward branches.
Move efficiently through this section, as the views and the fun come after the treeline.
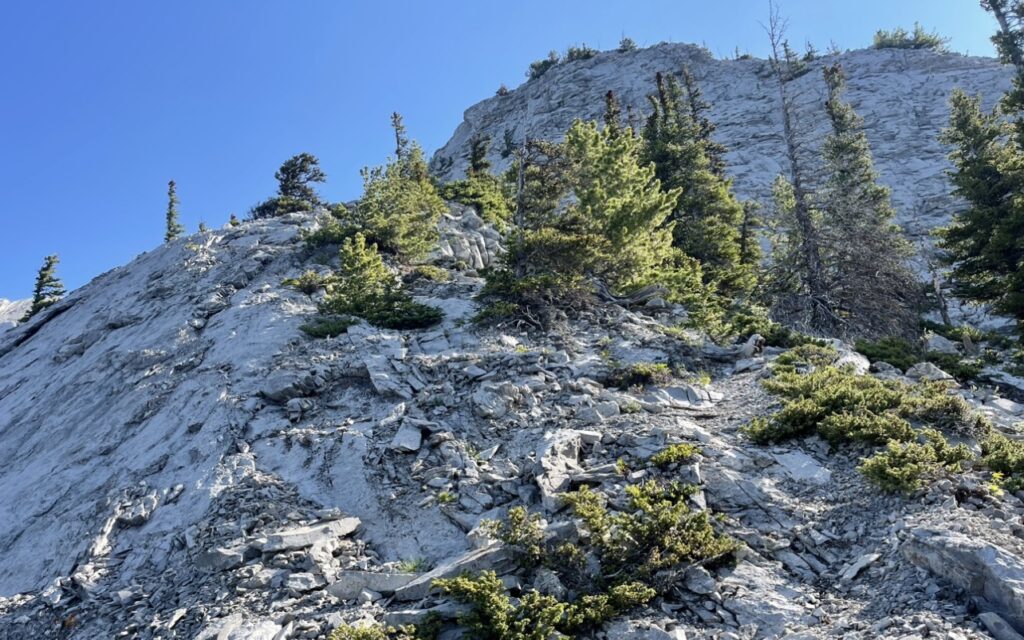
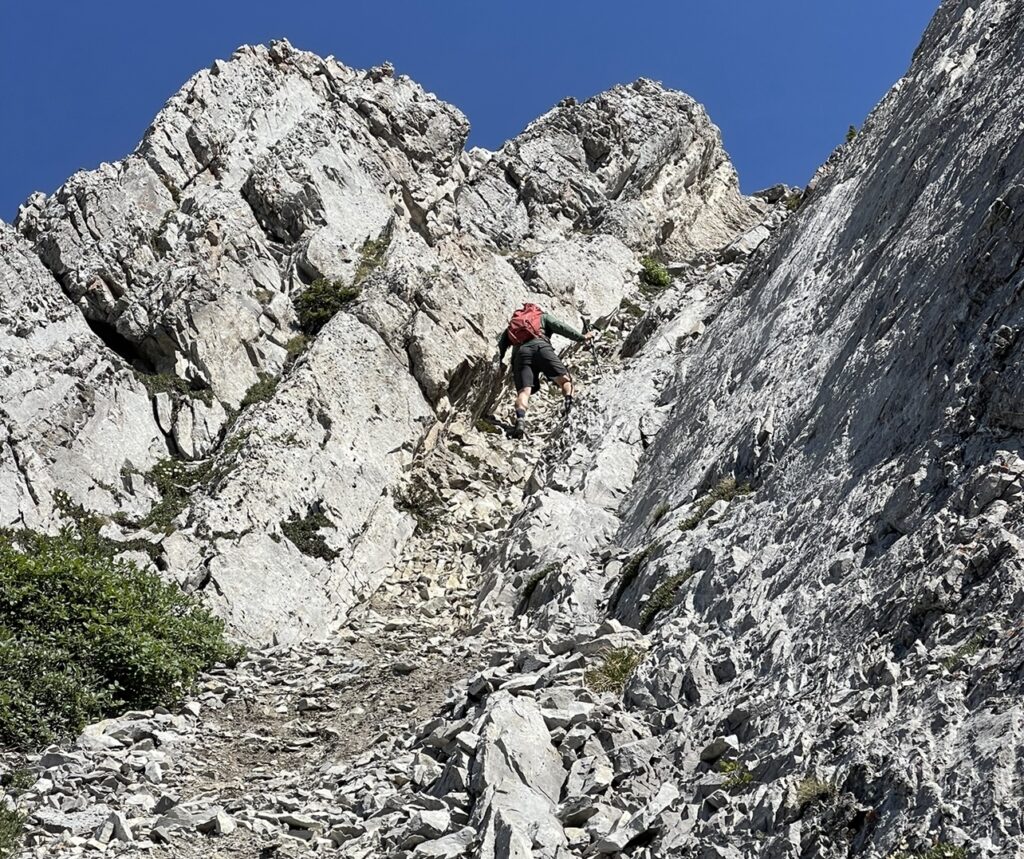
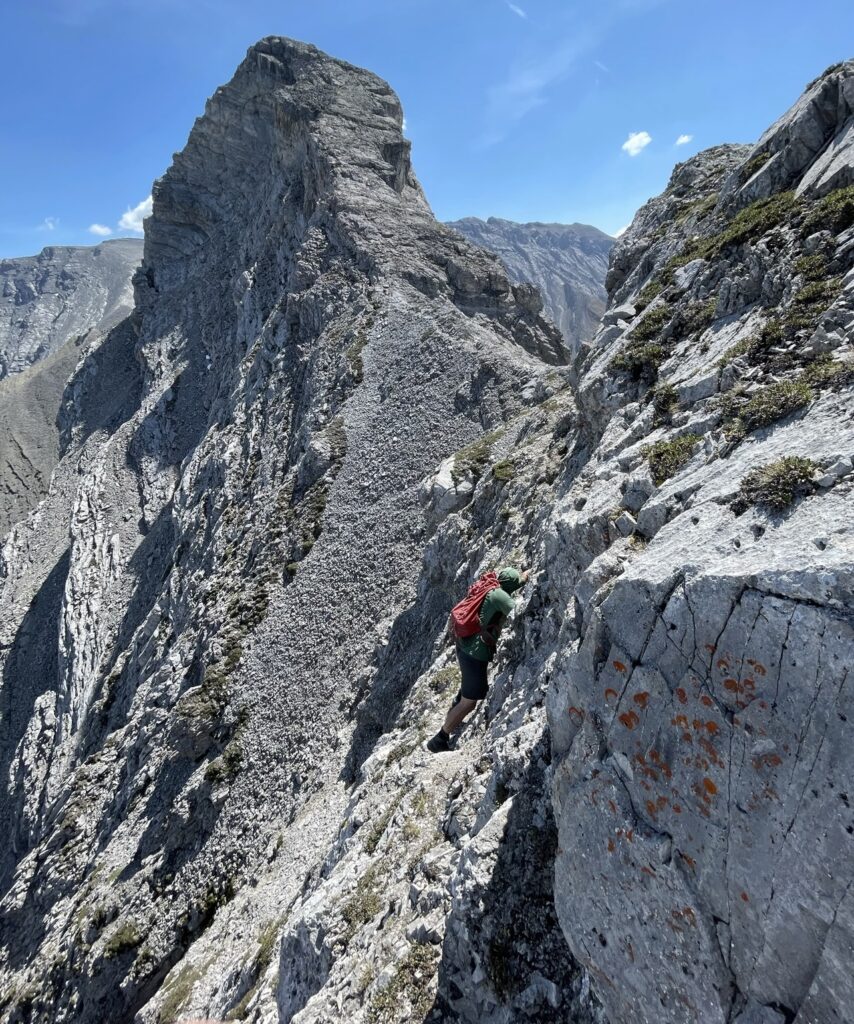
3. The Slab Scramble
3 kilometers into the hike as you near the tree line, you will pop out a small rock chute with only slab above you. This is the first real scramble that you will encounter, and is therefore a great time to put on your helmet.
The rock here is solid and quite textured. It will be rough on your hands.
Trend up and to the right as you move up the slab for the easiest route. About 10 meters to the right, an easier 4th class scramble gully should appear. Staying too far left will have you scrambling 5th class slab. No matter which route you take, you will pop out at the top of this ridge to journey on.
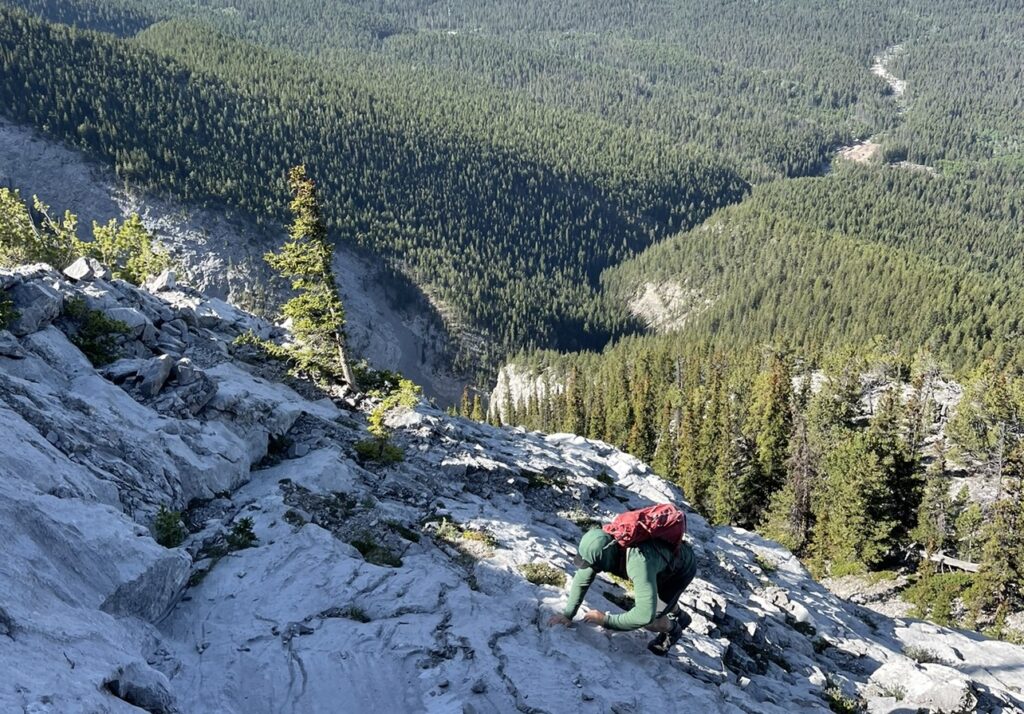
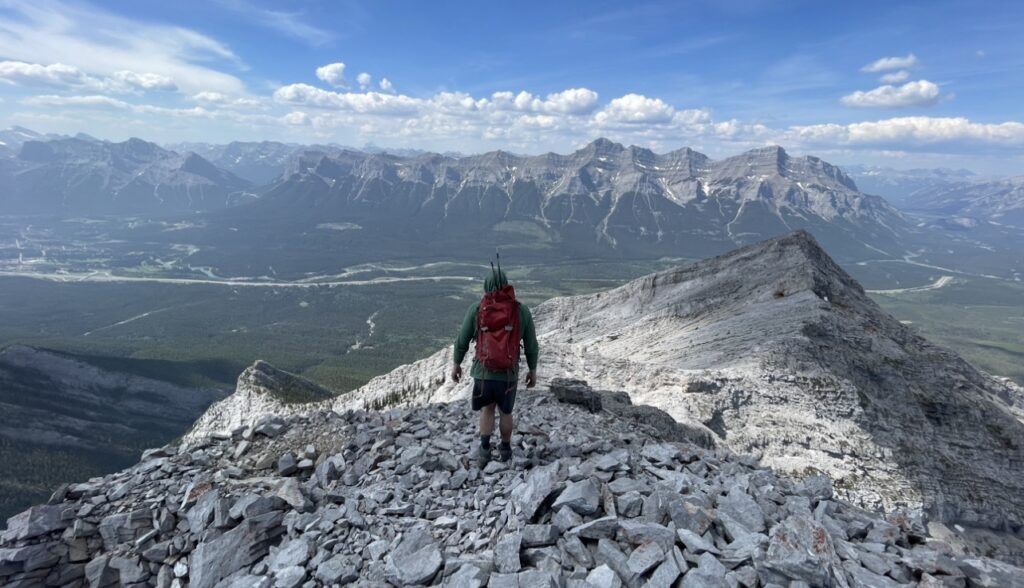
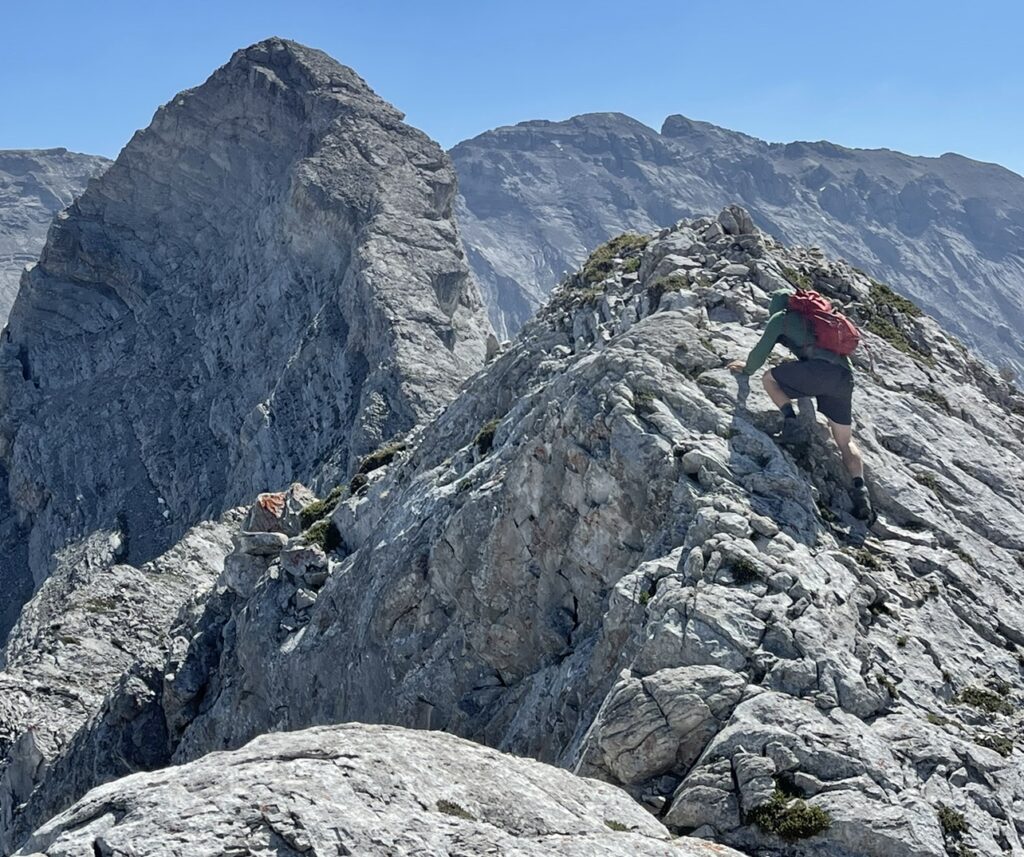
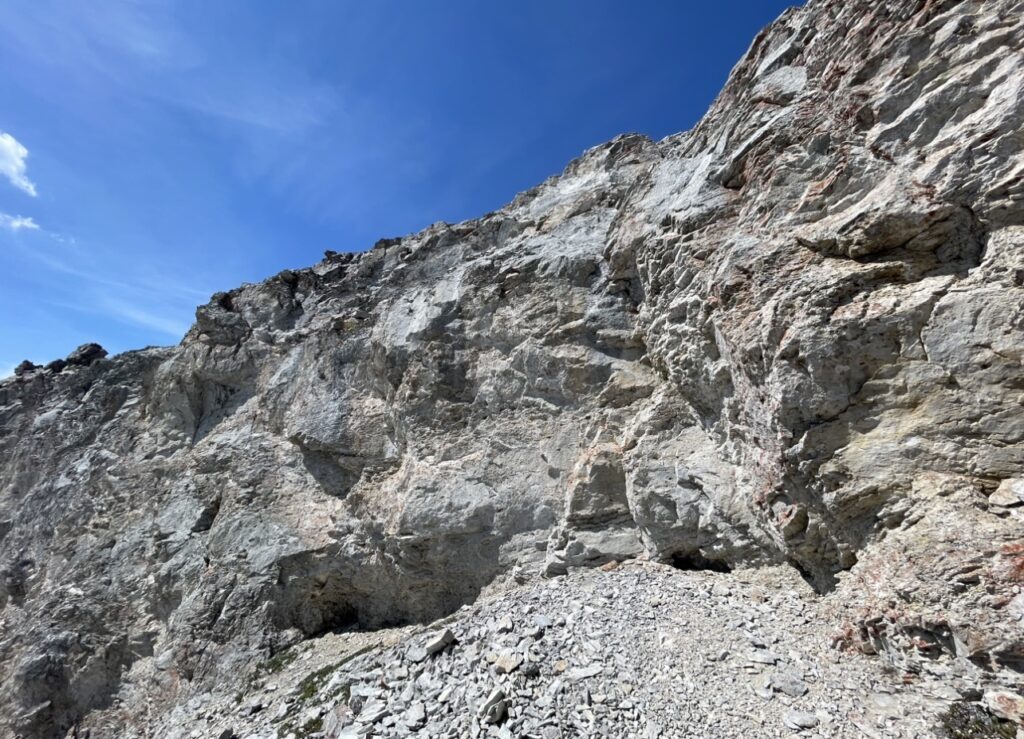
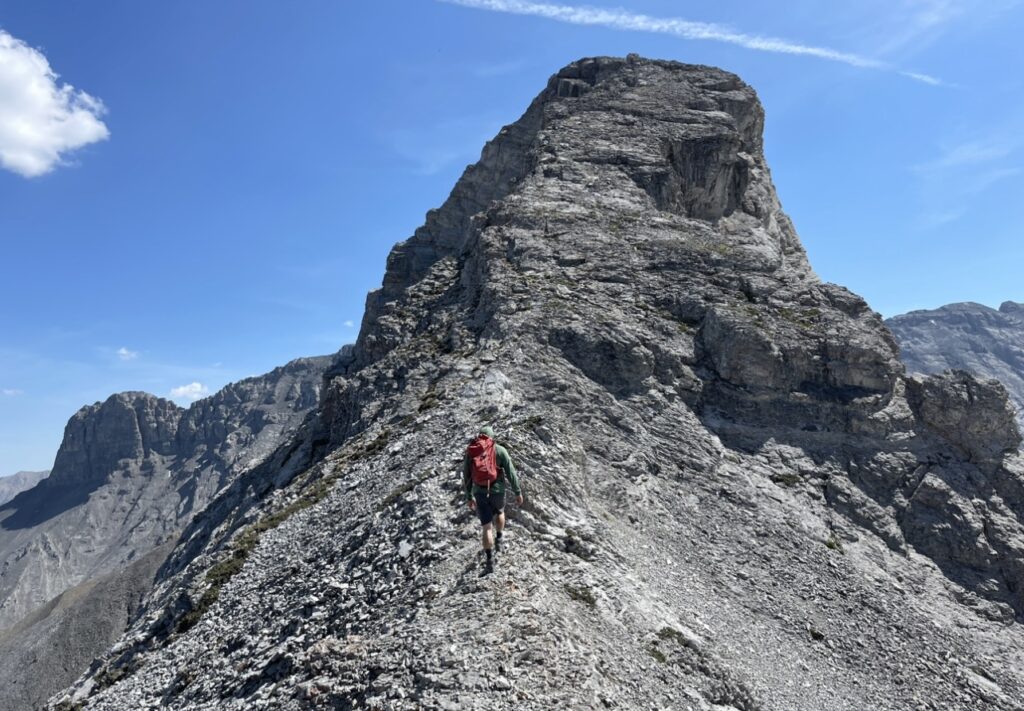
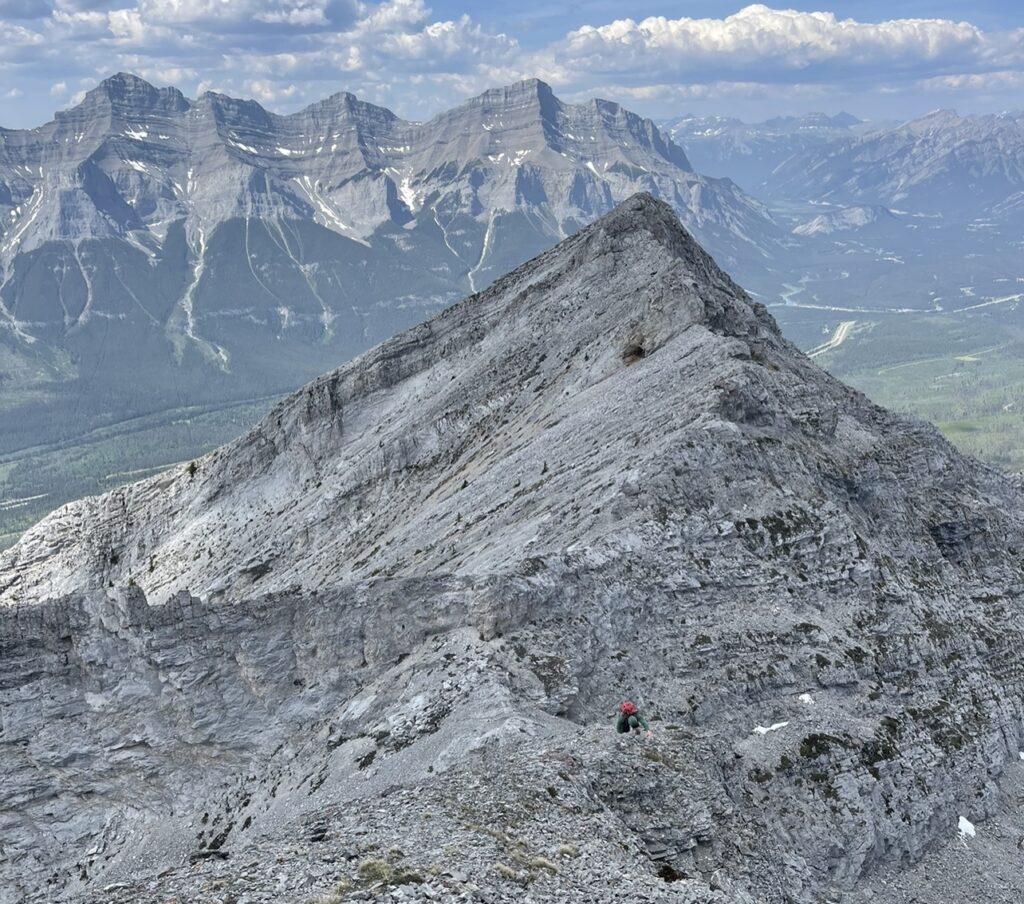
4. The Ridge to False Summit
From the top of the slab, the ridge to the false summit is a very obvious line connecting your current location up to the main ridge.
Hike along the ridge, staying as high on the rock as you can.
While the ridge is quite level, there is a dirt trail bypass on the climber’s right side of the ridge. Although this makes for faster travel, we found the dirt to be quite slippery, with significant exposure on the right at times. I accidentally sent a rock careening down the gully which assured a fall here could be fatal.
By staying up on the crest of the ridge when possible, the travel might be slower, but the terrain is more stable.
As the incline increases, the scrambling becomes more technical. It is possible to scramble the ridge the entire way to the false summit, but I recommend keeping an eye out for a way to get into the scree on the climber’s left of the ridge.
Just as the incline increases, there is a cairn (small rock pile), indicating a logical entry point into the scree gully. However, it is possible to leave the ridge and transition to the scree after this point as well, though it does make for a few difficult traversing moves.
Once in the scree, work your way up the loose rock to the rightmost gully above you, which has the lowest grade of incline. This gully will require you to stem your way uphill with some 4th class scrambling. Be cautious of rockfall from persons above in this gully.
Once you scramble out of this gully, the false summit is in sight, and is an easy hike to obtain.
The false summit is a great spot to stop if you’re feeling fatigued or not up for more scrambling.
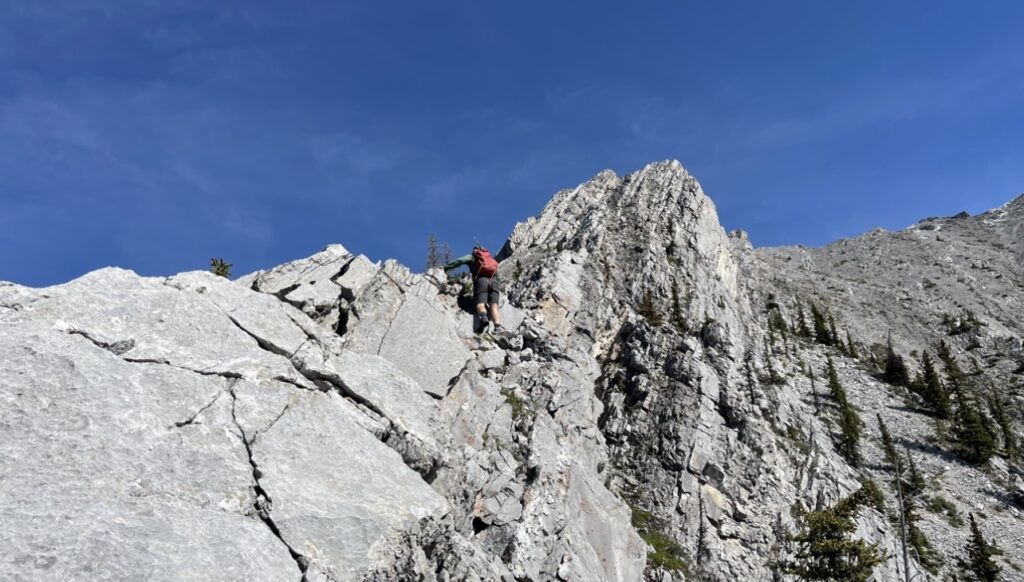
5. The Bypass
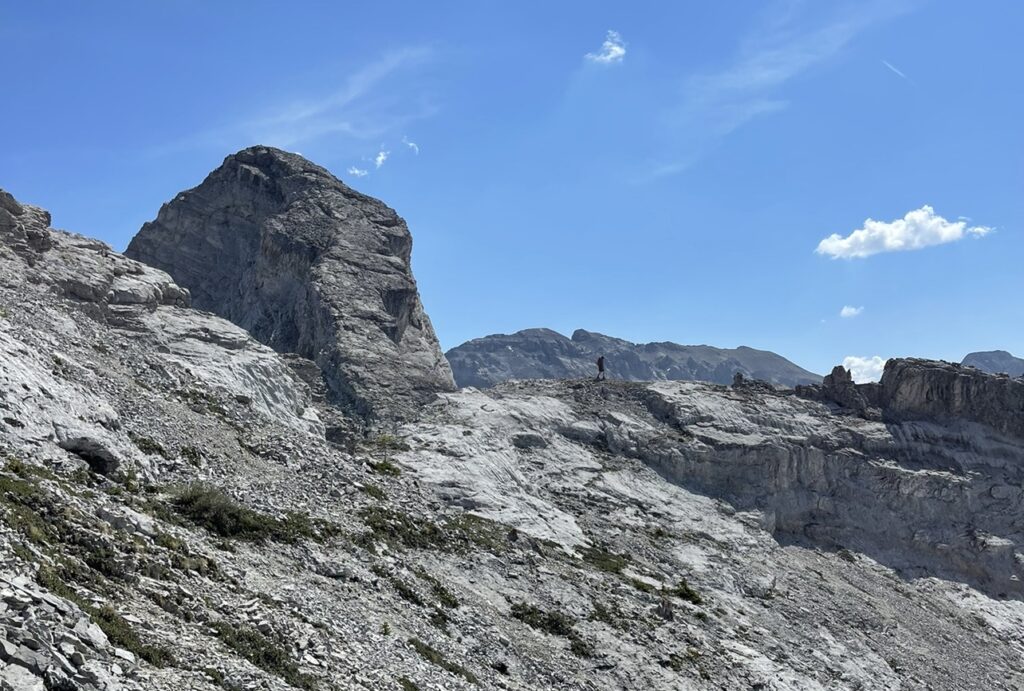
From the false summit, the true summit is an obvious ramp to the north, with three high points between.
Hike north off the false summit, downhill towards the first knobby high point. Be cautious hiking down as there is exposure to the west. Scramble up and over the first high point.
The second high point, however, don’t bother scrambling. The north backside cannot be downclimbed. Instead, hike downhill into the scree bowl on the east to traverse around the second high point. Bypass this point on the scree, and head for the third (flat) high point.
Once you reach this third and flat high point, there are two methods to get down.
The first option to get down from this point is by hiking to the end of the platform, locating two pitons in the rock, and rappelling off the face. Climbing experience is necessary for this move. A 30-meter rope would suffice – the rappel is short.
The second option, which I’d recommend, is using the bypass. The bypass is located at the southwest end of this flat platform, and is marked by a cairn. Two airy steps around the side of the platform reveal an easy ledge around the side. Good hand holds and a solid ledge make for an easy traverse.
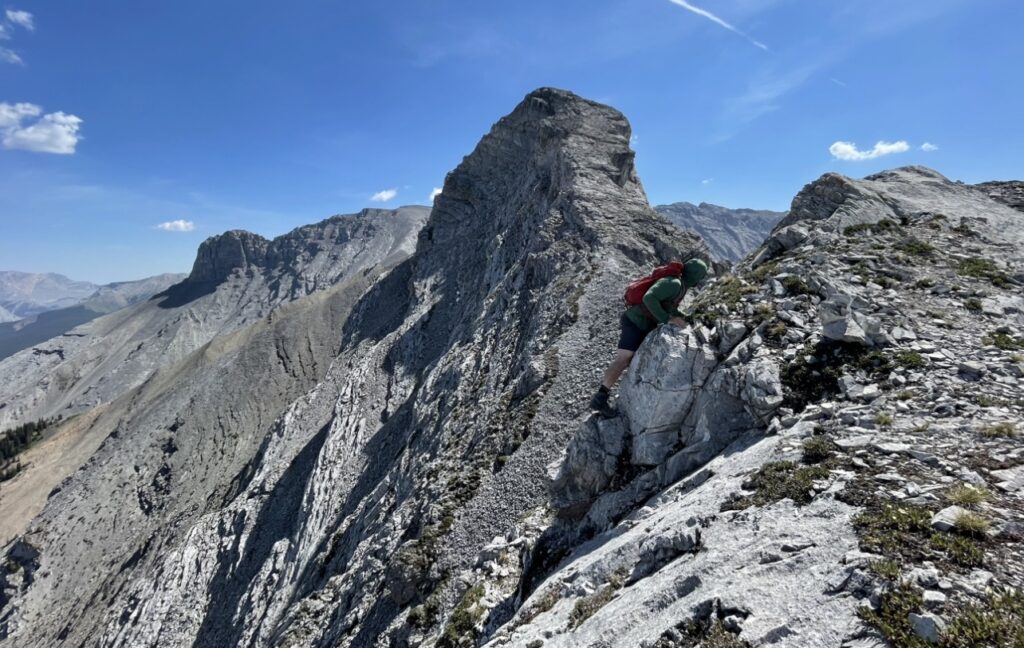
6. The Summit Block
Once at the base of the flat platform, either by rappelling the face or scrambling the bypass, the summit block is an easy ramp in front of you.
The scramble up the textured slab and chunky scree is very easy compared to the prior journey. It will only take about 5 minutes to reach the summit.
Enjoy your accomplishment! From here, descend the way you came, as grueling as it might seem. Prior attempts by other parties have not found a faster or easier descent.
What to Bring When Hiking Princess Margaret Mountain
Aside from the usual hiking necessities, some items you might find helpful for this adventure are:
- Poles – This hike is steep, and poles can help save your muscles and joints in this terrain. However, there is a lot of scrambling in this hike, so I’d recommend collapsible poles that you can put away when you need your hands for scrambling.
- Bear Spray – You should always carry bear spray when hiking in the Rockies! Bears and cougars have been seen in this area. Purchase some at the Canadian Tire in Canmore if you find yourself without.
- Scrambling Gloves – My hands were pretty chewed up from all the hands-on scrambling on this adventure. Consider protecting your skin with some scrambling gloves.
- Sun Protection – A large portion of this hike isn’t shaded by trees. You will be exposed to direct sunlight. Wear sunscreen, bring a hat, and consider a light layer if you’re prone to burning.
- Helmet (optional) – When you wear a helmet on a bike, it’s a safety measure for a “just-in-case” scenario. Scrambling is no different. Consider a helmet for rockfall and accident protection.
- Durable clothing – This hike isn’t completed very often, and as such, the treed portion is a bit overgrown. Save your skin from several scratches by wearing long sleeves, pants, and durable clothing that won’t tear.
Princess Margaret Mountain Tips To Get The Best Experience
- If you’re a confident scrambler, don’t bother bring a rope, harness, and rappel gear. Despite what you might read on other blogs, the bypass is easy to navigate and mitigates the need to rappel. This keeps your load lighter and your travel faster.
- Know your strengths. When you’re on the ridge to the false summit, you can scramble the ridge entirely or drop into the scree and scramble up a gully. Knowing what you plan to do ahead of time can save you time in trying to safely convert to the other option.
- Make note of your ascent route. The route down looks deceptive and it would be easy to be pulled too far skier’s right (meaning your right when you’re going downhill). Be sure to make mental note of your surroundings and follow a GPS route for a safe journey!
Frequently Asked Questions
Do I need a Kananaskis pass for the Mount Princess Margaret hike?
No, you do not need a kananaskis pass to hike or summit Princess Margaret Mountain! Because you’re parking in the hamlet of Harvie Heights, you don’t need the digital pass.
Do I need a rope to summit Princess Margaret Mountain?
No, you don’t need a rope to summit Princess Margaret Mountain if you use the bypass route. As well I think it’s safer to use the bypass than to trust old pitons with a rappel.
Recommendations From My Experience
- The scrambling on this adventure was more involved than I had anticipated. Although it was fun, it was rough on my hands and more time-consuming than we planned for. Knowing this, bring scrambling gloves and plan for a longer adventure.
- I did struggle a bit with route-finding on this trip, scrambling up a 5th-class option instead of locating the 4th-class option. I recommend checking your GPS often, particularly before scrambling any sections, as well as on the descent.
- The rappel bypass was an excellent option and felt very secure. However, there is exposure in this section. Take your time, even if it feels easy.
- Travel quickly through the quarry and the trees. This gives you more time for scrambling and to enjoy the summit. However, don’t forget to pack the sunscreen as you’ll have a lot of time without shade!
Other Questions?
Were your questions left unanswered? Drop a comment below and I’ll get back to you! Also, if you’ve hiked Princess Margaret Mountain, leave a review below for others to see!
Other Recommendations:
I would recommend summiting Bald Eagle Peak before Princess Margaret Mountain. Bald Eagle Peak seems to be more traveled than Princess Margaret, which is comforting to know you’re not alone on a mountain, and the scrambling is less involved, though still significant.
Another recommendation is Big Sister. Big Sister is a steep ascent on a ridge or through a gully, with a large downclimb before the summit. I found Big Sister to be a more scenic objective, though just as fun with the scrambling.
For an easier day out, consider Gap Peak – a hidden gem with a fun ridge scramble to the summit!
Happy trails!