
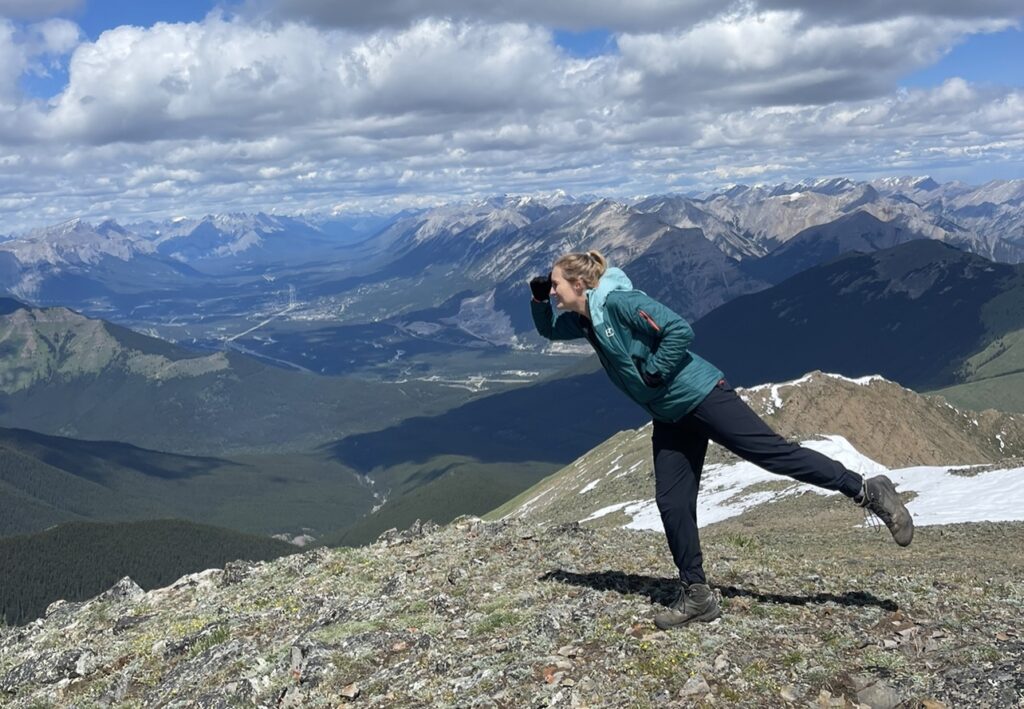
Mount Collembola is an infrequently hiked mountain near the town of Canmore, Alberta, yet it holds some of the most stunning views in the area! It might be one of my favorite hikes to date. It’s kind of like a better Tent Ridge, which has become overrun with crowds.
What’s special about Mount Collembola is that it can be hiked from either Canmore, Kananaskis, or Mount Allan, and it offers true 360 degree views with excellent ridges and several options for additional adventure.
Although it poses a long day, Mount Collembola is an incredible adventure. This mountain is for you if you have a full day to explore, don’t mind route-finding, are open to small scrambles, and love ridges. Avoid this one if you don’t have much time, don’t like technical scrambles, or the weather is excessively hot.
Mount Collembola Quick Stats
- Distance – 16.6 km / 10.3 mi
- Elevation Gain – 1440 m / 4,724 ft
- Approximate Time – 7-10 hours
- All Season Hike? Not recommended in winter
- Dog Friendly? Yes from Kananaskis, likely difficult from Canmore due to scramble section
- Kid Friendly? Likely no due to distance, elevation, and scramble.
- Beginner Friendly? Likely no due to distance, elevation, and scramble. Possible if experienced leaders.
- Cell Service? Likely spotty throughout.
- Wildlife Encounters? Possible bighorn sheep, bears, marmots.
- Access to Water? Creek crossing (very early in the hike).
- Bathrooms? Outhouses at parking lot
- Chance of getting lost? Moderate chance of selecting wrong trail.
Driving Directions & Where to Park for Mount Collembola
From Canmore
Pro Tip: I would recommend hiking Mount Collembola from Canmore / Dead Man’s Flats as opposed to hiking it from Kananaskis (Ribbon Creek) due to the well-defined trail on the Canmore side.
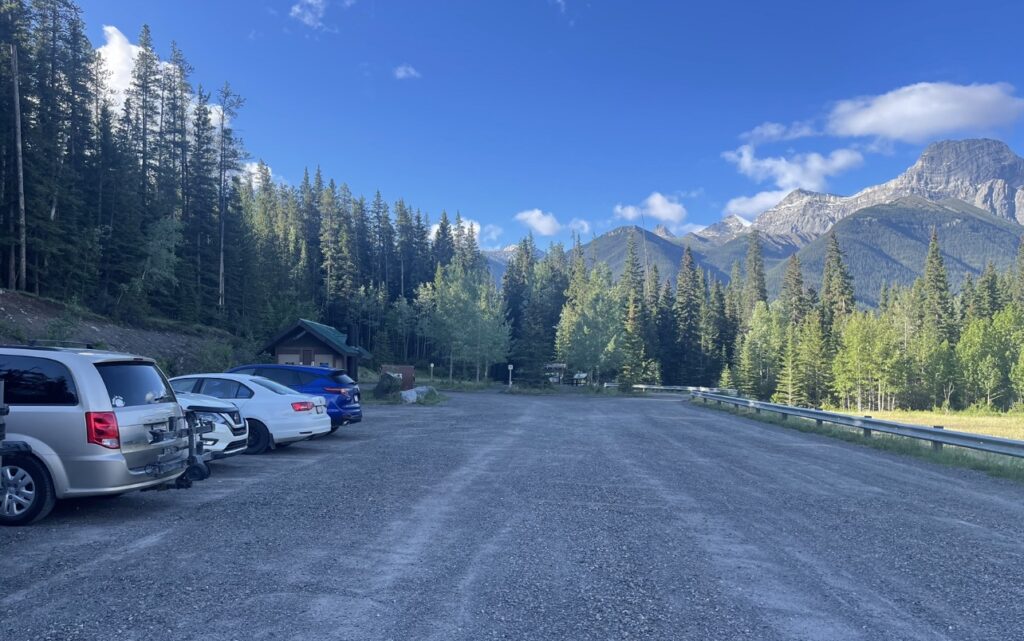
To access the hike from Canmore, drive highway 1 and take the exit for Dead Man’s Flats (George Biggy Sr Rd). Drive south, uphill, along this road for 1 minute until you reach a moderately-sized paved parking lot at the end of the road. This is where you want to park.
This parking lot also serves Pigeon Mountain, Wind Ridge, Mount Allan, and Centennial Ridge, and therefore can get very busy on summer weekends. Plan to arrive early.
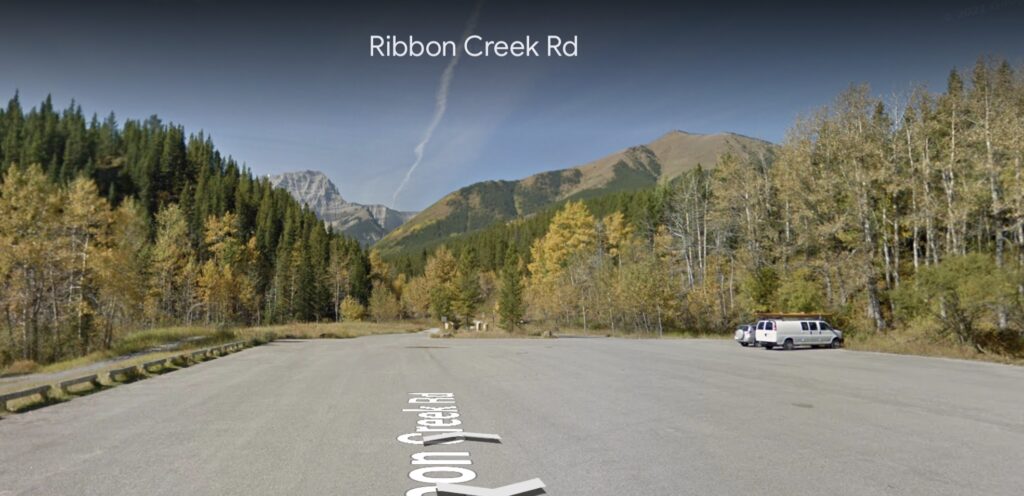
From Kananaskis
Hiking Mount Collembola from Kananaskis can be done, but the trail is not defined and can result in a bushwhack. If you plan on hiking Mount Collembola from Kananaskis, drive highway 1 and take the exit for highway 40 south.
Drive along highway 40 until you reach Kananaskis Village, marked with a large sign. Turn right here (Mount Allan Drive).
Following signs for the hostel, take your first left onto Centennial Drive, followed by a quick right onto Ribbon Creek Road. Drive past the hostel and park at the parking lot at the end of this road.
How to Get to the Mount Collembola Trailhead
From Canmore (Dead Man’s Flats)
I recommend using a GPS, as there are several trails in this area, and it can be confusing as to which trail to follow.
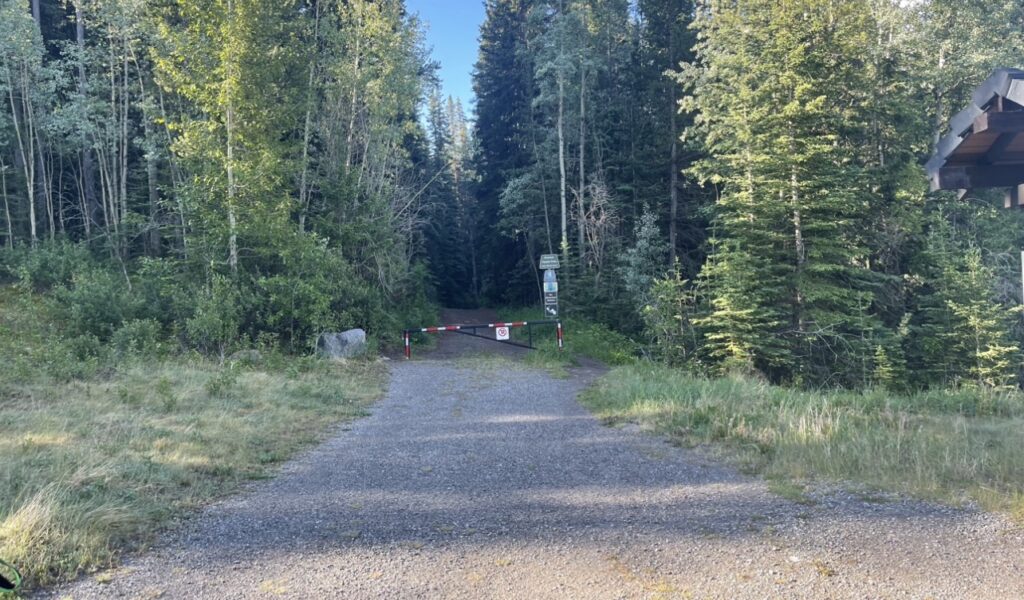
From the Canmore / Dead Man’s Flats parking lot, hike past the outhouses to the large sign at the end of the lot marking a very obvious trail entrance. Start your hike here.
Following signs for “Centennial Trail”, take a right at the first intersection, followed by a left at the second intersection. This will put you on a large cutline that works its way to the base of the mountain for 5.9 kilometers.
After 5.9 kilometers, turn left to get on Mount Collembola’s ascent route. The trail leaving Centennial Trail to hike up towards Mount Collembola is not obvious and is overgrown with the nearby brush. I recommend following a GPS.
There is no official signage for Mount Collembola aside from the Centennial Ridge trail. This turnoff is the start of the Mount Collembola hike.
From Kananaskis (Ribbon Creek)
I do not recommend hiking up to Mount Collembola from Kananaskis as there is no defined trail. It is safe and possible to do so with a GPS, but requires route-finding, navigation skills, and bushwhacking.
Consider hiking up to Mount Collembola from the Canmore side, or use this route as a descent option instead.
Either way, a GPS is recommended to navigate. Further direction on this route will not be provided in this blog as I have not personally traveled this route, though a few individual trip reports on Facebook groups say it is a simple hike up, albeit a long one.
How To Hike Mount Collembola Successfully
1. The Start and The Cut Line
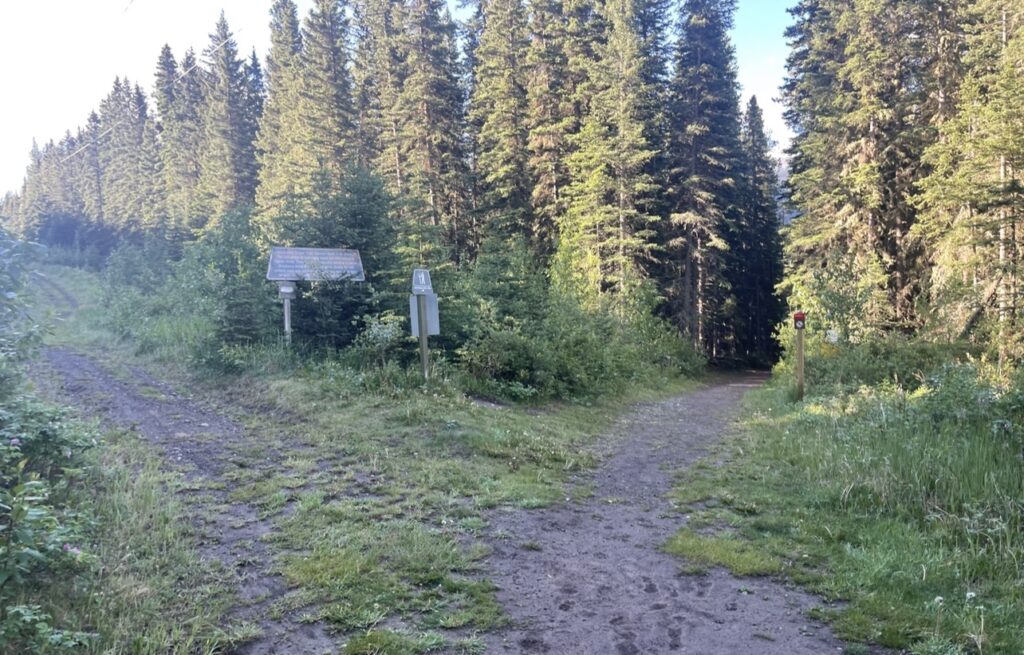
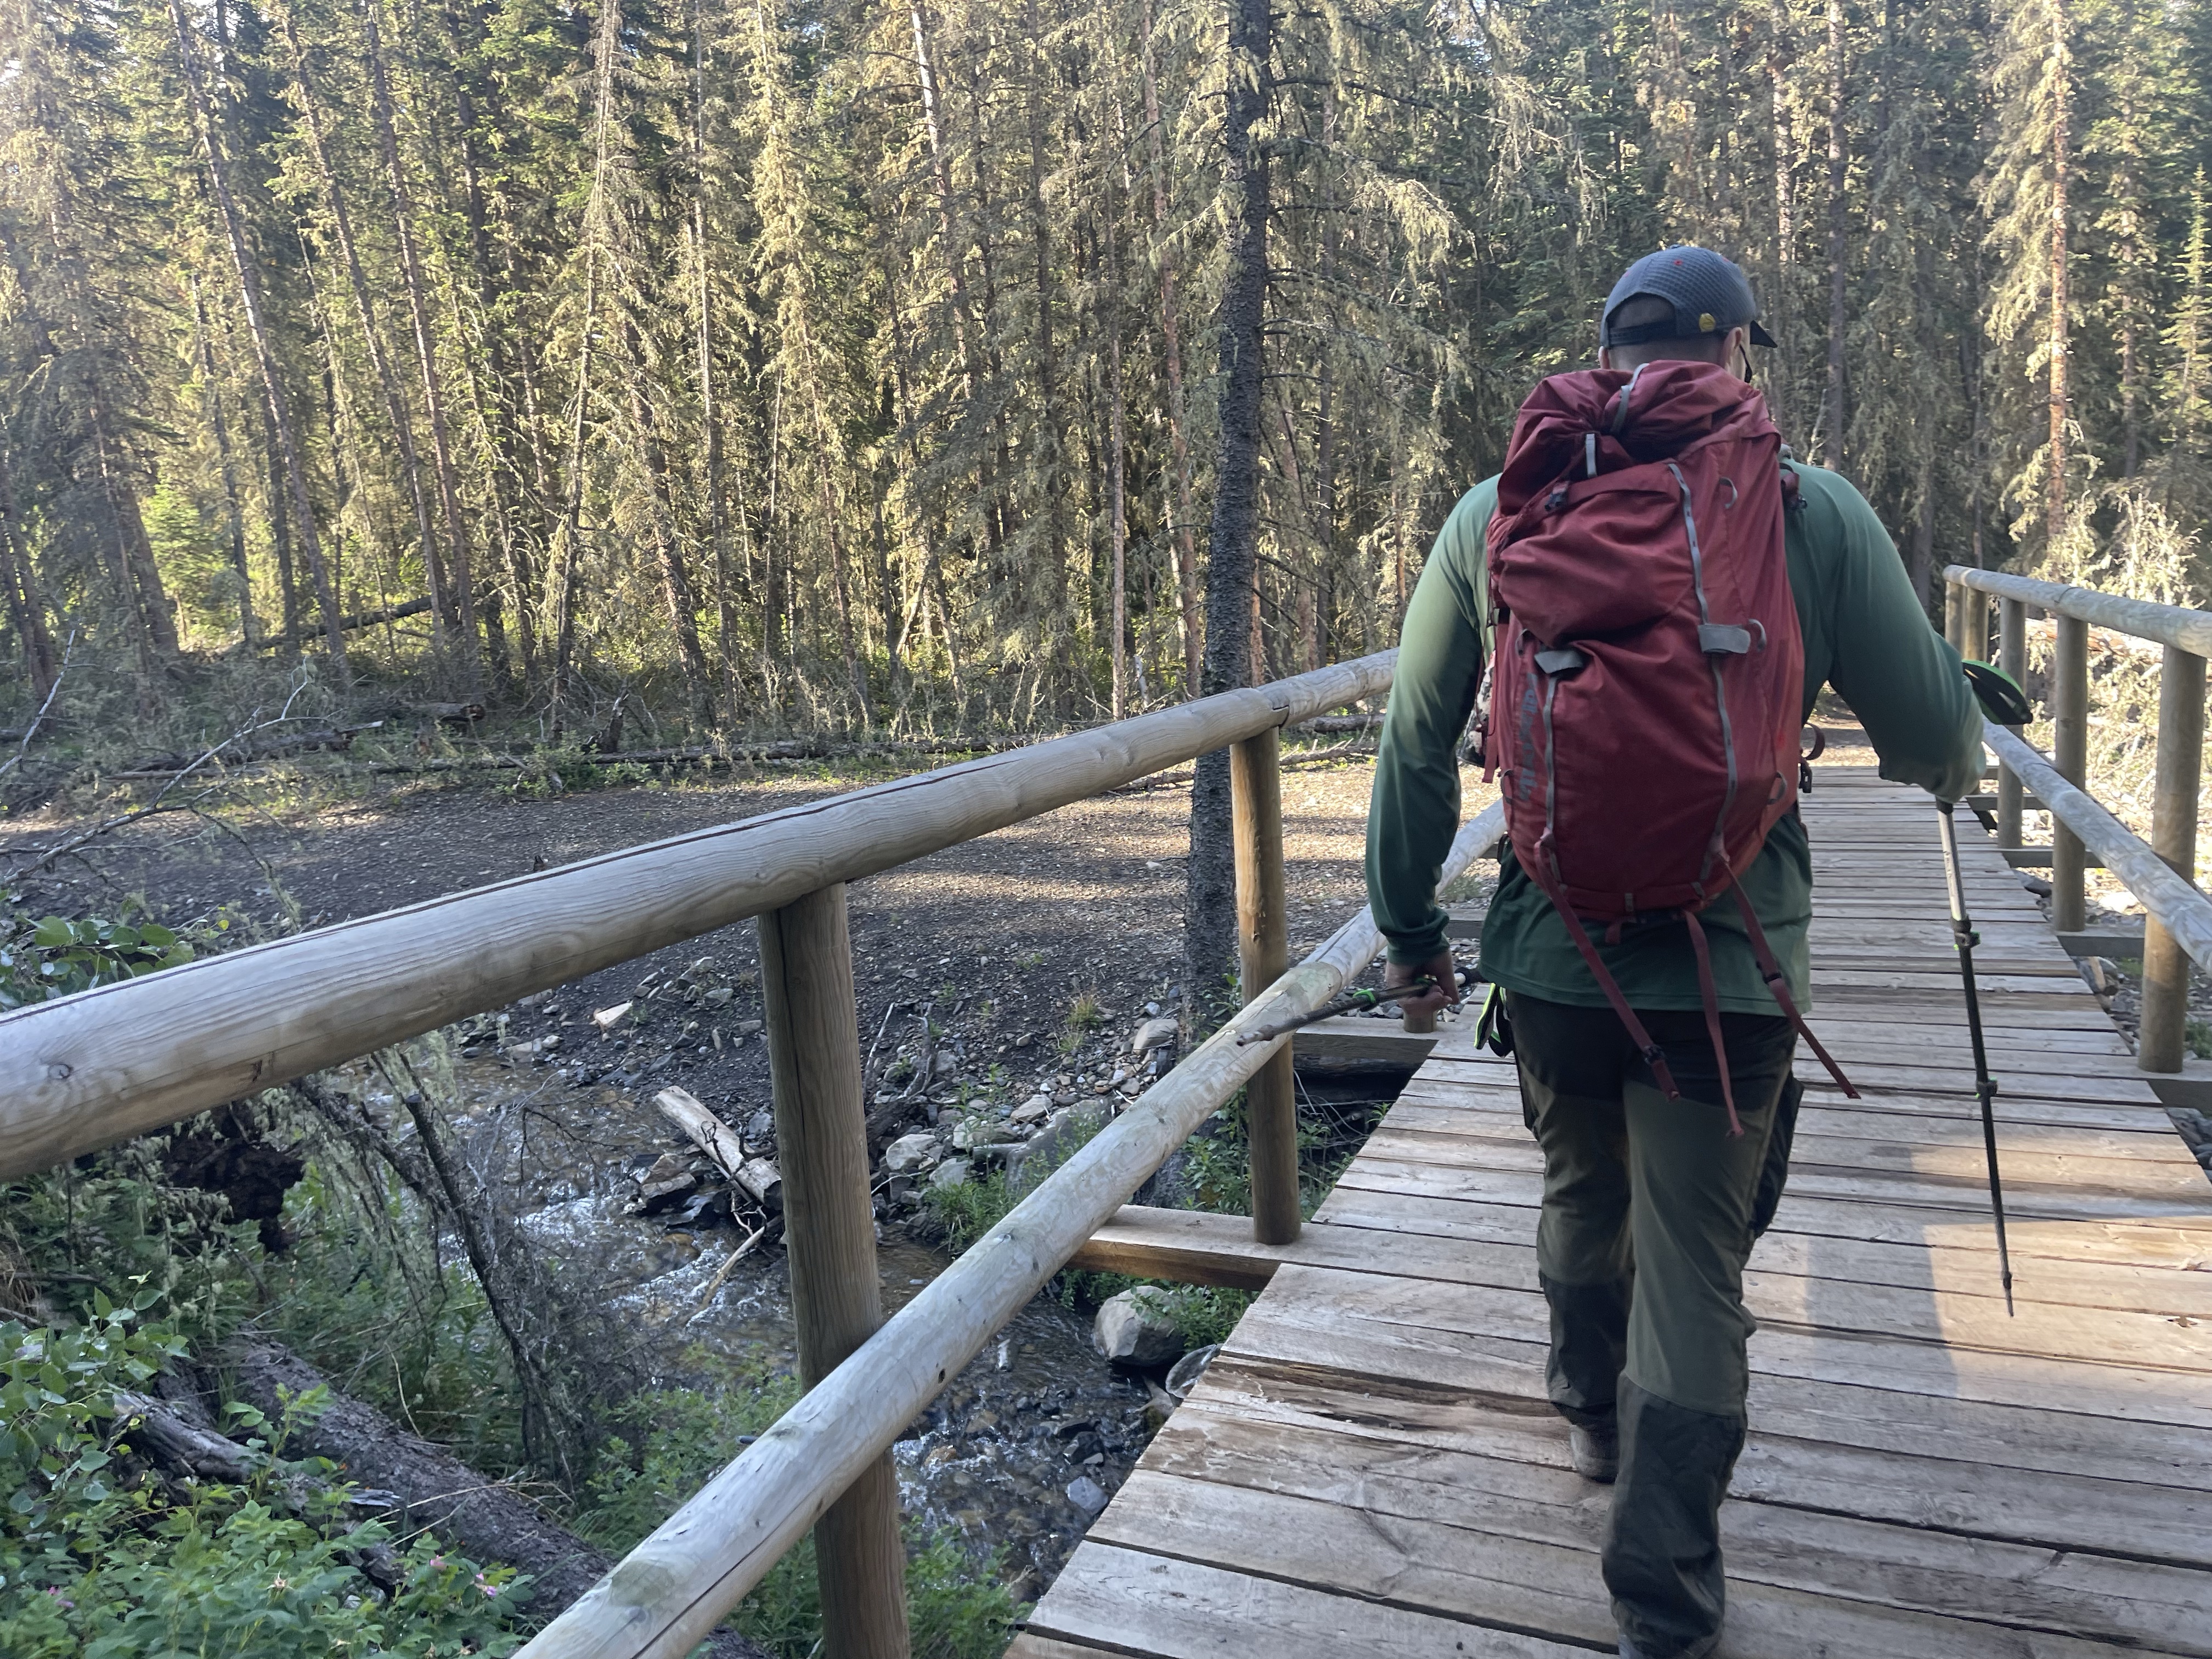
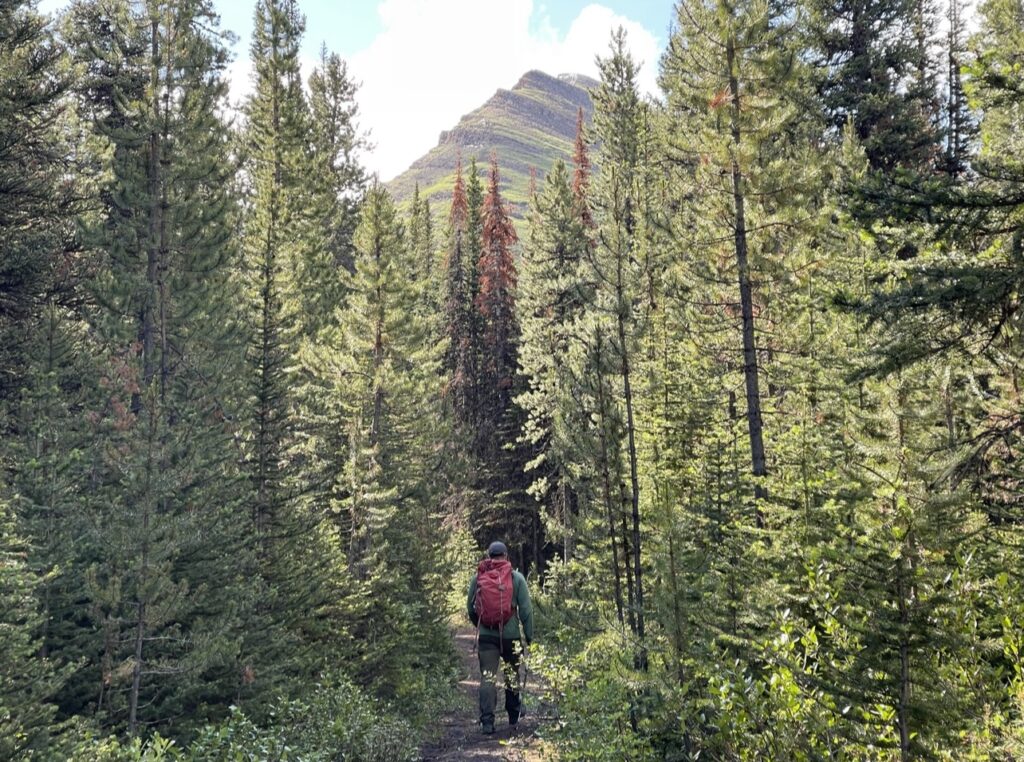
Start from the Dead Man’s Flats (Canmore) side for the easiest navigational approach. From the parking lot, follow the obvious trail down to the creek following signs for Centennial Ridge.
The start of this hike has many trails in the area, so either navigate using a GPS track (I personally use AllTrails), or follow the signs for Centennial Trail.
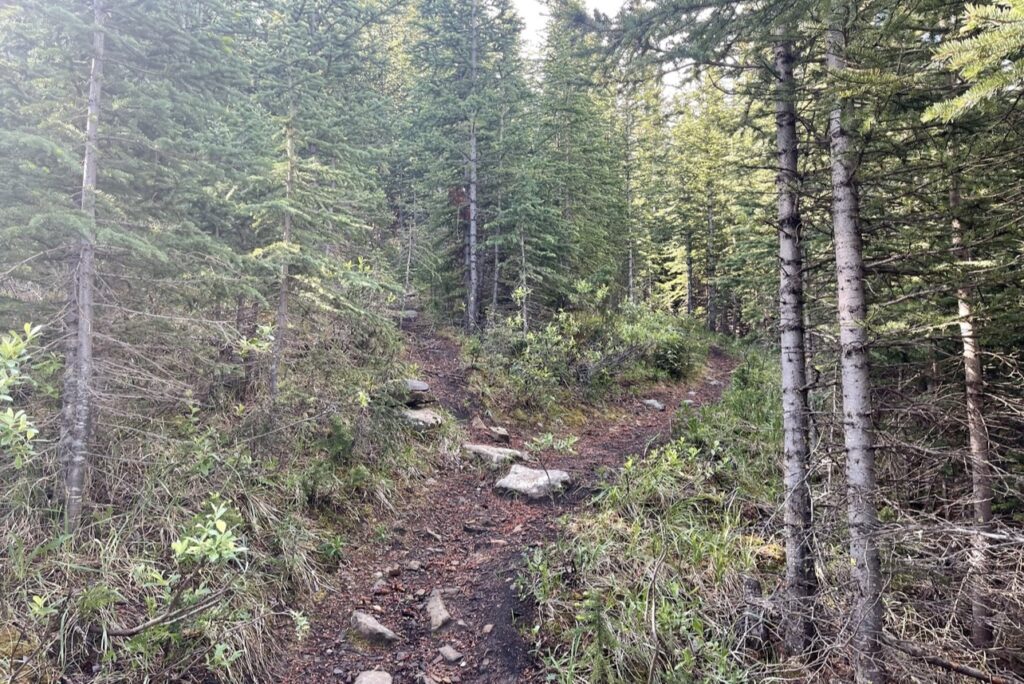
You will cross a creek very early on in this hike, and this is your only chance to fill up with water. Once you’ve crossed the creek, you are on a wide fire road that gradually narrows and becomes more overgrown with brush. The incline slowly increases, and the ground becomes rockier as you go as well.
You are able to bike as much of this section as you feel capable of. Most parties should be able to bike in at least 3km (6km round-trip).
Unfortunately this part of the trail is long, dull, and offers no views. It’s best to push through this section as quickly as possible to get to the good part faster. Biking would help get through this section faster.
6 kilometers in, you need to make a lefthand turn to leave the Centennial Ridge trail and start hiking up the slope towards Collembola. This exit is not obvious as the Collembola trail is very overgrown. I recommend following a GPS to not miss the turn.
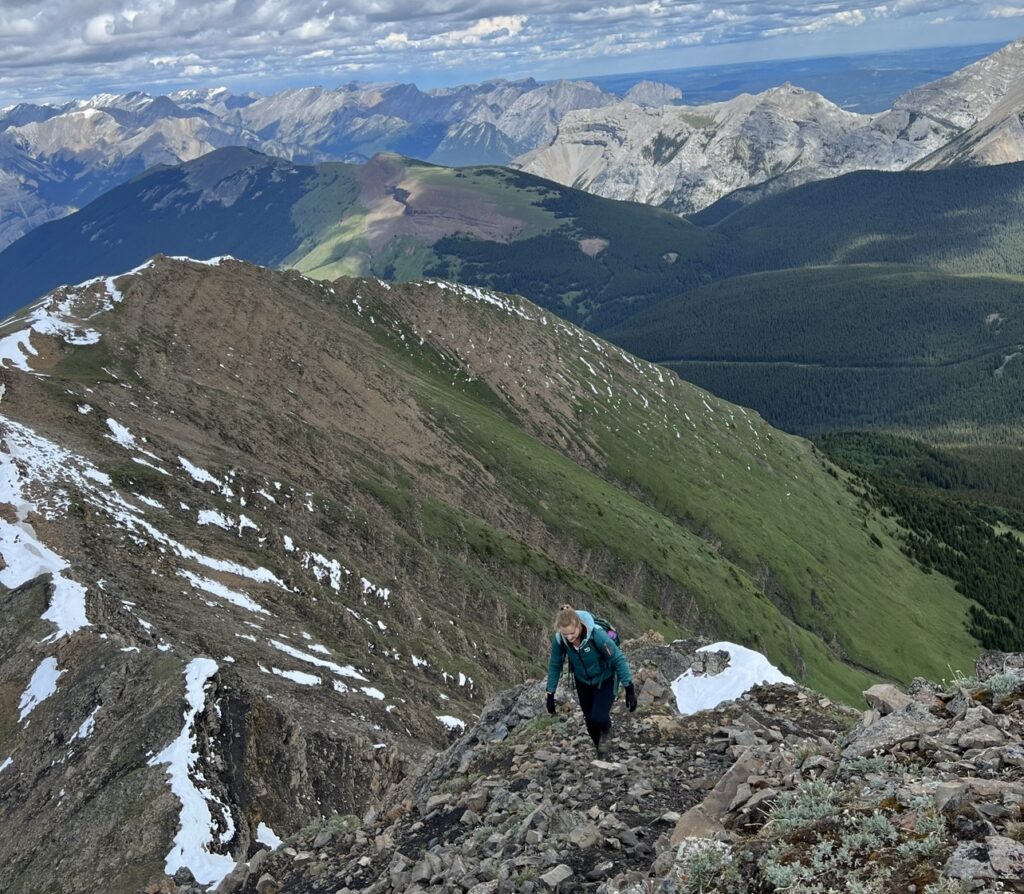
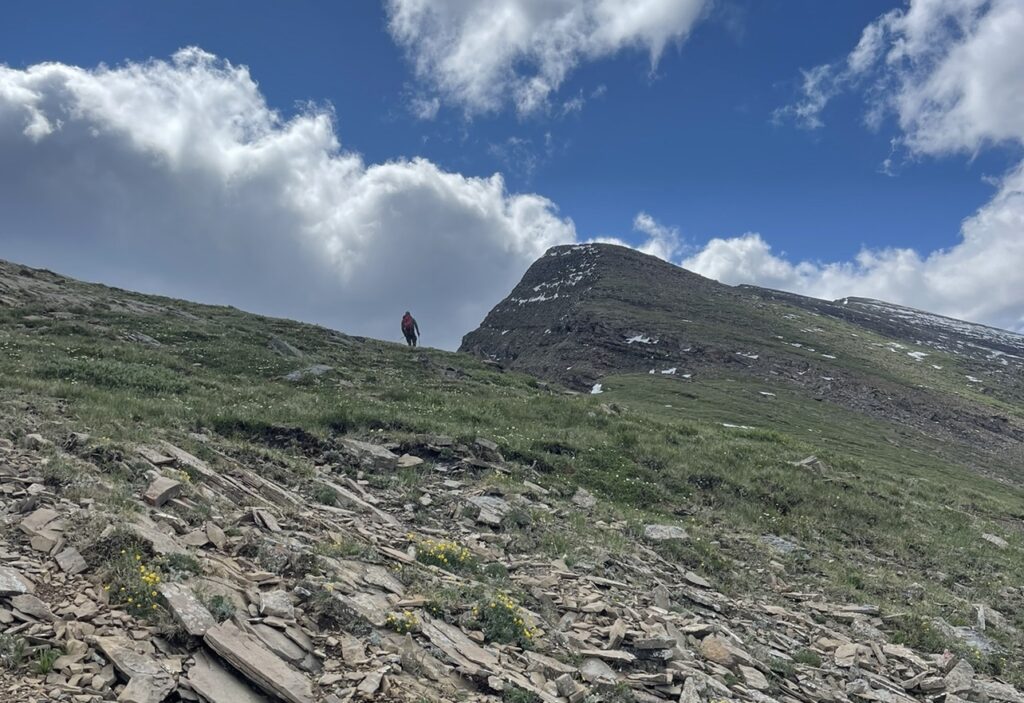
2. The Grassy Slope
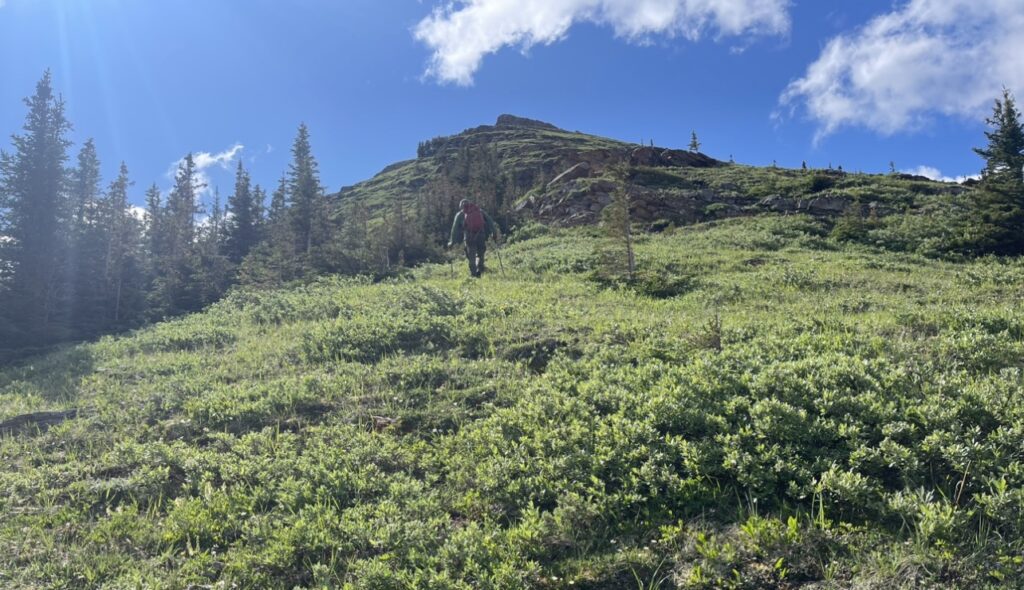
Once you leave the Centennial Ridge trail, the incline increases even more as you work your way through thick brush towards a grassy slope.
There is a faint trail to start, but as you approach the grass, it seems to disappear. No matter, your route is simply “up”, and you quickly break the tree line.
There are some minor cliff bands in the grassy slope, but they are easy enough to step over. No scrambling is required, and you can make your way up through the terrain whichever way you find easiest.
The top of this grassy slope looks like it might be the summit, but do not be fooled – you have a long way to go.
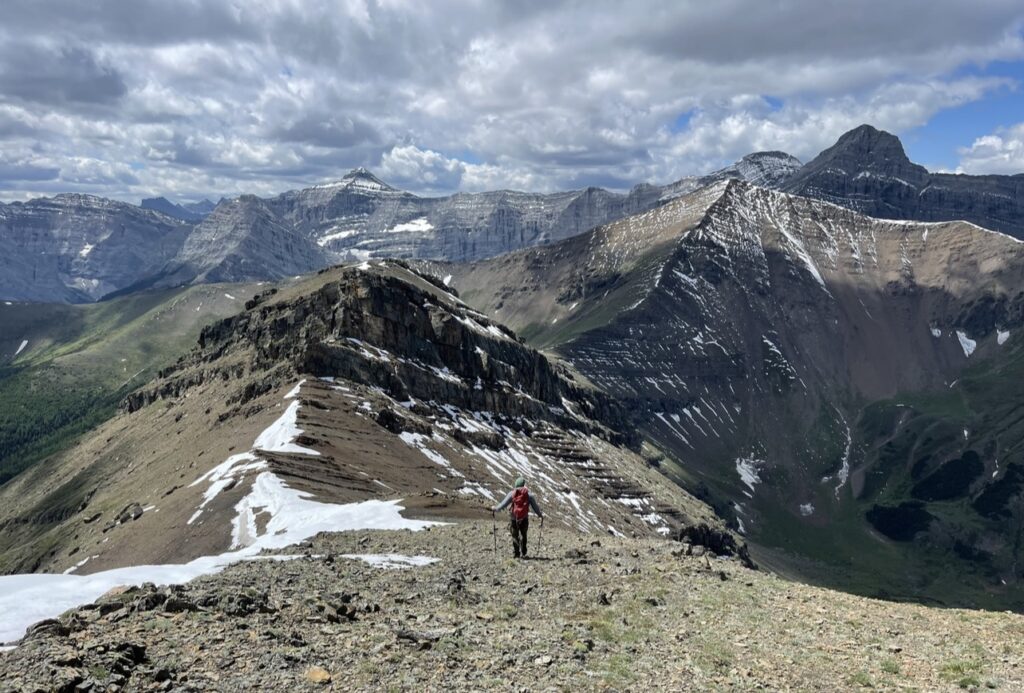
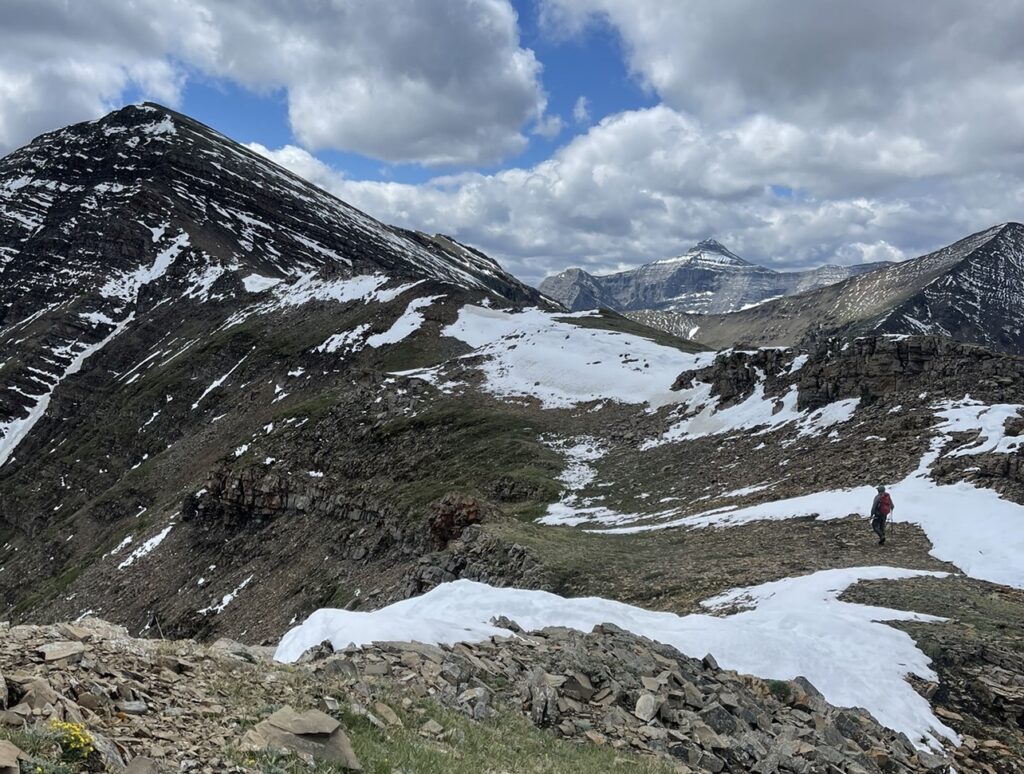
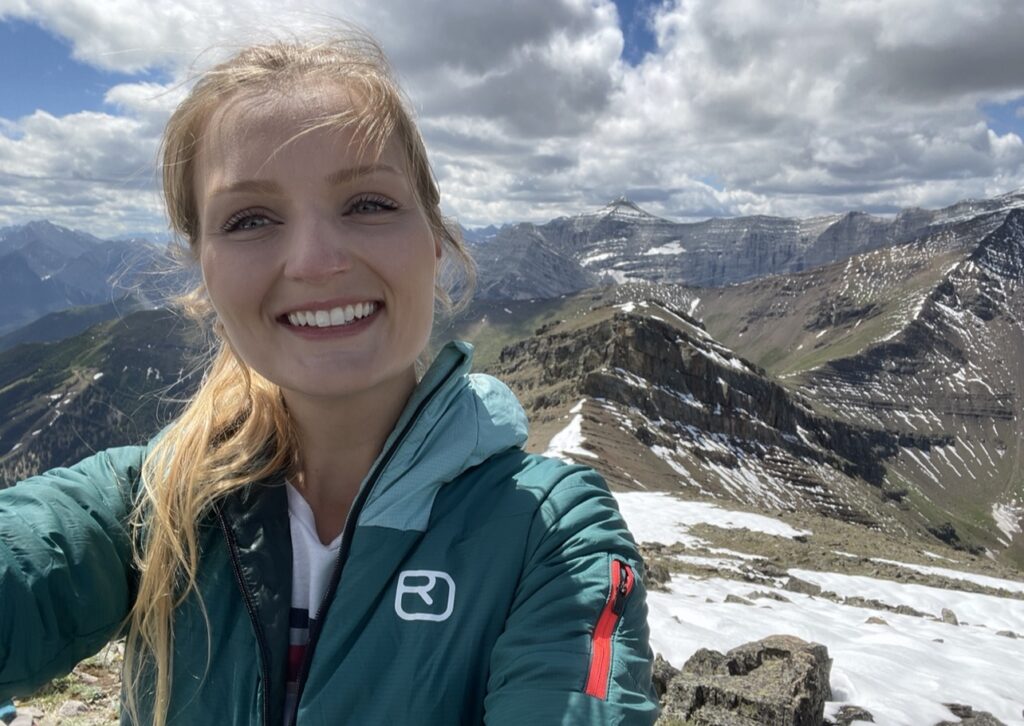
3. The Ridge
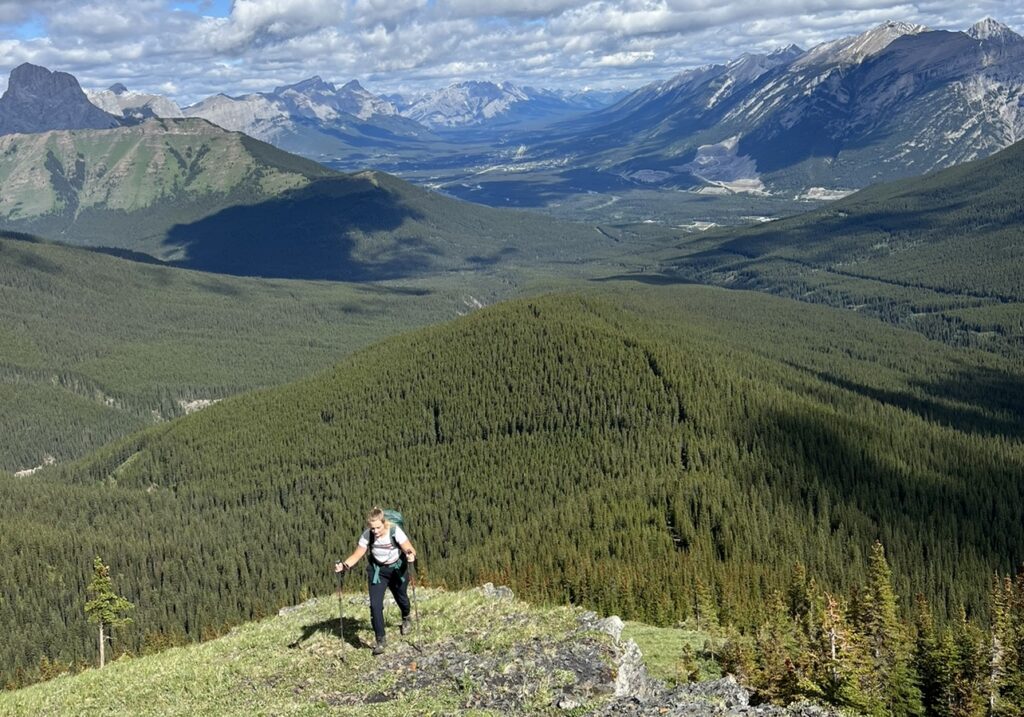
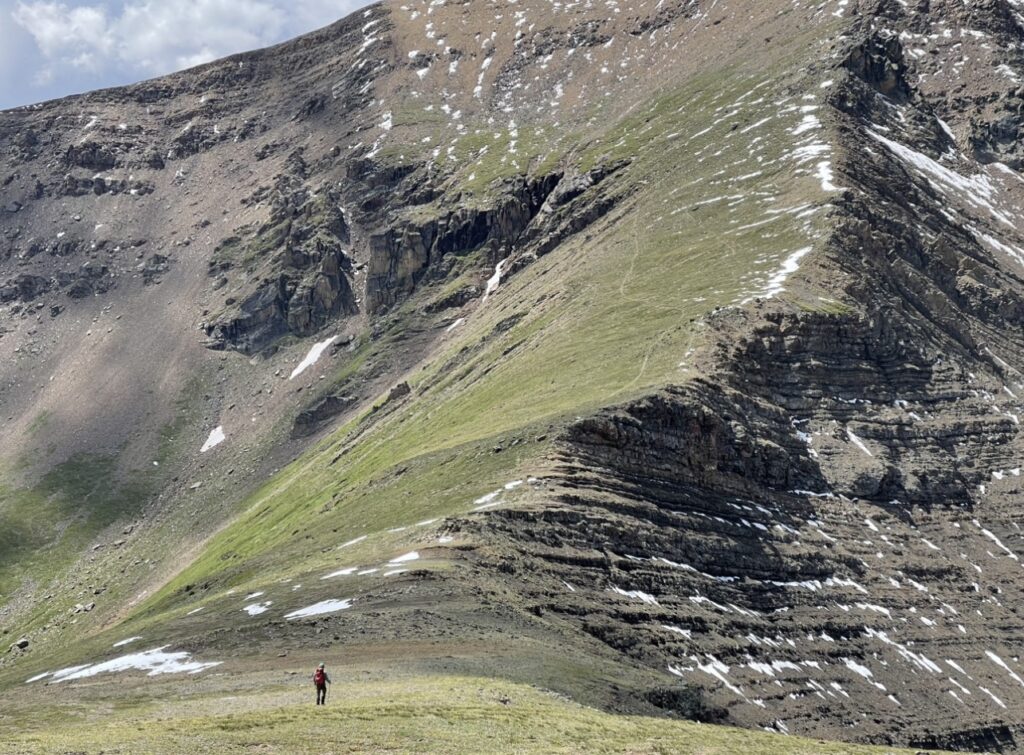
At the top of the grassy slope, you will find yourself on a broad ridge that rolls over various high points. It almost appears as though you’re hiking up and over a series of hills.
This part of the hike gets more and more beautiful as you go. Take your time to enjoy the scenery here.
More small cliff bands remain throughout the ridge, though they remain easy to navigate through. There is no real scrambling through the ridge.
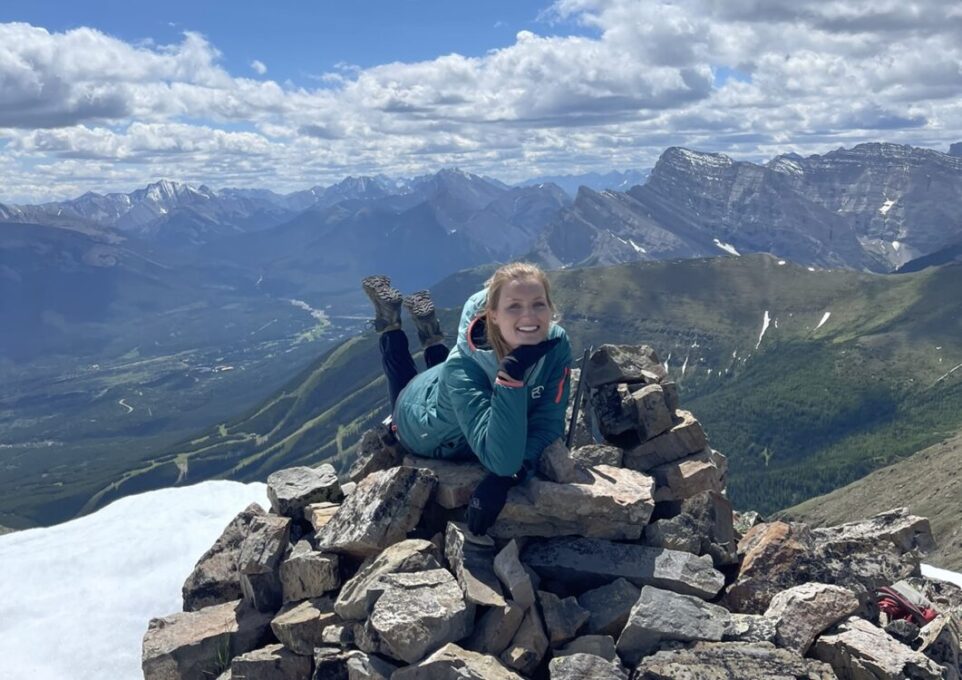
Just before the summit block, you will come to a large rock area, which we took to calling the “rock garden”. There is no scrambling here, but the terrain could cause a rolled ankle if you’re not watching your step. It also makes for a neat area to take some pictures.

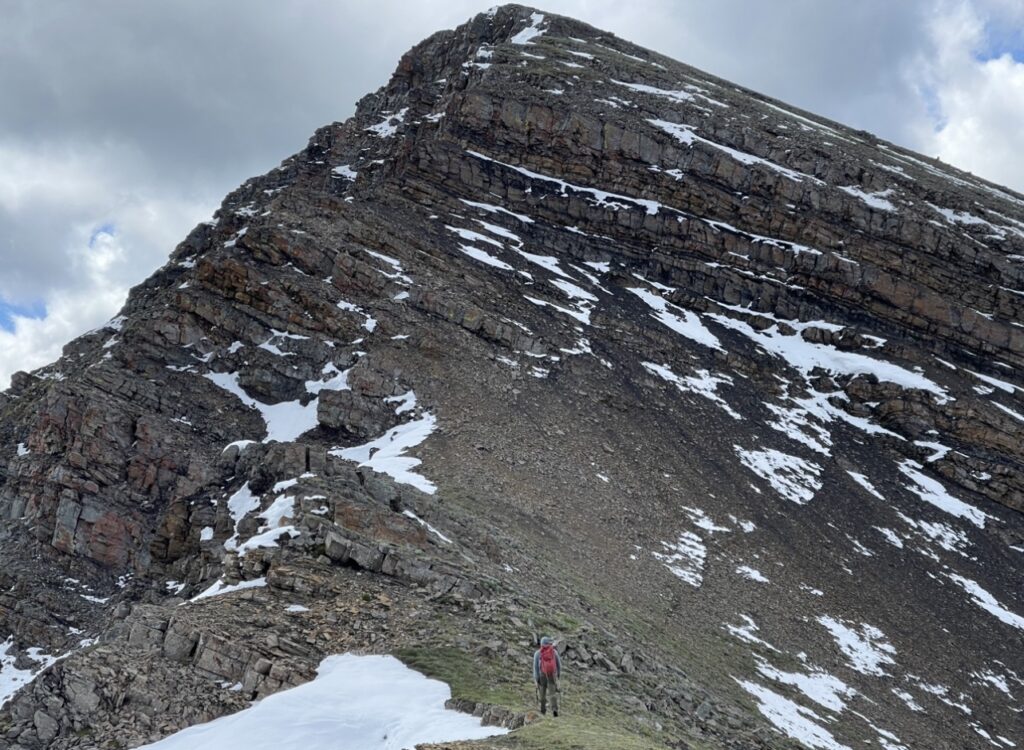
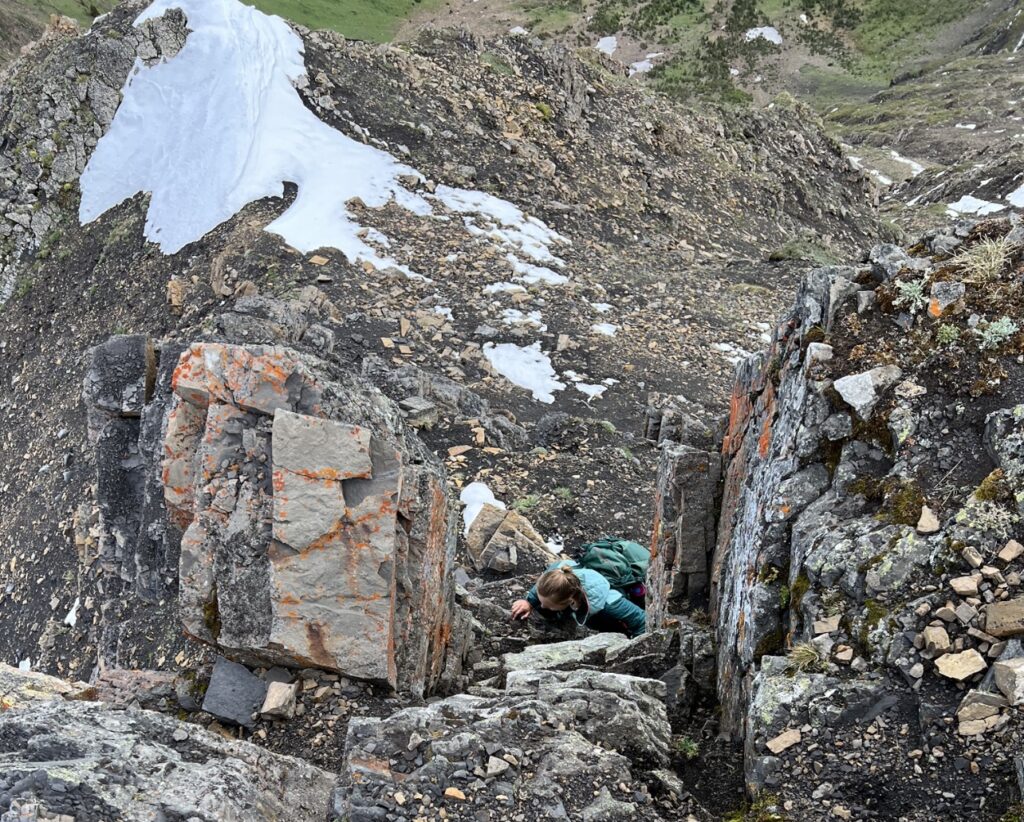
4. The Scramble and Summit
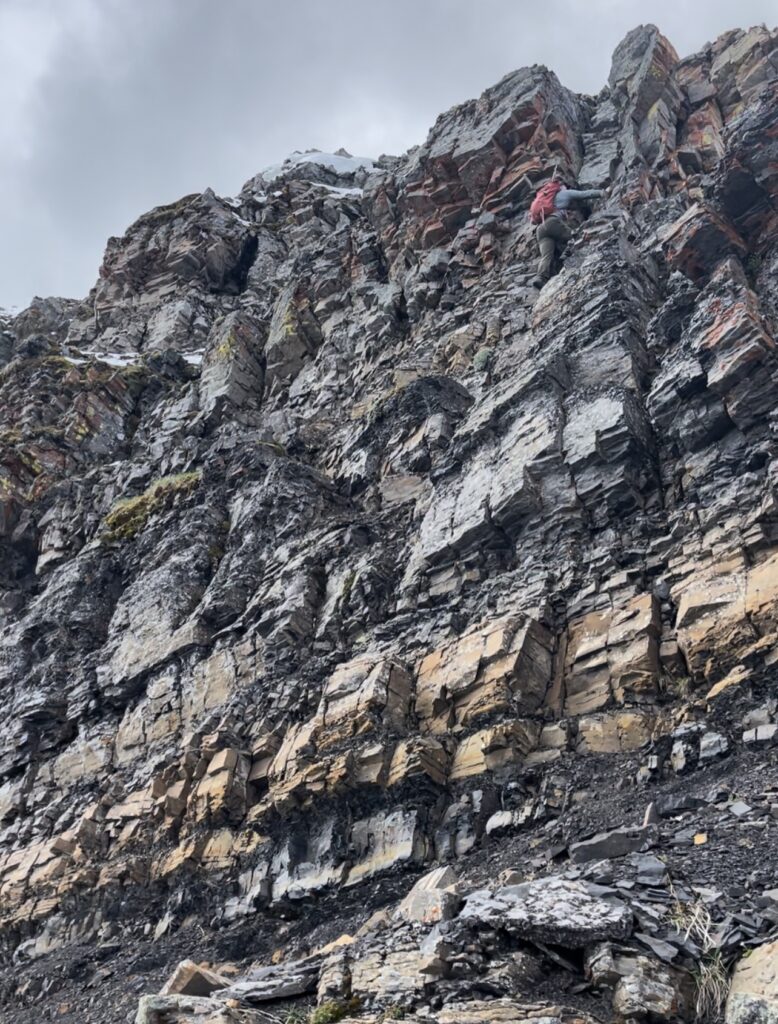
As you near the summit block, the ground turns to soft black shale and you make your way up to a large cliff band.
As you near the rock wall in front of you, keep making your way up and to the climber’s left (meaning left as you’re hiking uphill). You will move left towards the face of the mountain.
Here you will need to use some route-finding skills to choose how you want to scramble up this section. This is the crux (hardest part) of the hike. There is a low fifth-class option just to the left of the ridge, or an easier fourth-class scramble even further left along the face of the mountain.
This scramble does have exposure with any line taken. I wouldn’t recommend it for beginners or dogs, though it is possible with patience, determination, and direction. Extra caution should be taken in adverse weather conditions.
Once on top of the scramble, the summit is an easy 5-minute hike to the top.
Descent Options for Mount Collembola
Several ways down the mountain exist, which is excellent as it gives options for your group based on personal factors, environmental factors, and anything else that comes up.
1. Back Down The Way You Came
This is likely the most difficult option if you have hiked up from Dead Man’s Flats, due to having to downclimb the scramble section. Even if you found the scramble to be fairly easy, exposure remains, and it can be difficult to locate the route you took up from above.
Hiking out the way you came up is a good option if you’re confident in retracing your steps, or if you summited from the Kananaskis Ribbon Creek side.
However, I wouldn’t recommend going down the way you came up as there is so much more to see.
2. Out The Other Side as an A-to-B
Another descent option is to hike out the other side – either the Kananaskis Ribbon Creek side or the Canmore / Dead Man’s Flats side. Traversing up and over mountains like this is known as an “a-to-b” or a “point-to-point” hike.
To do this, I would recommend pre-planning and leaving a car at the location you plan on exiting. Don’t forget to bring the car keys on your hike! A GPS will also come in handy to aid in navigation.
Hike from Canmore to Kananaskis instead of the other way to avoid having to downclimb the crux cliff band.
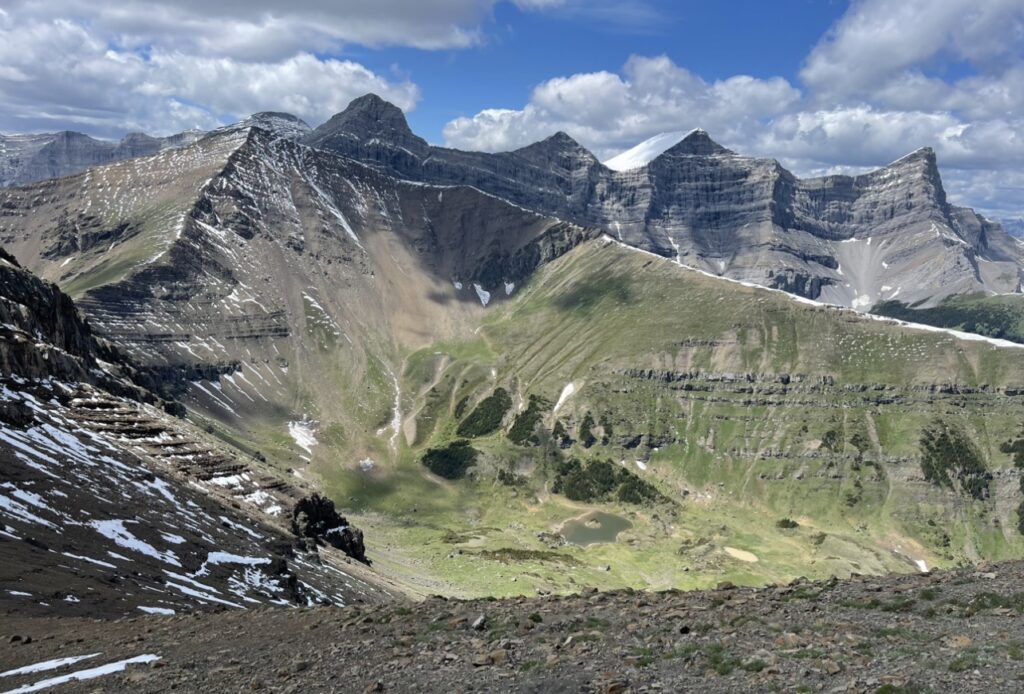
3. To Mount Allan and Centennial Ridge
This would be my biggest recommendation. I will make a blog post about the traverse, but hiking up to Mount Allan only involves 300 meters more elevation gain, and offers some stunning views as well as a double summit.
There is some scrambling and route-finding required to hike up to Mount Allan, as well as to navigate down some scramble sections on Centennial Ridge.
Hike from Collembola to Allan (instead of Allan to Collembola) to scramble up the tough sections instead of having to climb down them.
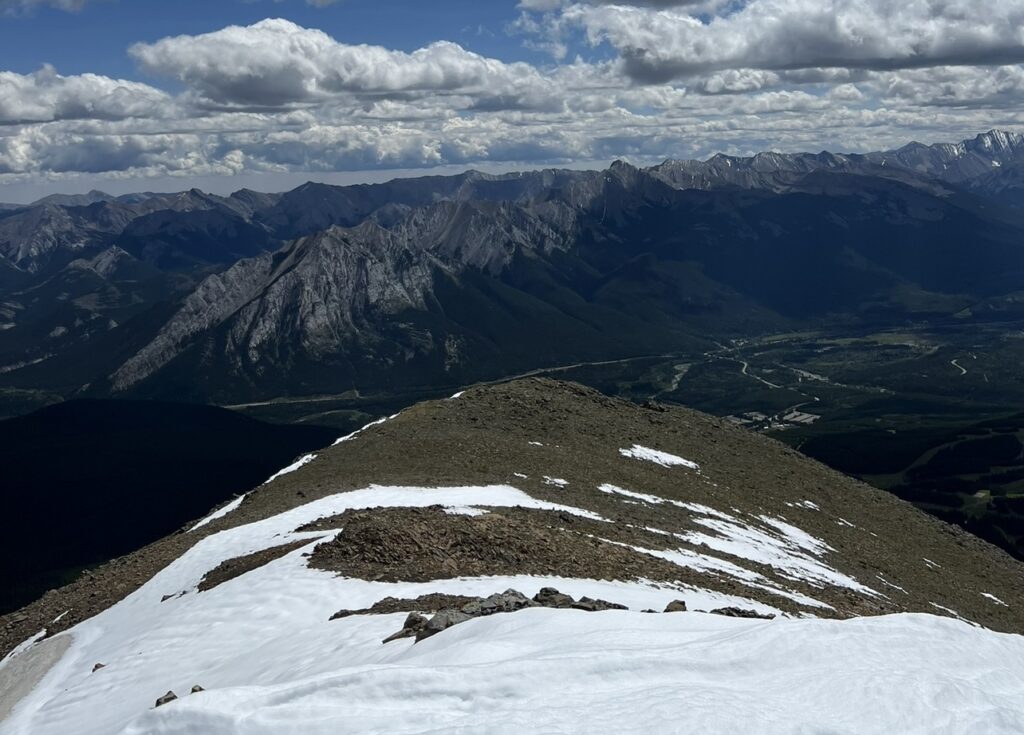
Centennial Ridge offers stunning views of the Wind Valley, the Lougheed mountains, and really give you that “Tent Ridge for grown-ups” vibe.
4. To The Tarns
If you’re feeling tired, done, or you aren’t excited about the prospect of scrambling, the easiest way out is to hike down to the tarns (small mountain ponds).
Hike off the summit towards Mount Allan (southwest). As you descend the rocky terrain, soft scree will become visible on skier’s right (meaning your righthand side on the way down). Take any line down the scree that you feel comfortable.
It is a relatively fast and simple descent to the tarns below. Enjoy the valley and the ponds before hiking out down the drainage (north). A GPS is recommended for easier navigation, but this drainage eventually cuts into the Centennial Ridge trail. Follow the Centennial Ridge trail back out (east).
What to Bring When Hiking Mount Collembola
Aside from the usual hiking necessities, some items you might find helpful for this adventure are:
- Poles – This hike is long. Poles may help you save your joints in the long run.
- Bear Spray – Bears frequent this area. Have your bear spray easily accessible and know how to use it. Consider other bear-safe measures, such as traveling in groups and making noise.
- Bike – You can bike 3-5 kilometers of the trail each way, depending on your comfort and skill on a mountain bike which will save you time and effort. Pro Tip: Rent an e-bike from Gear Up in Canmore for an added boost!
- Sun Protection – A large portion of this hike isn’t shaded by trees. You will be exposed to direct sunlight. Wear sunscreen, bring a hat, and consider a light layer if you’re prone to burning.
- Water – It shouldn’t be said that you need to bring sufficient water and food on a hike. However, this hike is long, in the sun, and doesn’t have access to drinkable water. Pack extra water on a hot day.
Mount Collembola Tips To Get The Best Experience
- Bike the first 3-5 kilometers. I’m not a confident biker, so I would only be able to bike about 3 kilometers in. However, with an e-bike or a skilled biker, you would be able to bike further. This will save you 6-10 km of slow hiking round-trip. Don’t forget a bike lock to secure your bike to a tree!
- Loop to Mount Allan and Centennial Ridge. Although I think Mount Collembola has better views, Mount Allan and Centennial Ridge are absolutely stunning, and it makes more sense to connect the mountains in a loop than to have to hike all the way back next time!
- Hike up from the Canmore side. Hiking Mount Collembola from Canmore gives you the best trail, allows you to scramble up instead of downclimbing, and gives you options for the way out.
- Take a different way out. From the summit of Mount Collembola, you can hike out to Kananaskis, Canmore, Mount Allan, or down to some tarns (small mountain ponds) in the valley. All are excellent options and allow you to see something new on the way out!
- Hike with a partner or a group. Bears are known to frequent this area (the Wind Valley), and hiking with others can deter a fatal bear attack. As well, these views are so special, you’ll want to share them with someone.
Frequently Asked Questions
Do I need a Kananaskis pass for the Mount Collembola hike?
Yes, either way you hike Mount Collembola, you need a digital Kananaskis pass registered to the vehicle’s license plate. Purchas a pass online here.
Which way should I hike Mount Collembola?
I recommend hiking Mount Collembola from Dead Man’s Flats (Canmore side), as the trail is defined the whole way. This also gives you many options for alternative routes if you find the hike isn’t for you or your group. (Pigeon Mountain, Wind Ridge, Mount Allan, & Centennial Ridge all accessed from same spot).
Recommendations From My Experience
- I wish we would’ve biked the first 3 kilometers at least. This would’ve saved 6 km of hiking round-trip, which would feel worth it to me. Strong bikers or e-bikers could likely go further, up to 5 km.
- I am so glad we looped to Mount Allan. It was only 300 meters more elevation gain, and I was happy to bag another summit. Also coming down Centennial Ridge was absolutely beautiful.
- I wouldn’t attempt to hike down from Mount Collembola the same route up from Dead Man’s Flats, as the scramble to the summit is quite technical. Consider hiking down the soft scree to the tarns (small ponds) below. Follow Bob Spirko’s route here.
- I assumed the route-finding would be easy due to the entire hike being on a ridge. However, it can be tricky to find where to scramble. Use a GPS track for easier navigation.
Other Questions?
Were your questions left unanswered? Drop a comment below and I’ll get back to you! Also, if you’ve hiked Mount Collembola, leave a review below for others to see!
Other Recommendations:
If you haven’t done Tent Ridge, I would definitely recommend doing that before tackling this adventure. If it’s not up your alley, this likely won’t be either.
For an easier loop, consider Heart Mountain to Grant MacEwan and the ridge out. Tack on Twin Towers if you’re an expert scrambler!
Another great loop is hiking Grotto Mountain up the direct route and out the ACC route. This is shorter and has less scrambling than Collembola to Allan, but is still quite a big day out!
Happy trails!
Wow Stunning review. Absolutely the best review I ever read about Collembola. Thank you