
Middle Sister, a peak located in Canmore, Alberta, is an excellent beginner’s hike, though it can be a bit challenging! It is an excellent objective, especially if you’re looking for something different from Ha Ling, EEOR, or Lady Mac.
If you’re looking for a long day out, with beautiful views and no scrambling, Middle Sister might be a hike you should try!
Are you interested in summiting one of Alberta’s most well-known and prominent mountains? Read below to find out if this beauty is for you!

What is Middle Sister in Canmore?
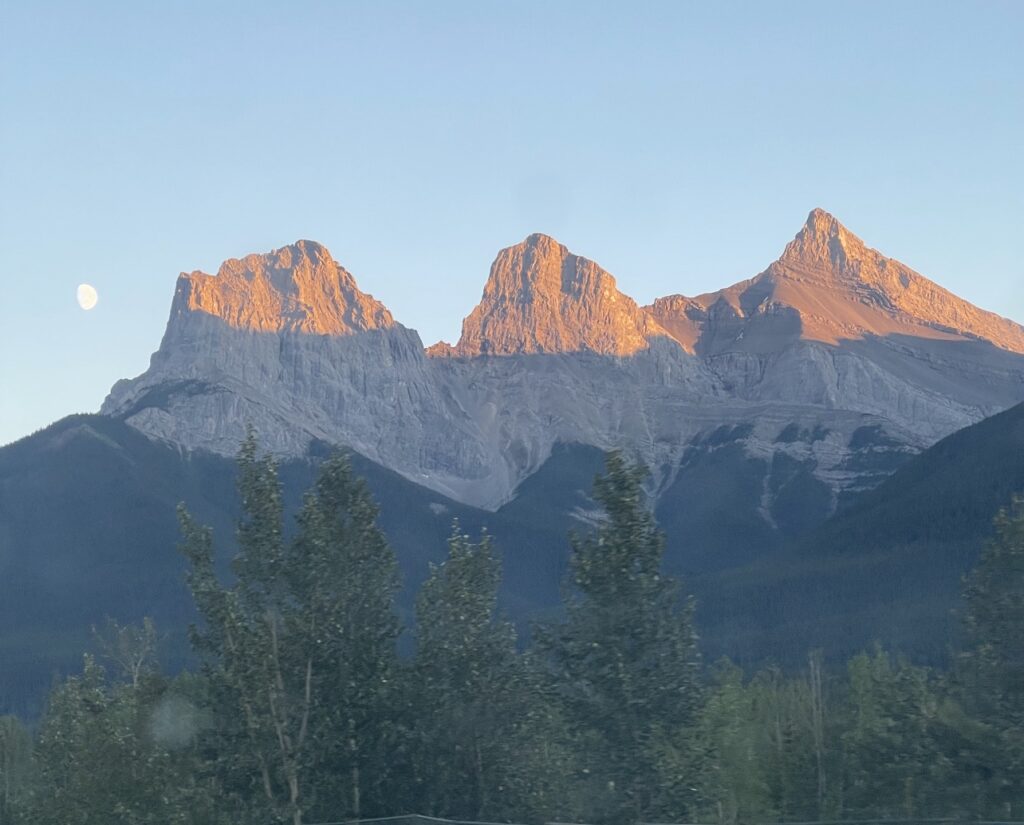
Middle Sister is the second-highest and middle peak of “The Three Sisters” in Canmore, Alberta. It is actually called Charity Peak, though the majority of people know it as “Middle Sister”.
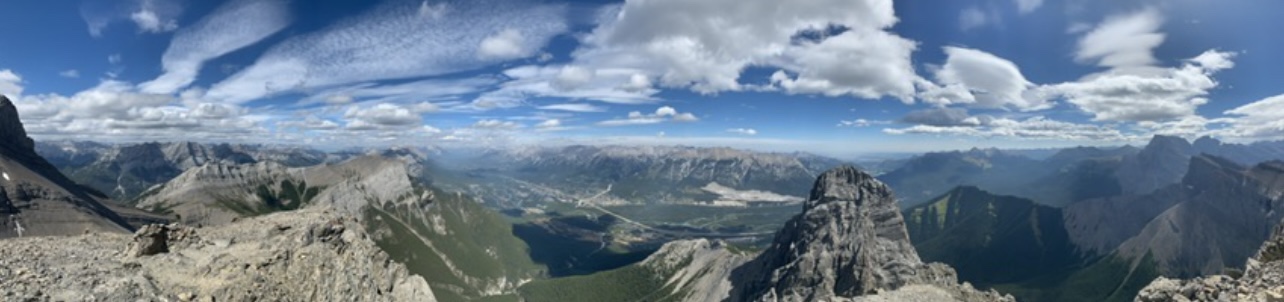
Middle Sister can be seen from almost anywhere in the town of Canmore, and has been photographed thousands of times.
You can reach it’s summit from both the front and back sides of the mountain, and very few brave parties have even reached it from the other mountaintops of The Three Sisters as well.
Middle Sister Quick Stats
- Distance – 15.4 km / 9.6mi
- Elevation Gain – 1480m / 4856ft
- Approximate Time – 7-10 hours
- All Season Hike? No
- Dog Friendly? Yes, but not recommended due to scree
- Kid Friendly? Yes, but not recommended due to long day
- Beginner Friendly? Yes
- Cell Service? Yes, at the summit
- Wildlife Encounters? Possible deer and bears
- Access to Water? Only at the beginning unless there’s remaining snow
- Bathrooms? No
- Chance of getting lost? Minimal
Driving Directions & Where to Park for Middle Sister
From Highway 1, take the Three Sisters Boulevard exit southbound.
Take the first left-hand exit onto the Three Sisters Parkway and continue all the way down the road, straight though the traffic circle, until you reach a dead end. This is where you will park your car.
How to Get to the Middle Sister Trailhead
Luckily, where you park your car is essentially the start of the hike for Middle Sister!
However, the trail that you start on is also the trail for a few other hikes in the area, so downloading a GPS trail on AllTrails, Strava, or Gaia is recommended.
There is no signage or official markers for the start of this hike.
How To Hike Middle Sister Successfully
The Start
Continue past the gate at the end of the dead end, and follow the trail up and to your right (known as “hiker’s right” when you’re heading uphill). You will be walking through the Canmore golf course, so keep an eye out for wayward balls!
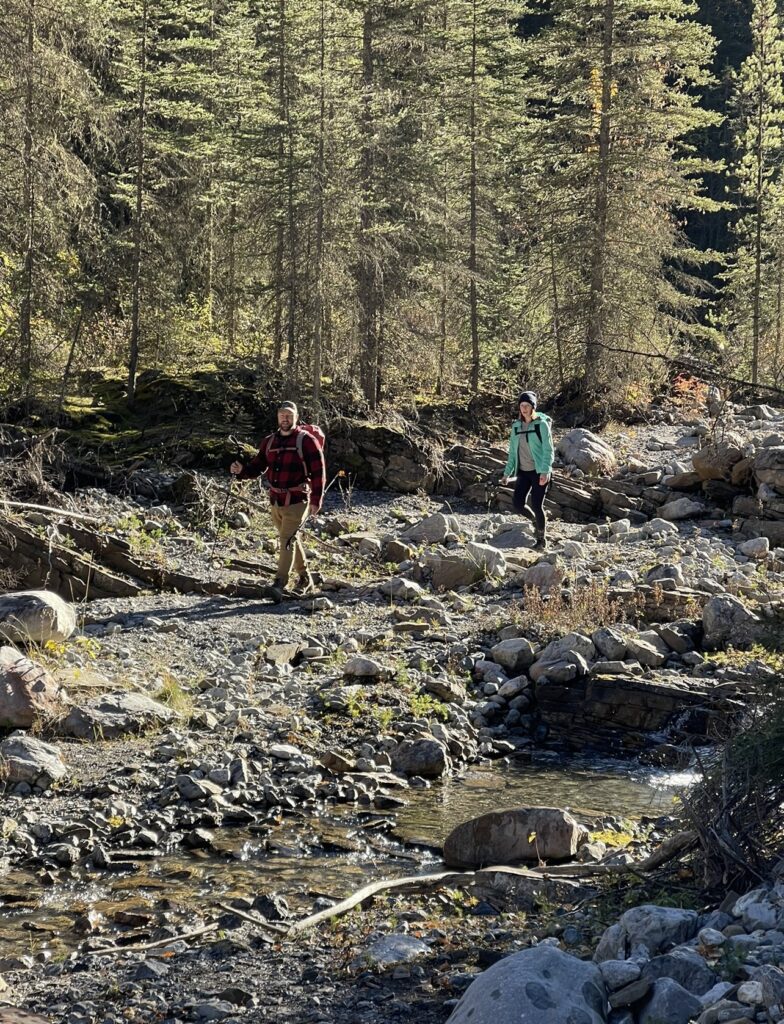
The trail eventually becomes quite large and follows the creek bed uphill. Many mountain bikers also utilize these trails. You should come to a narrowing in the creek bed where a small makeshift bridge is setup.
You want to cross at this bridge.
The trail should start to rise sharply up into the mossy ground in the trees on hiker’s right, staying well above the creek. A dirt path should be faintly visible.
Eventually this trail comes down into the creek. There will likely be small amounts of flowing water in this lower part of the creek.
The Creek Bed
Once the trail comes down into the creek bed, you’re essentially following the creek up to the bowl of the mountain where the creek is formed.
You can stay in the center of the creek and “boulder hop”, though sometimes deadfall and debris such as fallen trees make this quite tedious.
Occasionally a small dirt path winds its way in and out of the trees, typically on hiker’s left of the creek. I find utilizing this trail as much as possible very beneficial because it is less time consuming compared to boulder-hopping up the creek bed.
No matter which way you choose, know that there is no “wrong” way to make your way up the creek.
You shouldn’t find yourself in any difficult terrain, though you may use a hand here and there to step over some very large boulders. If you find yourself feeling like you’re scrambling or climbing, try looking off to one side or another to find an easier trail up.
Be prepared for this section to feel like it never ends, particularly on the way out. It is not technically difficult, but can become quite tedious.

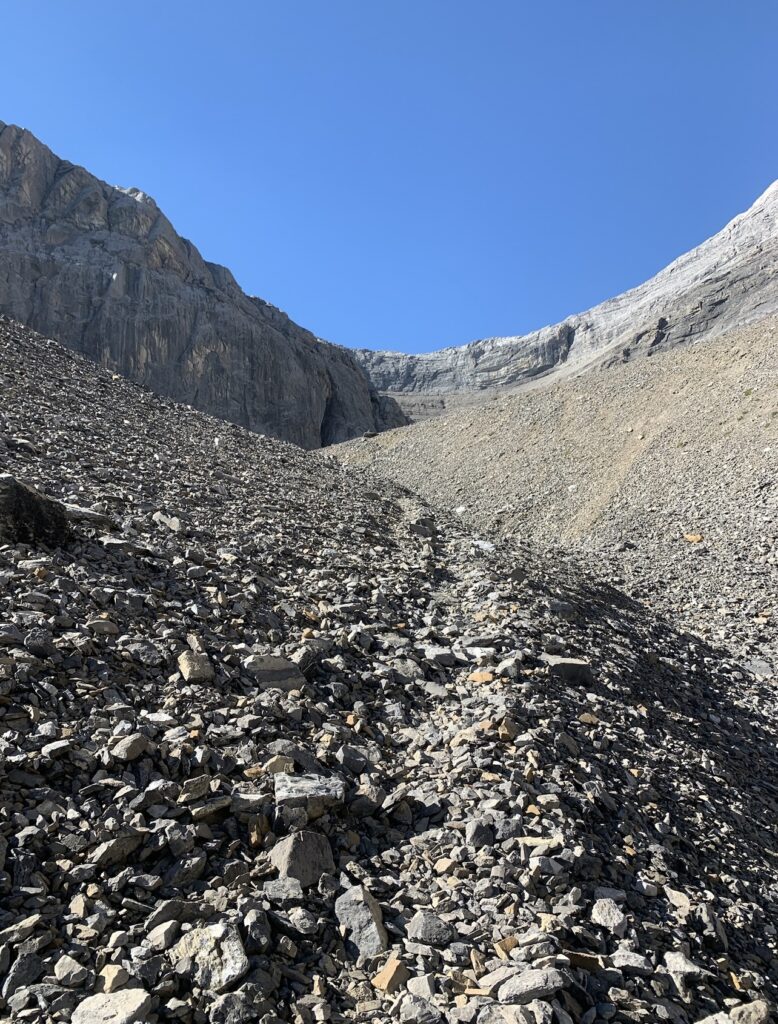
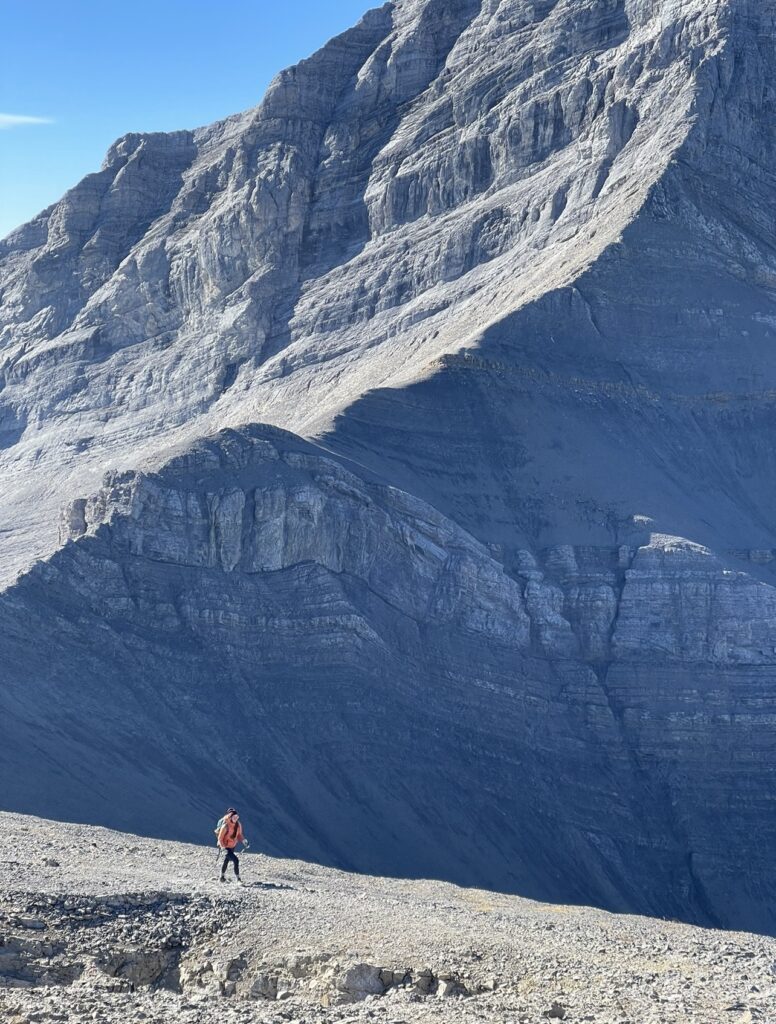
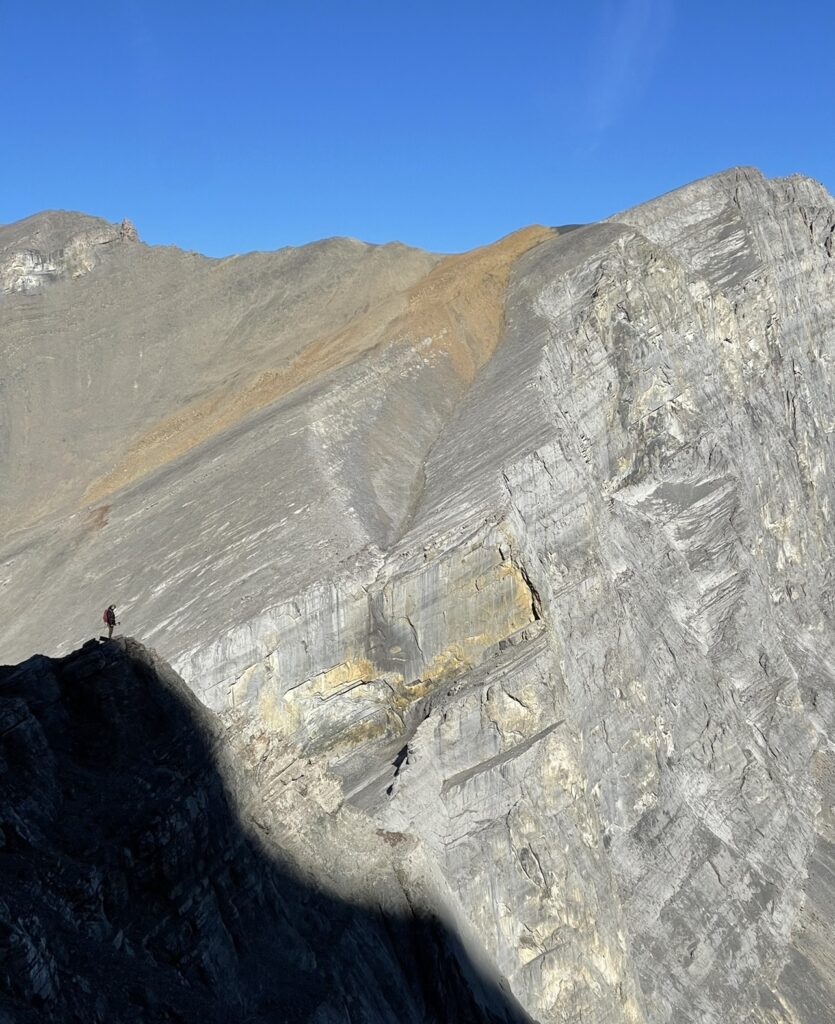
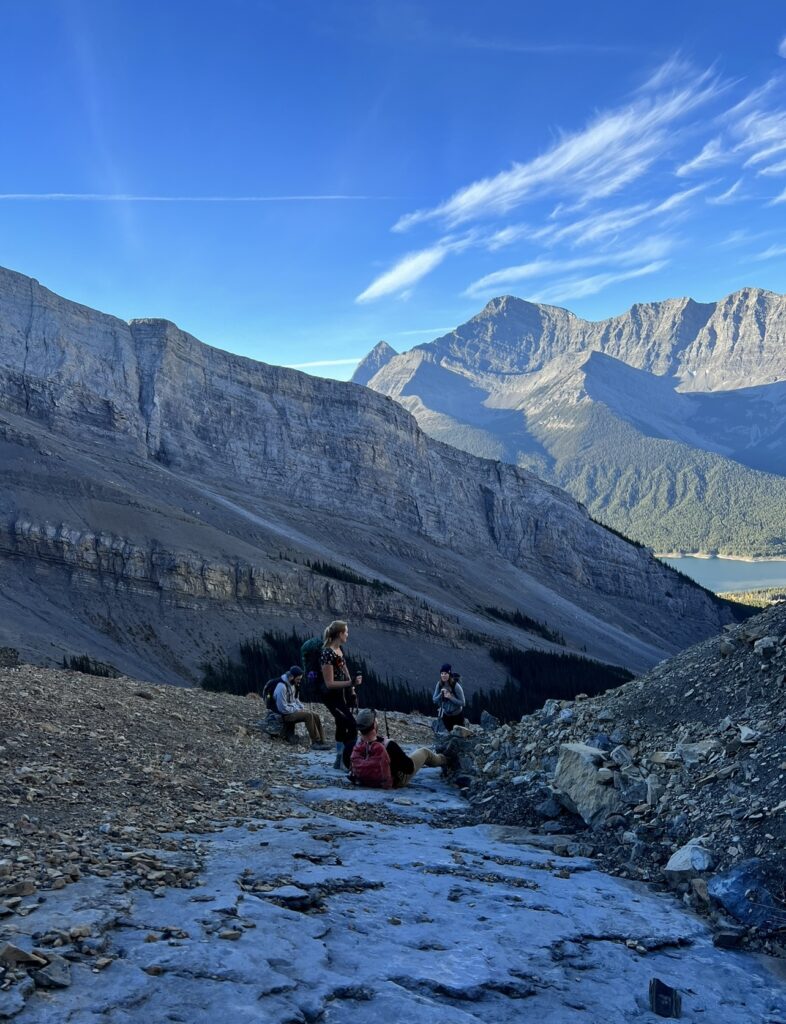
The Scree
Once the creek bed ends, you will come to a big basin where the surrounding rock all dips down towards the center.
Start heading up into the scree, eventually making your way up and to hiker’s right. A trail may become evident eventually, and sometimes fellow hikers pile rocks (then called “cairns”) which are intended to be used as way-finders to help guide the way.
If a trail does not become apparent, that is ok. You will want to continuously head uphill and to the right, eventually turning almost back the way you came, or to about a 5 o’clock position on a clock as you gain elevation in the scree.
This scree is steep, and you may find that your feet slide half a step back with each step you try to take forward. Keep persevering through this section! The summit is well-worth the grind!
The Never-Ending High Points
Once you rise out of the basin, you will be heading back towards the town of Canmore.
This part of the hike becomes quite deceiving, as you will think you see the summit multiple times. As you rise out of the scree, you see a high point off in the distance. Don’t make the mistake of thinking that’s your objective!
Each time you see a high point, another one will start to appear in the distance, likely about four times.
There is nothing technical in this section – no scrambling, no hand on, and the gradient isn’t overly steep. However, if can be quite tiring as you just want to get there already! Patience will be a virtue through this section.

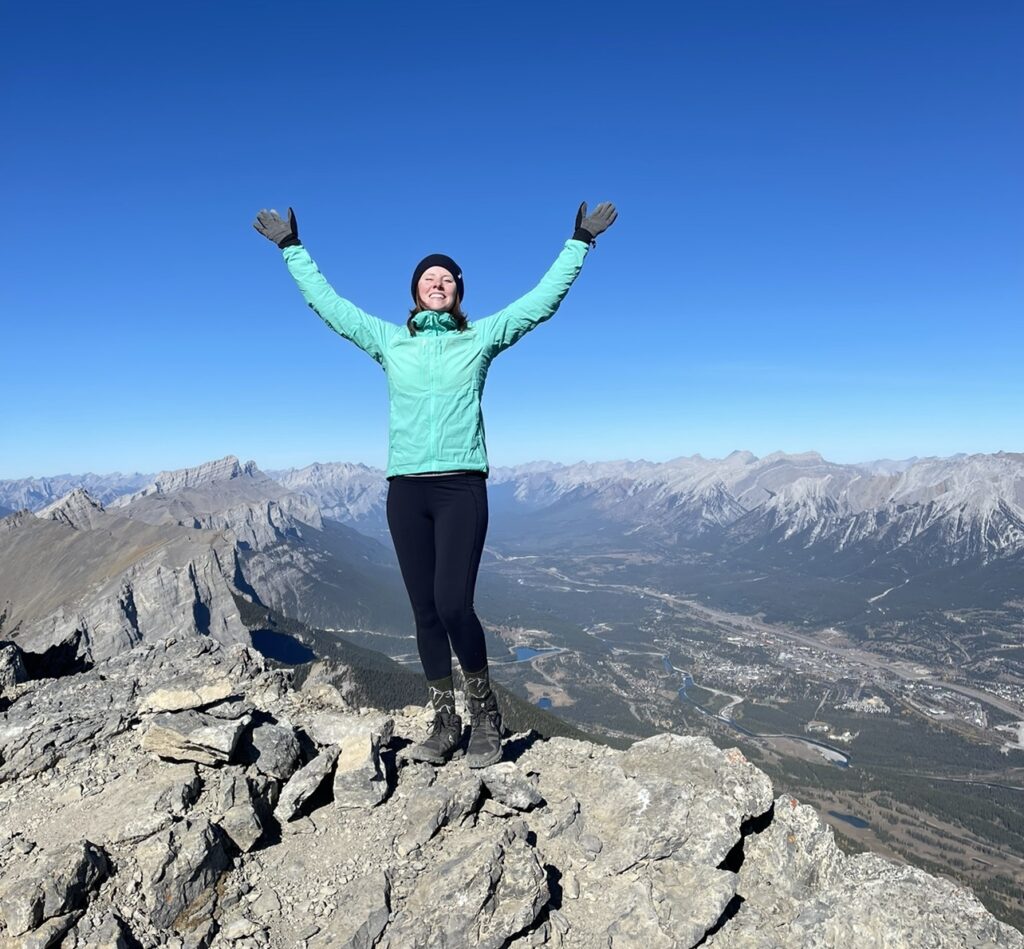
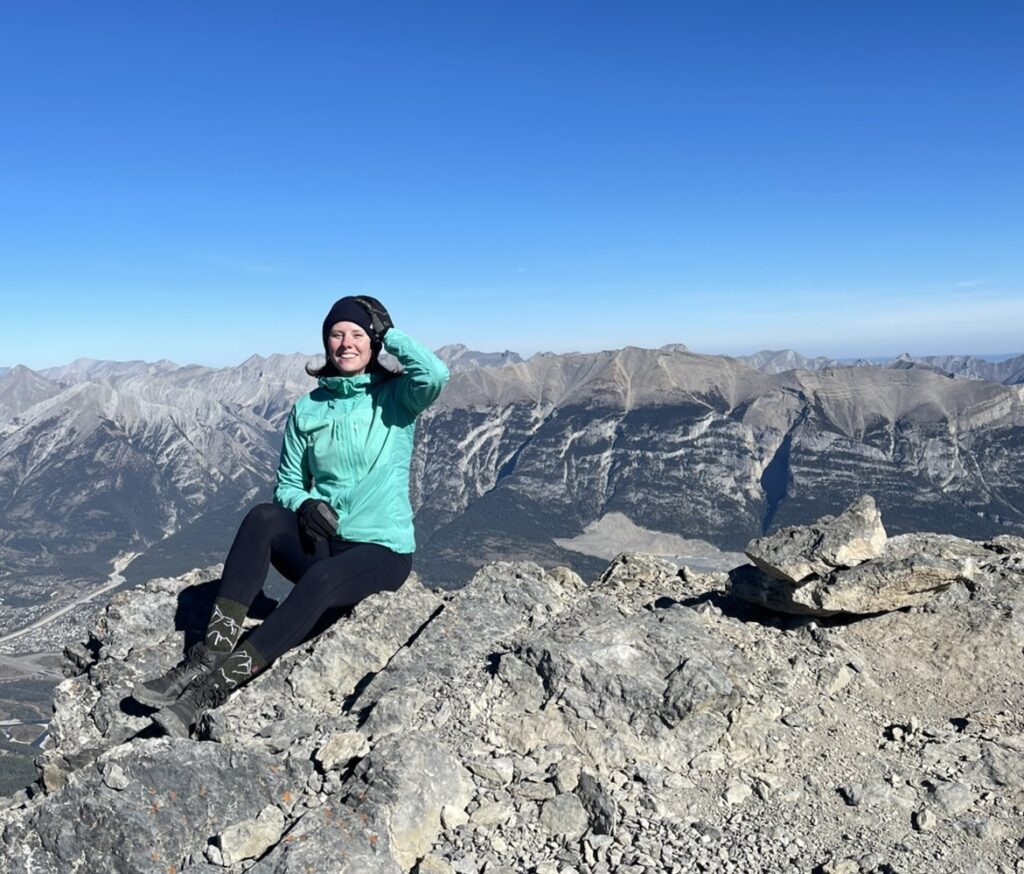
The Summit
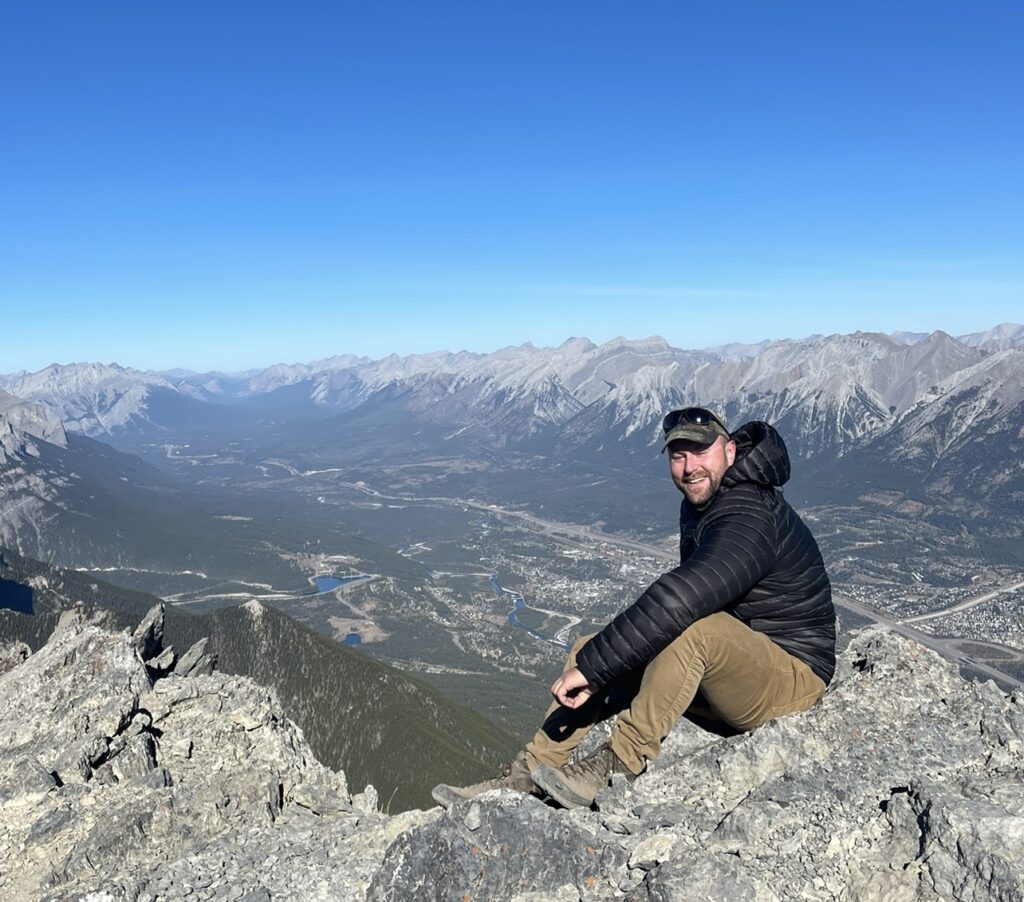
Finally the summit will start to rise into view. Walk your way up to the top and take in the spectacular views!
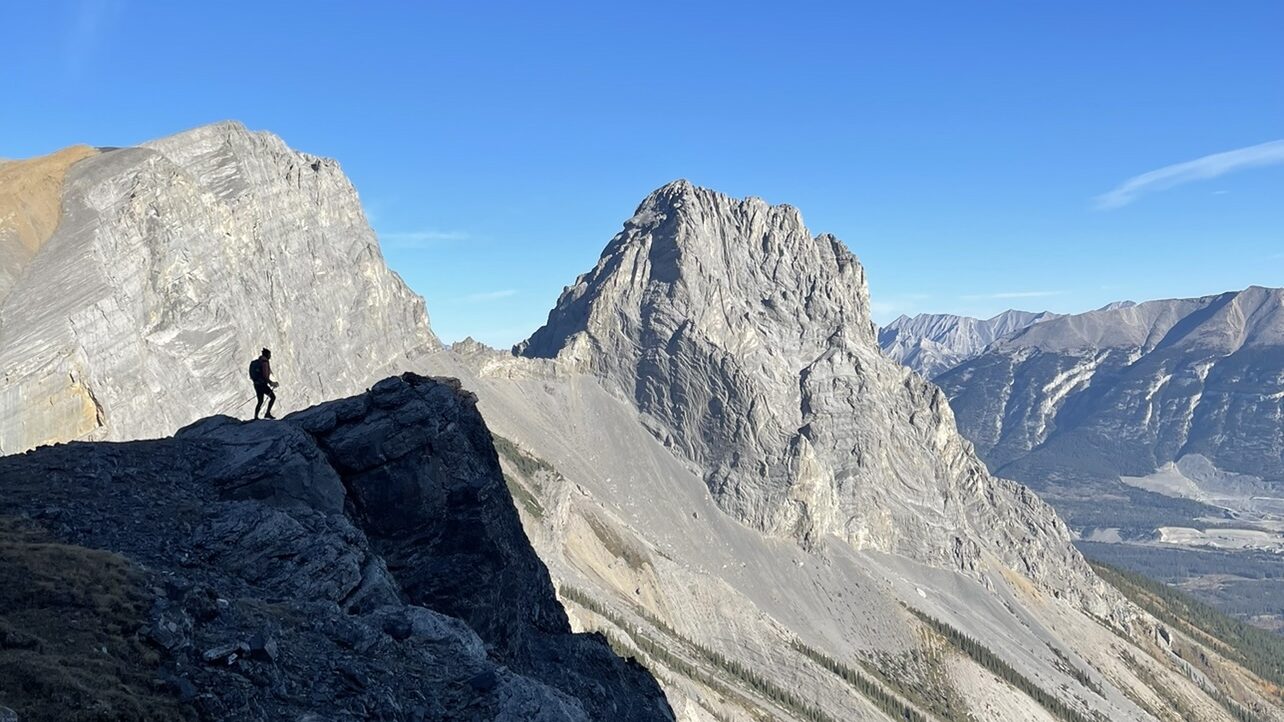
“Little Sister” will be a big blocky mountaintop below you towards the town of Canmore. “Big Sister” will be a massive behemoth behind you that blocks your view of the mountains behind.
There also might be a wind shelter available to crouch inside if the wind is making you a bit chilly. Look for rocks piled in a curved structure.
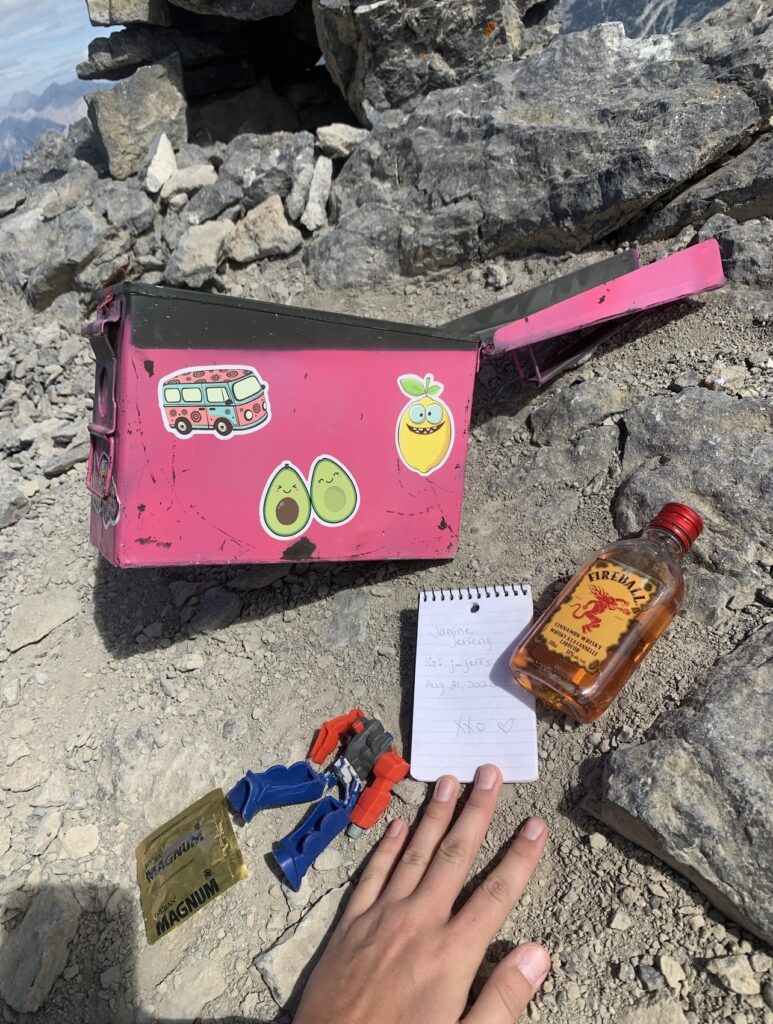
Likely you will also find a summit register at the top of Middle Sister! Summit registers are small boxes or containers that typically contain a pad of paper and a writing utensil, though sometimes other objects are left inside by hikers who fashion themselves as comedians.
Feel free to open the register and leave your name behind as a way to celebrate your achievement!
Many summits in the Canmore/Kananaskis area have pink summit register boxes at their peaks. The question of who paints and leaves these boxes for others to find is a mystery!
Best “Intragrammable” Moments on Middle Sister
1. The Creek Bed
Although the creek becomes tedious to walk up and down, there are some very cool boulders in this section, and during low light hours, the sunlight streaming through the trees can be very stunning.
Take photos of your hiking pals maneuvering up, over, and around large rocks, or catch a scenic photo of the sun glistening through the trees.
2. The Scree
Photos in this section really show how much of an effort it is to hike up Middle Sister. Take photos of your subjects as they come up behind you, take a break, or descend behind you.
Photos of your friends hiking uphill in front of you won’t amount to much unless you take a wide photo for perspective then zoom in when you’re discussing the photo with people.

3. The Final Push
While you’re standing on the summit, take photos of your adventure buddies making their final ascent towards the summit.
With Big Sister looming in the background, you can get some really amazing perspective photos of the grandiosity of the Rockies.
Stand at the summit and zoom in on your friends for magnitude of the mountains. Try aperture mode on a DSLR camera to blur the background and keep your subjects in focus.
4. The Summit
It’s difficult to get a bad photo standing on the summit of Middle Sister.
Try taking photos in all directions to play around with the view and lighting. Don’t forget to take photos with your friends as well as alone!
You also might enjoy taking a picture of your name written in the summit register! It’s a nice way to commemorate the occasion.
What to Bring When Hiking Middle Sister
Typically my backpack contains the same gear no matter which mountain I’m summiting. However, there are a few essentials I wouldn’t hike Middle Sister without:
- Bear Spray – Although the likelihood of encountering a bear on Middle Sister is decreased due to its proximity to the town of Canmore, it’s never an impossibility. You should always carry bear spray in Kananaskis country and have it easily accessible to you (not in the bottom of your pack).
- Hiking poles – You can likely keep the poles tucked in your pack for the creek bed section, as it’s hard to get good stability with the poles on such rocky terrain. However, once you hit the scree, the elevation gain quickly increases and doesn’t alleviate much. Poles become a huge asset going up and down here.
- Snacks – Don’t listen to the reviews on AllTrails from trail runners bragging about how quickly they ran this hike. It will very likely take you 8 hours or more. Come prepared with enough fuel to get you through the day.
- Warm Layers – Middle Sister is known for being windy and cool at the summit. Pack a wind layer and some protection for your hands and ears at a minimum.
Although this hike could possibly be done by both kids and dogs since there is no scrambling, it is a very long day and I would recommend either leaving them at home or finding another objective. The scree is also very rough on dog paws. Ensure to bring booties for your pet if you do decide to bring them along.
3 Middle Sister Tips To Get The Best Experience
1. Start Early
Middle Sister is a full-day objective. To give yourself the greatest chance at success and maximum daylight hours, start early.
I suggest starting the hike just as the sun is rising. It will give you plenty of daylight hours, cooler temperatures, and a chance at seeing some deer wandering through the trees.
Also, in the summer, thunderstorms are more common, and tend to increase in likelihood as the day goes on. Starting early can possibly help to avoid inclement weather.
2. Wait Until Mid-To-Late Summer
The basin where the creek ends and the rocks from the surrounding mountains meet in a low point is often quite snowy, even into the middle of summer.
To avoid having to traverse this snow, I suggest waiting until mid-July or later to try to summit Middle Sister.
It is possible to summit when there is still snow present, but it would be ideal to have experience hiking in snowy conditions. Microspikes for your boots would be highly recommended, and some knowledge of avalanche hazard and prevention could be essential depending on the amount of snow present.
The one benefit of some snow remaining is that you can melt it for water if you have found that you’re running low, as there is likely only flowing water at the start of this hike.
3. Try Hiking Over From The Orphan
Are you extremely fit and adventurous?
Another way to summit Middle Sister is via “The Orphan”, a hike which is accessed from the back side of Middle Sister along Spray Lakes Road.
This route likely requires some scrambling, as the scree is shallow and slippery or you can hike up on steep slab. Hand use can be helpful.
You can hike Middle Sister via The Orphan as an “A to B” (meaning hiking in one way and out another) or as an “out and back” (meaning in one way, then back out the way you came in).
I would suggest hiking it as an A to B, hiking up The Orphan, then up Middle Sister, then out to the Middle Sister trailhead. This requires two vehicles or someone who is willing to drop you off or pick you up, however.
Hiking Middle Sister via The Orphan also saves you about 150m of elevation gain and 1.6km if you hike as an A to B (or 150m more gain but 2.8km less if you hike as an out and back)
Middle Sister Via The Orphan Stats (Out and Back)
- Distance – 12.2 km / 7.6mi
- Elevation Gain – 1612m / 5289ft
- Approximate Time – 7-10 hours
- All Season Hike? No
- Dog Friendly? No
- Kid Friendly? No
- Beginner Friendly? No
- Cell Service? Yes, at the summits
- Wildlife Encounters? Possible deer and bears
- Access to Water? None
- Bathrooms? No
- Chance of getting lost? Some confusion is possible, unlikely to get truly lost
Frequently Asked Questions
How long is the Middle Sister Canmore hike?
Middle Sister in Canmore will likely take you 8-10 hours to hike to the summit and back. You should prepare for a full day hike.
Is Middle Sister Canmore open 2023?
Yes, Middle Sister is open and available to hike in 2023! Middle Sister is one of the few Canmore peaks that was not closed for maintenance and is doable for beginners, though is a very long day.
Is Middle Sister Canmore a hard hike?
Middle Sister in Canmore is not a technically hard hike – there is no scrambling and you shouldn’t need your hands. However, it is a very long hike and can become quite tedious.
Do I need a Kananaskis pass for the Middle Sister Canmore hike?
No, you do not need a Kananaskis pass to hike Middle Sister, as you are parking within the city boundary. However, if you hike Middle Sister via The Orphan, you will need a Kananaskis Pass to do so if you park a car.
What is the name of the Middle Sister Mountain in Canmore?
The name of the Middle Sister mountain in Canmore is actually Charity Peak, though most people just know it as “Middle Sister” and refer to it as such.
Can you hike the Three Sisters in Canmore?
You can hike two of the Three Sisters mountains in Canmore. Middle Sister is an easy (but long) hike, and Big Sister is a moderate scramble that is only recommended for experienced adventurers. Little Sister is a technical climbing route and cannot be hiked.
Which of the Three Sisters is easiest?
Of the Three Sisters in Canmore, Middle Sister is the easiest to summit, as it is simply a long day hike and requires no scrambling.
Has anyone climbed the Three Sisters?
Few people have climbed all 3 of the Three Sisters in Canmore. This is likely because climbing the Little Sister is very technical and difficult. Only a handful of people have managed to traverse the Three Sisters in a single outing.
My Experience Hiking Middle Sister as a Beginner
I have summited Middle Sister twice: once as a beginner on a solo adventure, and the second time as an experienced adventurer with some friends.
The first time I hiked Middle Sister, I hiked the classic route from the town of Canmore. I actually didn’t mind the creek bed, as the rocks kept my mind busy and the elevation gain during this portion was pretty minimal.
However, I was surprised by the running water at the beginning of the trail and got slightly frustrated trying to prevent my boots from getting wet.
On the way down I discovered the trail on hiker’s left, which made the descent better, but I wished I had known about it on the way up.
I felt very safe hiking this trail alone, though it was the first time I hadn’t encountered anyone else on a trail, which did spook me a little bit. I also got startled easily by some deer. Have your bear spray easily accessible and know how to use it, just in case.
Because this trail is so long, you probably won’t encounter many people on the trek. Be prepared for some solitude.
As a beginner, I remember thinking the scree wall looked almost vertical. It seemed like it was going to be impossible to hike up. I just kept putting one foot in front of the other and eventually made it, but oh my goodness it truly felt endless. You will need some mental fortitude to get through this one.
The photos I took on top of the summit were some of my favorite photos I ever took. It truly felt worth it.
However, a minor injury on the summit made me panic a bit, as I was wildly unprepared to be so far back in the mountains alone with no first aid equipment or ability to call for help. Don’t make my rookie mistake: come prepared with some first aid supplies and an ability to call for help if needed.
The second time I hiked Middle Sister, my friends and I hiked up The Orphan, down to the basin, then up to Middle Sister, and out the creek bed as an “A to B” hike. We had one car parked at The Orphan and one car parked at Middle Sister.
I asked my friends what they thought, and we all agreed that hiking Middle Sister via The Orphan was the preferred way to hike Middle Sister. We found the creek so tedious to walk out that we were grateful we didn’t have to come up that way. It also meant we didn’t have to hike back up The Orphan on the way out.
However, hiking Middle Sister via The Orphan does require some scrambling experience.
Both times I was on the summit of Middle Sister, the weather was worse than I had expected. Come prepared with some warm layers to get the full enjoyment of the summit.

Other Questions?
Is there something I missed? Do you have some unanswered questions about the trail? Drop a comment below and I’ll get back to you as soon as possible!