
In Canmore, on the north side of the #1 highway lies Mount Lady MacDonald. It is directly across from East End of Rundle, and is visible from almost anywhere in the town.
This hike is quickly becoming one of the more popular ones in the area, and has options for various skill levels. It is, however, prone to closures due to construction and wildlife encounters.
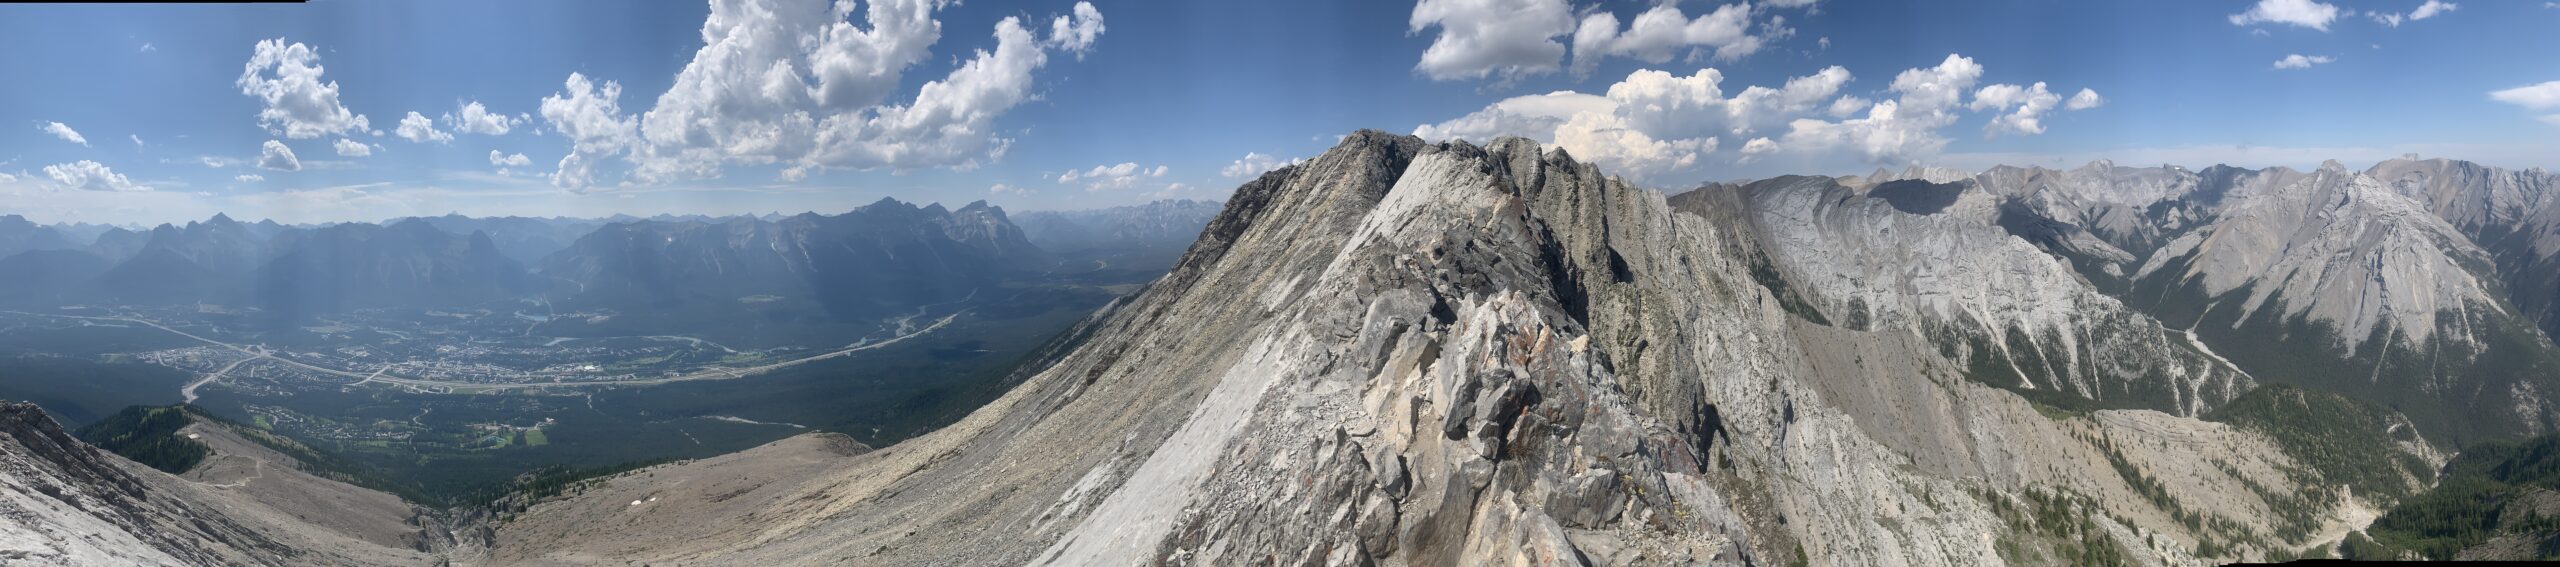
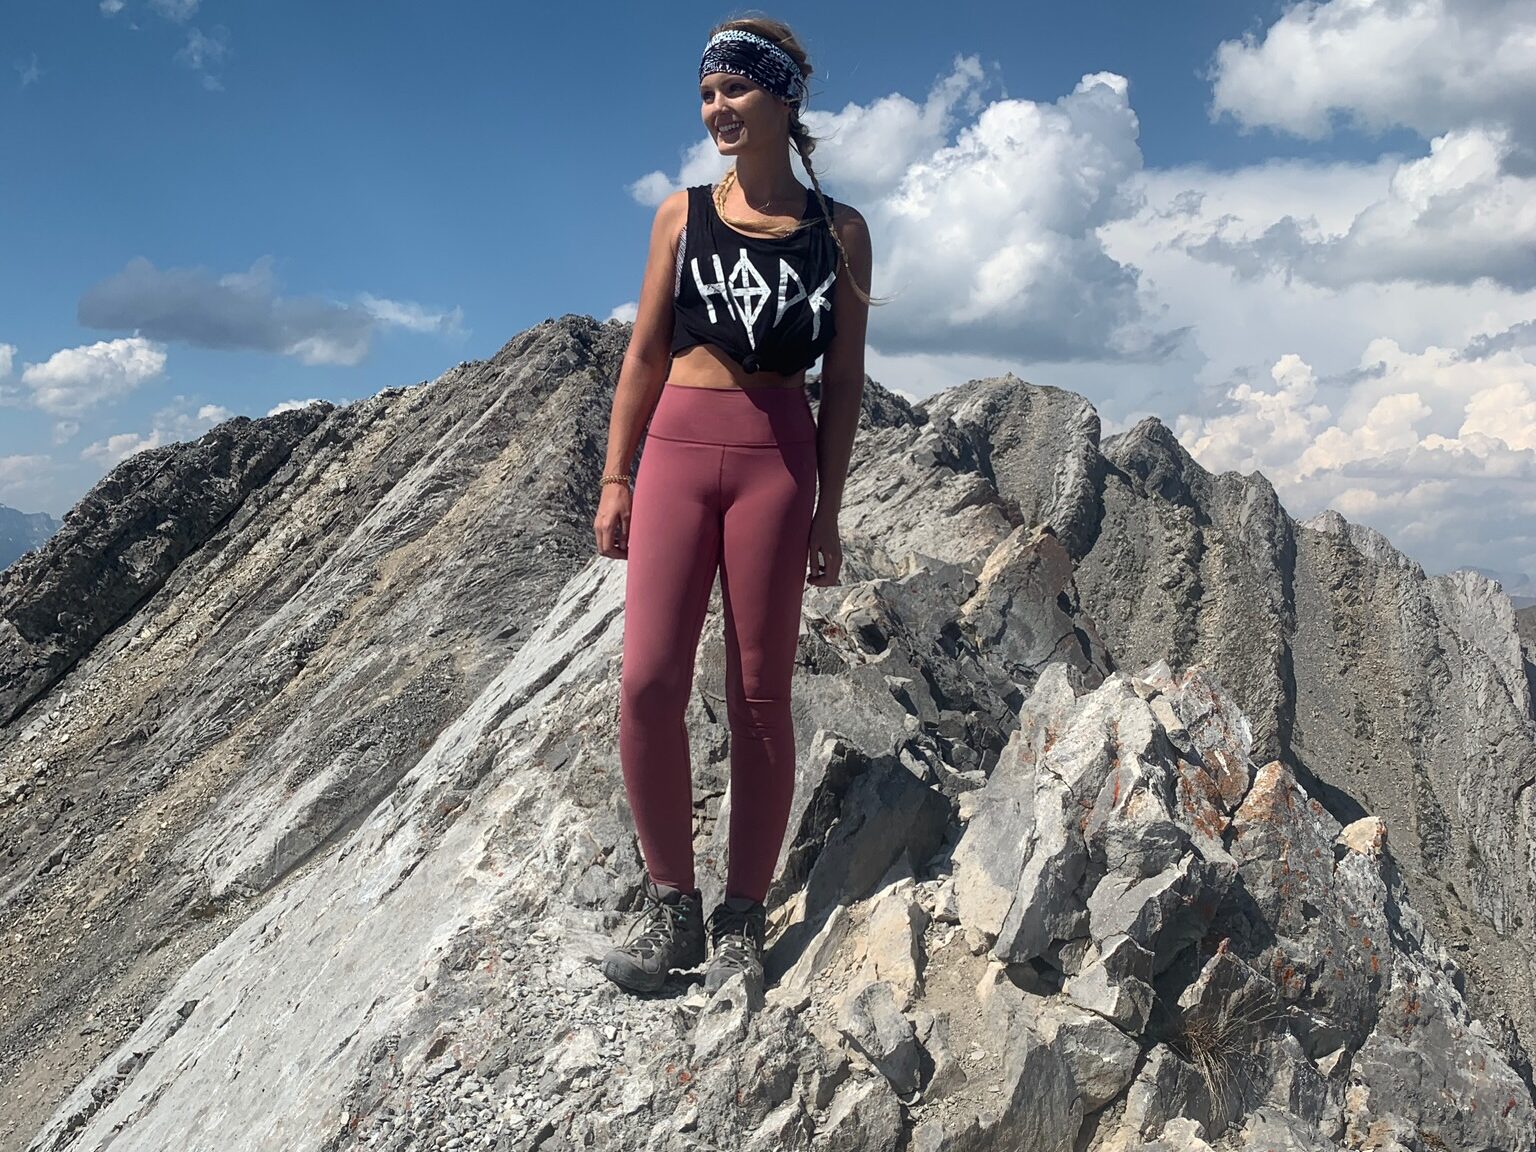
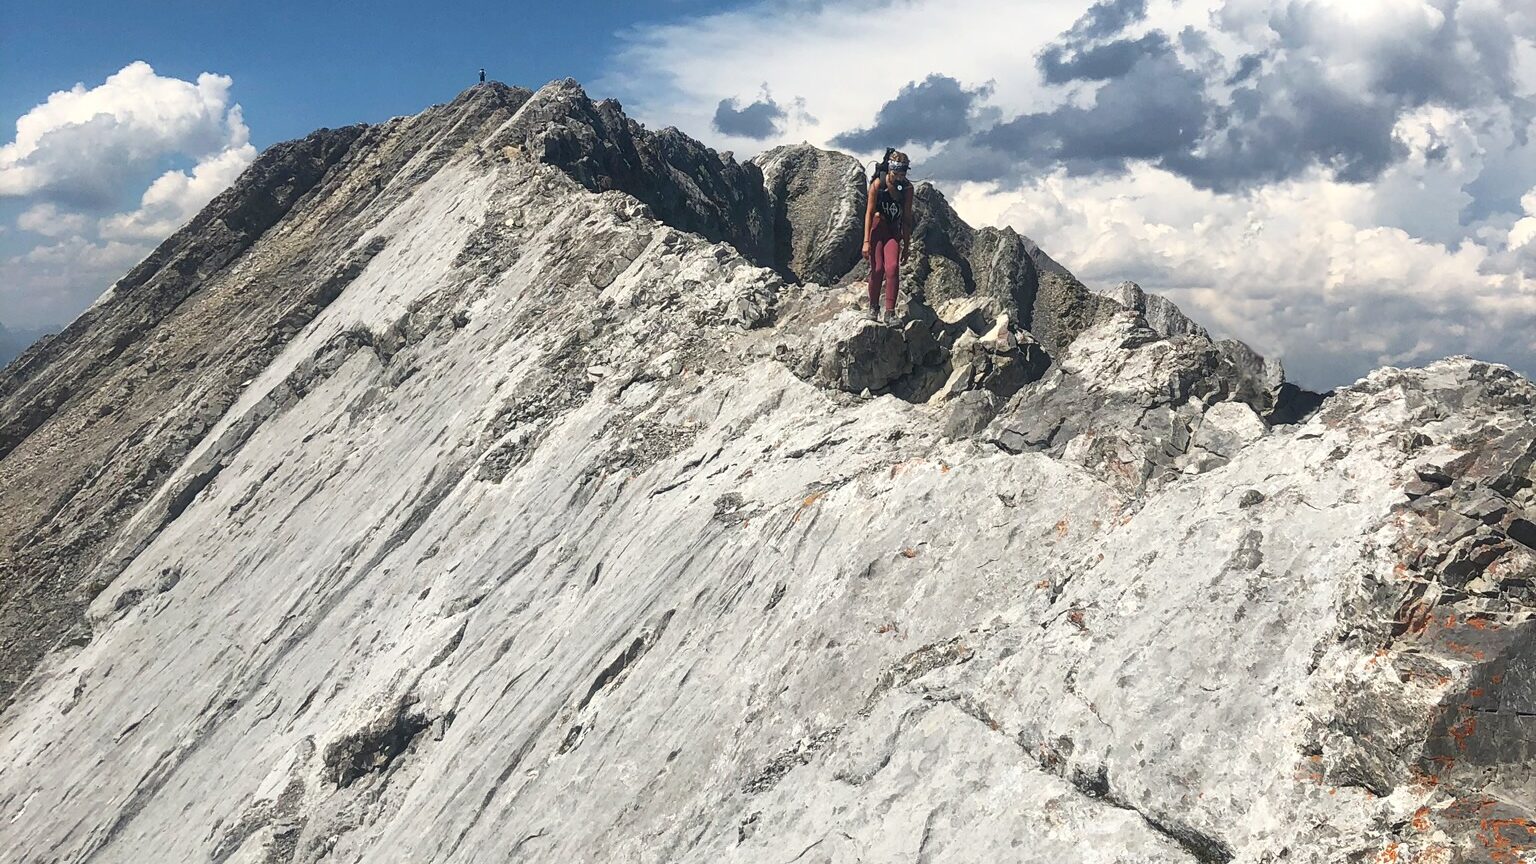
Lady Mac is known for its knife-edge ridge, which has a sheer drop on either side. Only the bravest scramblers manage to make their way across it.
If you’re looking for a spicy scramble in Canmore, or a big hike from the townsite, Lady MacDonald just might be the right option for you.
Mount Lady MacDonald Stats
- Distance– 9.8km (6.1mi) to the summit and back; 7.9km (4.9mi) to the teahouse and back
- Elevation Gain – 1303m (4275ft) to summit; 976m (3202ft) to teahouse
- Approximate Time – 5-7 hours
- All Season Hike? Yes, to the teahouse.
- Dog Friendly? Yes, to the teahouse.
- Kid Friendly? Yes, to the teahouse.
- Beginner Friendly? Yes, to the teahouse.
- Cell Service? Yes.
- Wildlife Encounters? Possibly sheep, bears, and ground squirrels.
- Access to Water? Cougar Creek at the parking area.
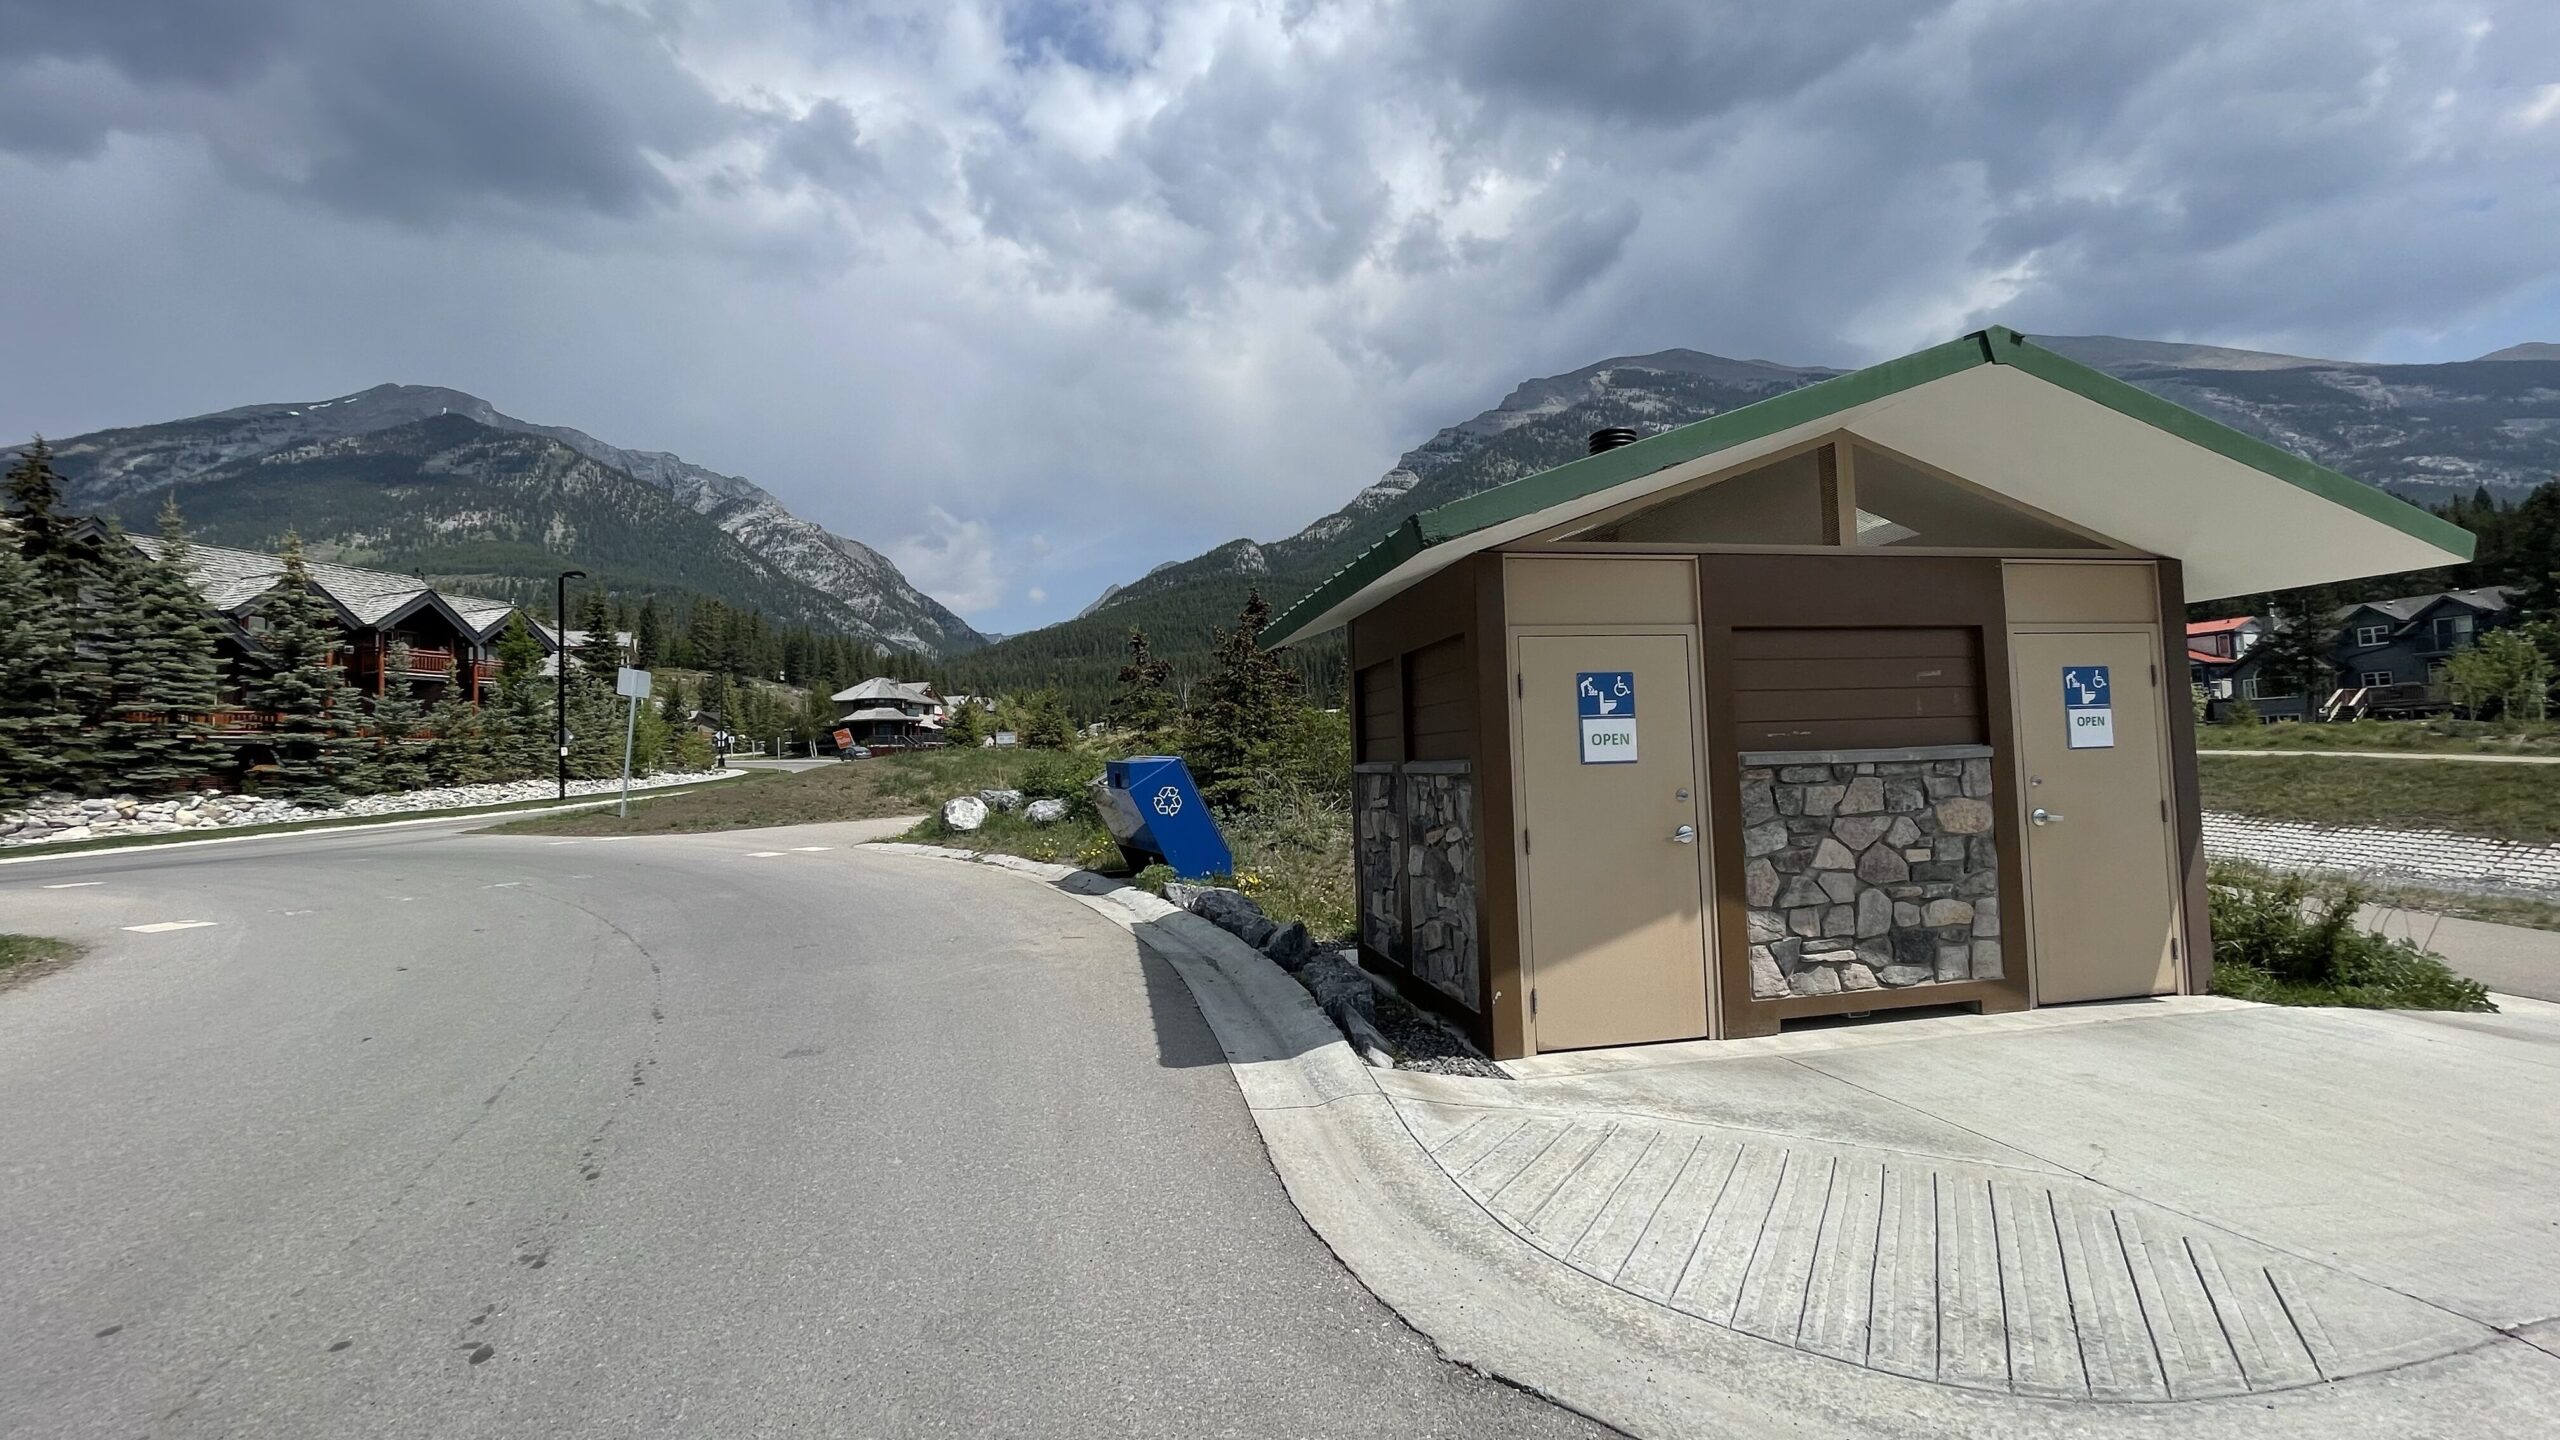
- Bathrooms? Outhouses at the parking area.
- Chance of getting lost? Minimal.
Lady MacDonald Trail Notice: 2024 Closure
As of January 2024, Alberta Parks has kept the Lady MacDonald trailhead closed, which includes both the teahouse hike and the summit. This is due to blasting along Cougar Creek for flood mitigation.
For more information about the Cougar Creek blasting project and the closure, check out Alberta Parks’ statement here.
The trail is expected to reopen sometime in 2024, though the exact dates remain unannounced.
Driving Directions For Mount Lady MacDonald
Drive through the town of Canmore and take the exit towards Benchlands Trail on the north side of the highway.
Continue uphill along Benchlands Trail for 2 minutes until you hit the traffic circle. Take the second exit, and the parking lot will be immediately on your right.
You will be parked along Cougar Creek, where a popular hiking and walking trail lines the side of the creek bed. The parking lot is small and often fills up fast! Get there early for your best shot at a spot.
How to Get to the Lady Macdonald Trailhead
From the parking lot, continue north along the left side of the creek bed. A 5 minute walk later, watch for the trail to branch up and to the left (known as hiker’s left) into the trees. This is the trail to the Montane Traverse, and one you want to avoid.
Continue along the creek bed another 10 minutes for the trail to slowly meander up the side of the hill. It does not bank hard into the forest. This is the Lady MacDonald trail and one you want to follow.
There is currently no official sign post or trail marker to indicate that you are on the correct trail.
I recommend downloading a hiking app to your phone (such as AllTrails, Gaia, FatMap) to ensure you’re on the correct trail, as there are several trails in the area.
The Mount Lady MacDonald Hike – Step By Step!
1. The Creek Bed
From the parking lot, the trail begins easily along the creek bed. Ensuring you get on the Lady MacDonald trail and not the Montane Traverse (as described above) is the first route-finding opportunity you need to be aware of.
The start of the trail is paved, obvious, and well-trafficked. 3 minutes up the creek, the trail turns to gravel, and then dirt where the construction barrier lies. There is nothing technical or hard about the start of the hike, though when it enters the forest, the incline begins.
2. The Forest
Once you enter the trees, there isn’t much to the trail for a long time. The trail gains the ridge of the mountain, and follows it uphill until the tree line.
There aren’t many views in this section, and the trail is steep, full of rocks and roots. It will likely take you 1.5-2 hours to move through this section.

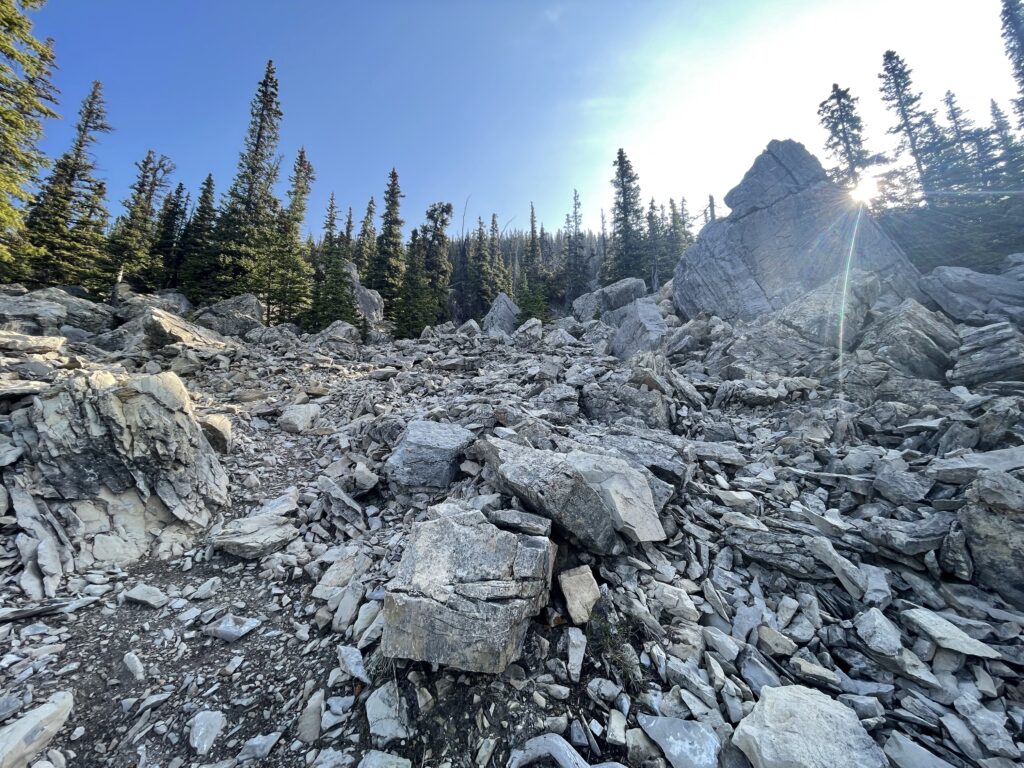
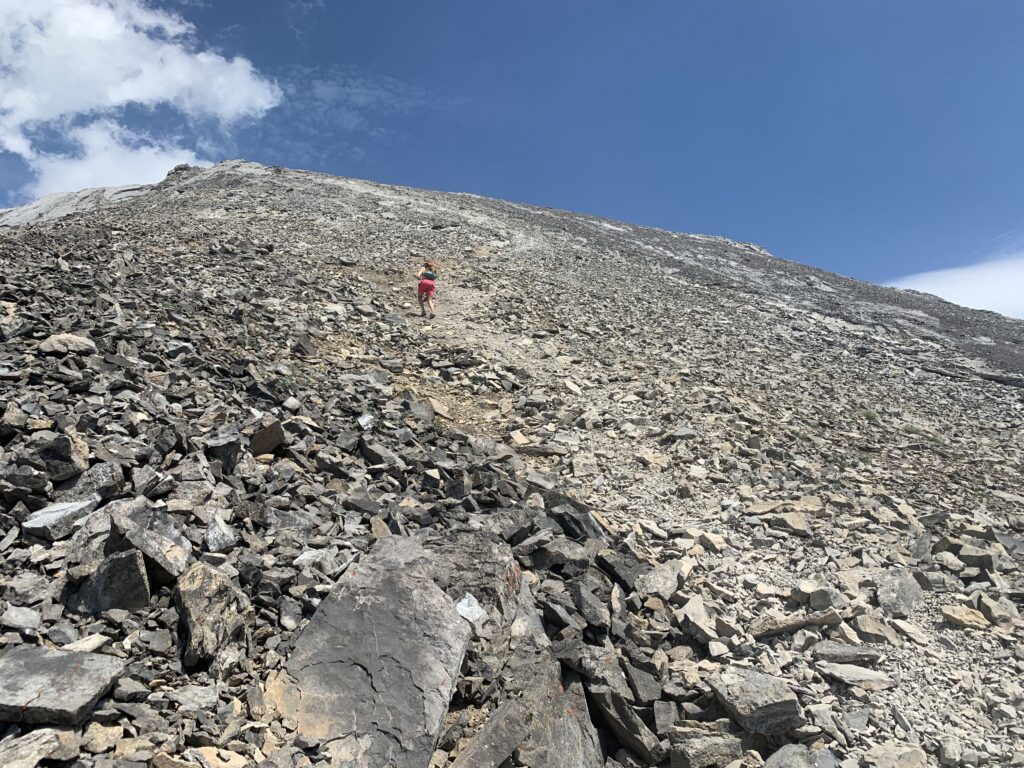
3. The Rock Garden
Just before you break the tree line, you will come to a large boulder field, which I call “the rock garden”.
There are a few signs indicating the proper way through this section, but I found them difficult to notice. I recommend following your GPS track. For reference, the trail generally heads straight up the majority of this section before banking left near the top.
Once you bank left, you gain the ridge of the mountain and the trail becomes obvious again.
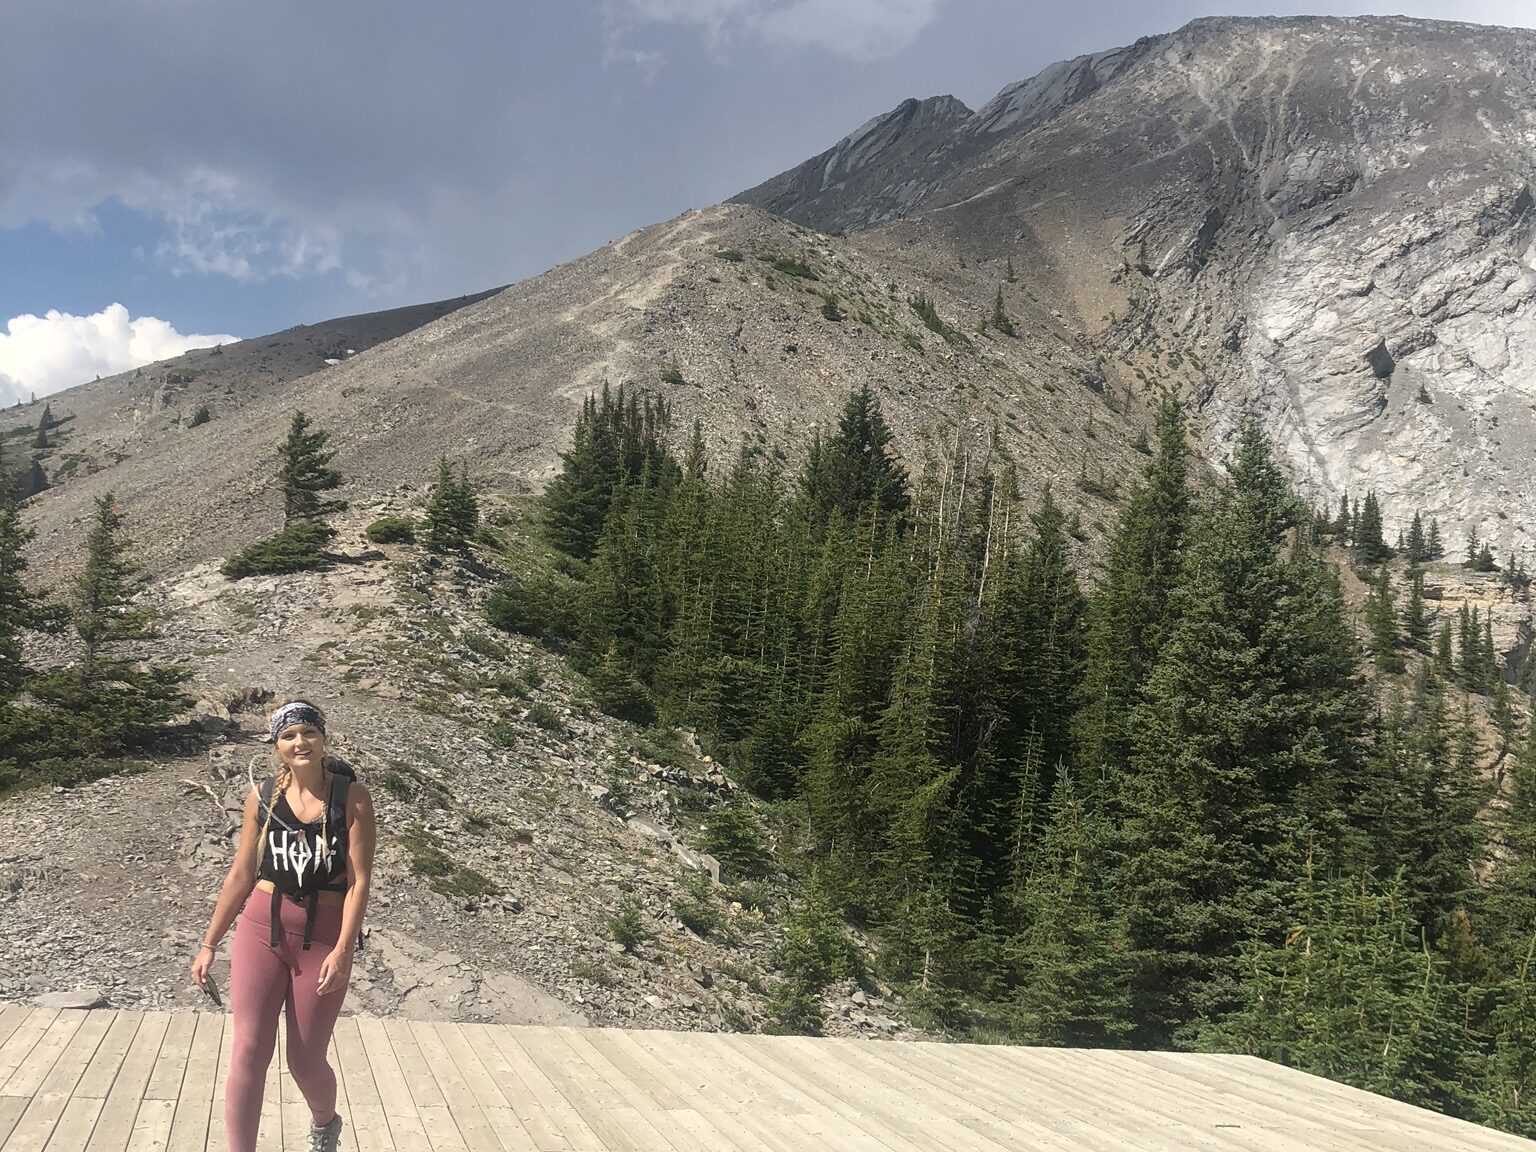
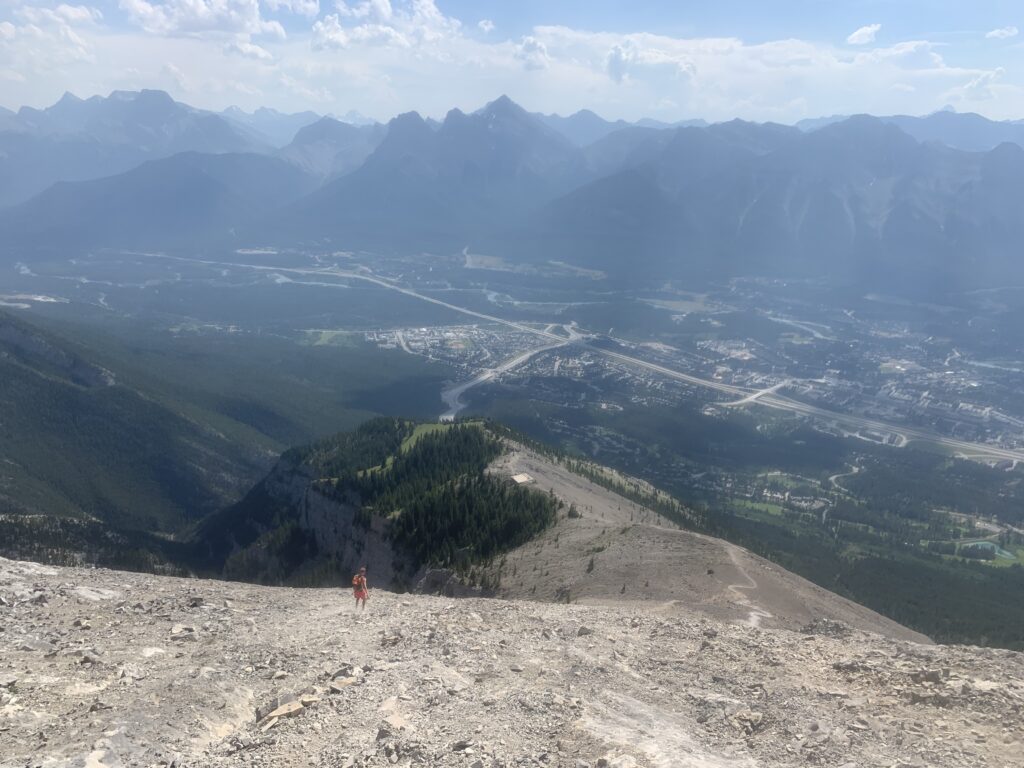
4. The Teahouse (Helipad)
Although the teahouse and helipad are gone, about 10 minutes after you break the tree line, you will come to a small flat section that continues to be referred to as “the helipad”.
This is a great place for a rest. Alternatively, if you aren’t comfortable with scrambling, this is a great finishing place for your hike, as the trail only gets harder from here.
5. The Scree
Once you leave the helipad, the trail changes from dirt to loose rock, known as scree. This is the second time you need to “route-find” or be aware of where the trail goes.
Follow the trail almost straight up to the ridge. The terrain will become steeper, and there will be sections of scree on slab. (Slab is large flat rock, which can be slippery at times). The trail will become non-existent as you hike higher and encounter these slab sections.
There is no “right way” up this section. Take your time and stick to the rocks that feel the most solid and comfortable for you.
About 20 minutes of hiking (depending on pace) should get you up to the ridge. Most parties with scrambling or summit experience should be able to make it up to the ridge, as it’s fairly typical mountainous terrain.
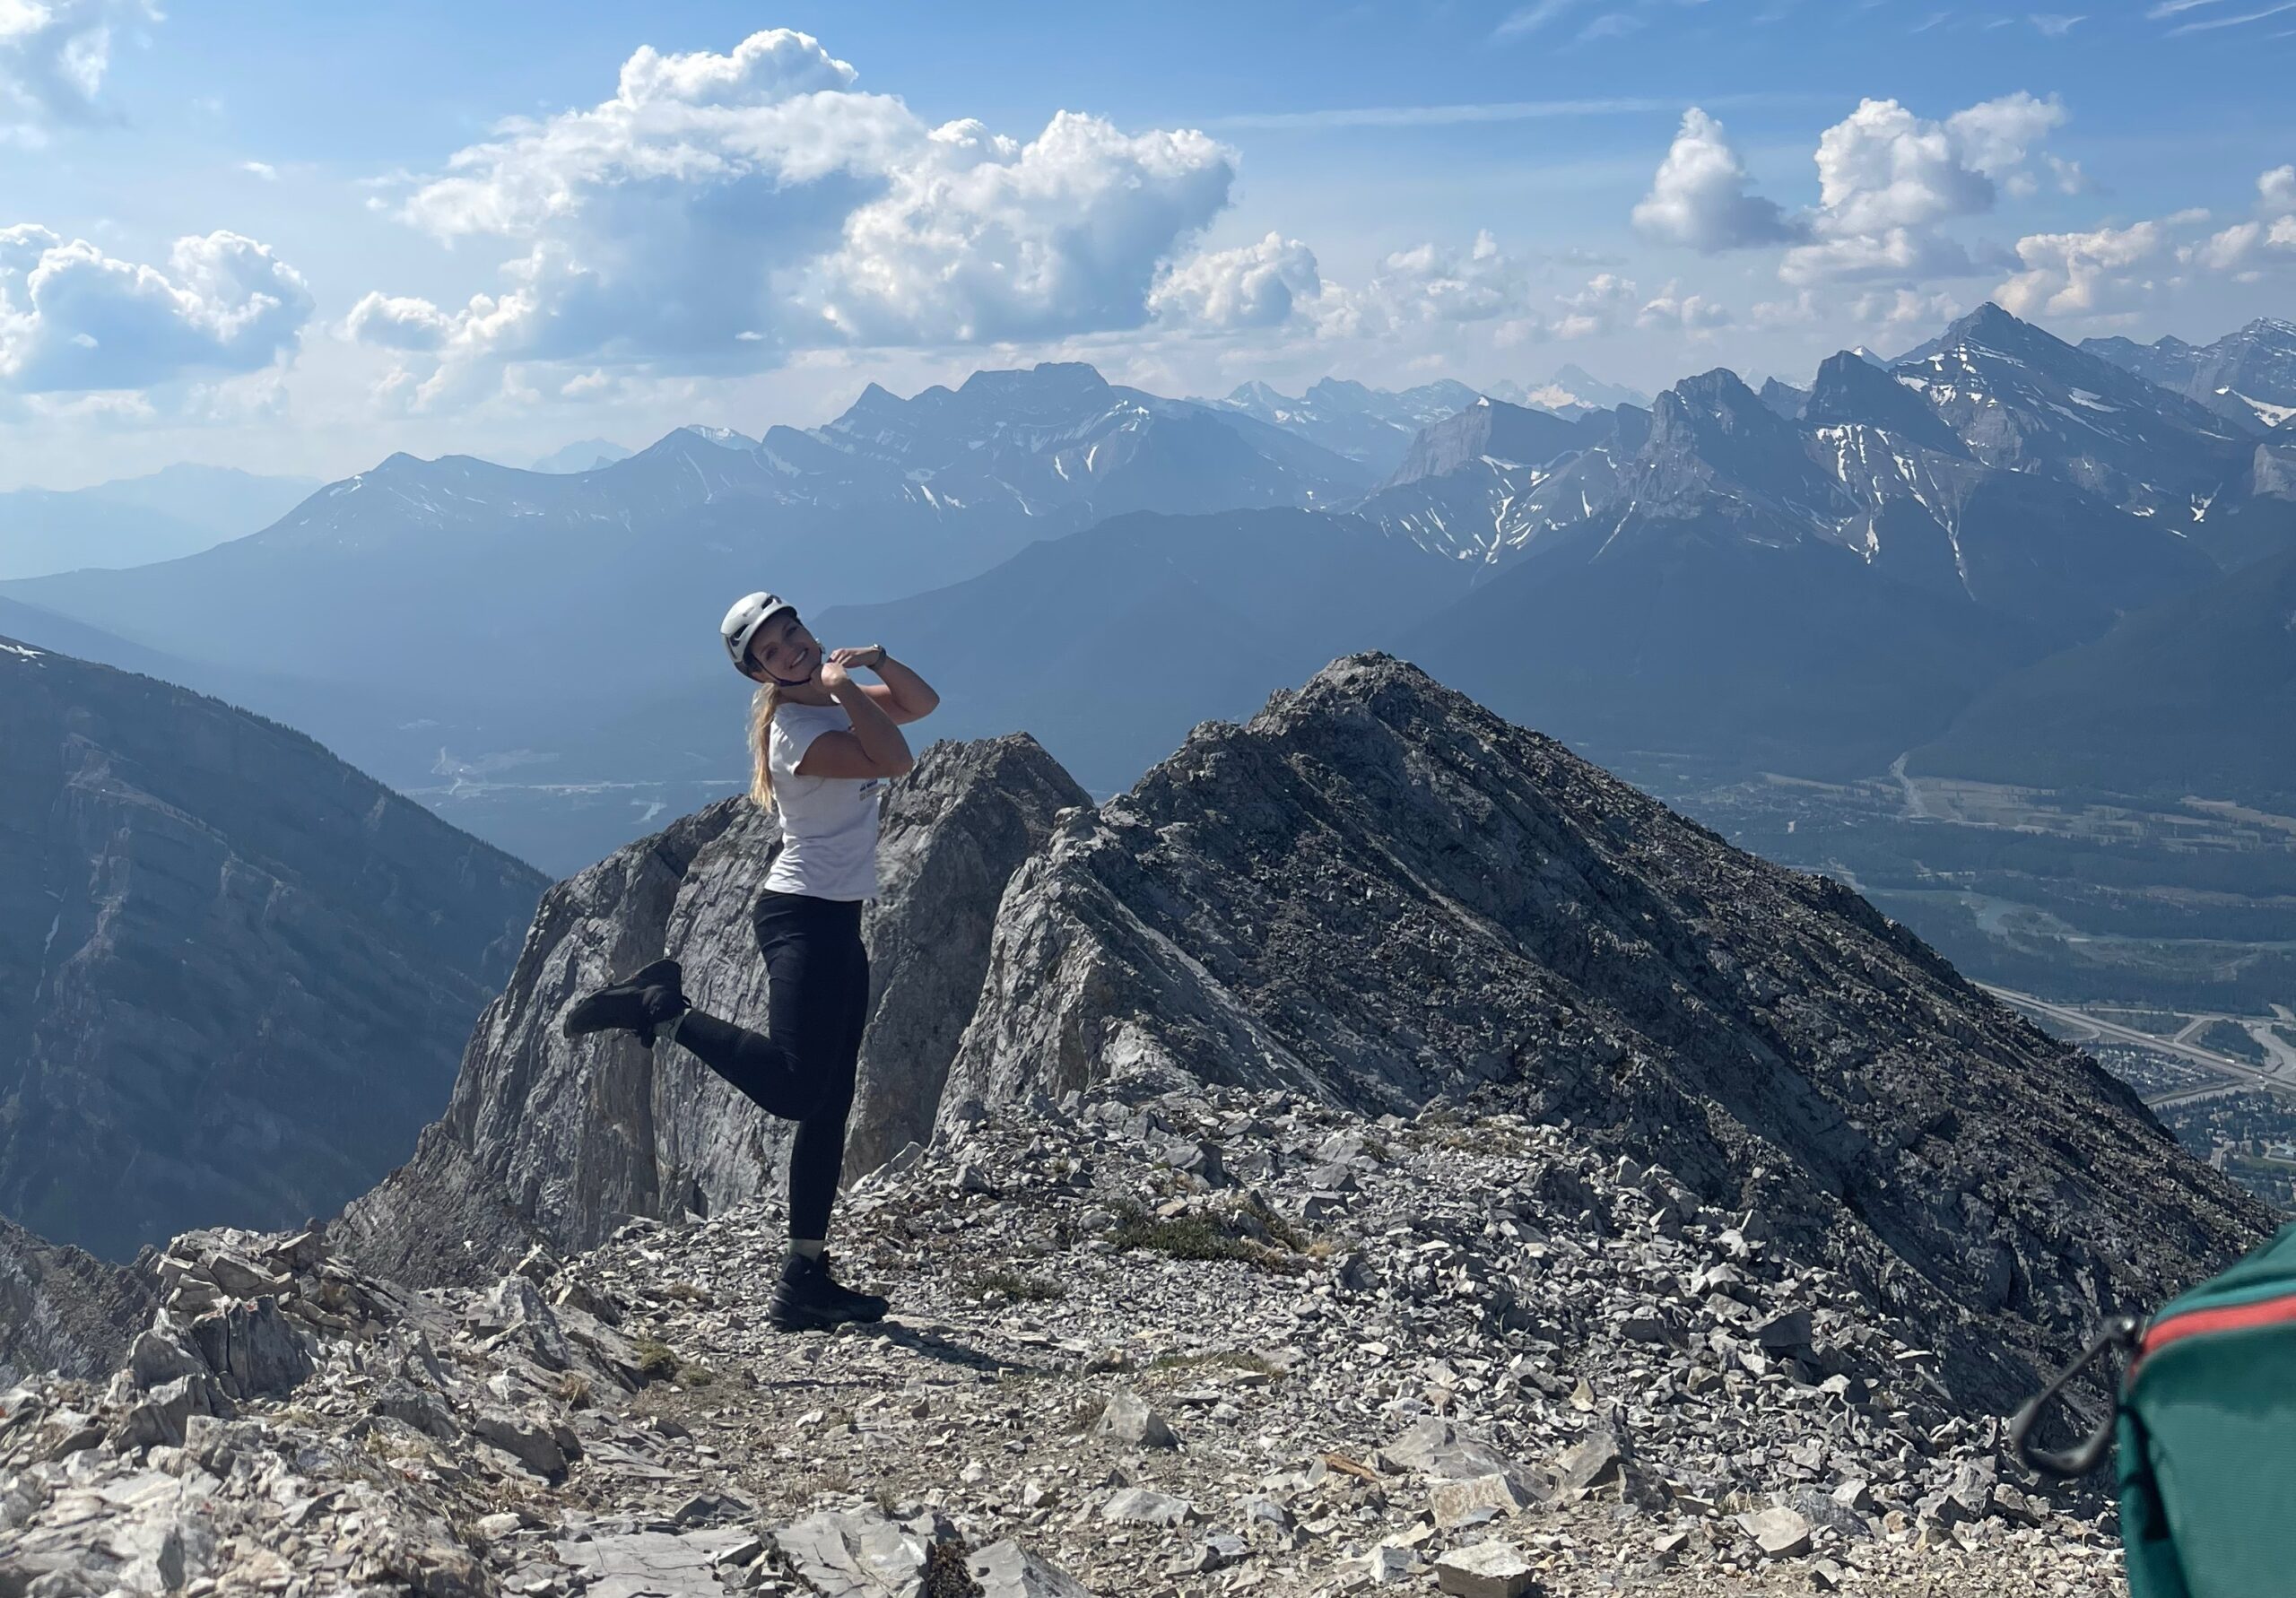
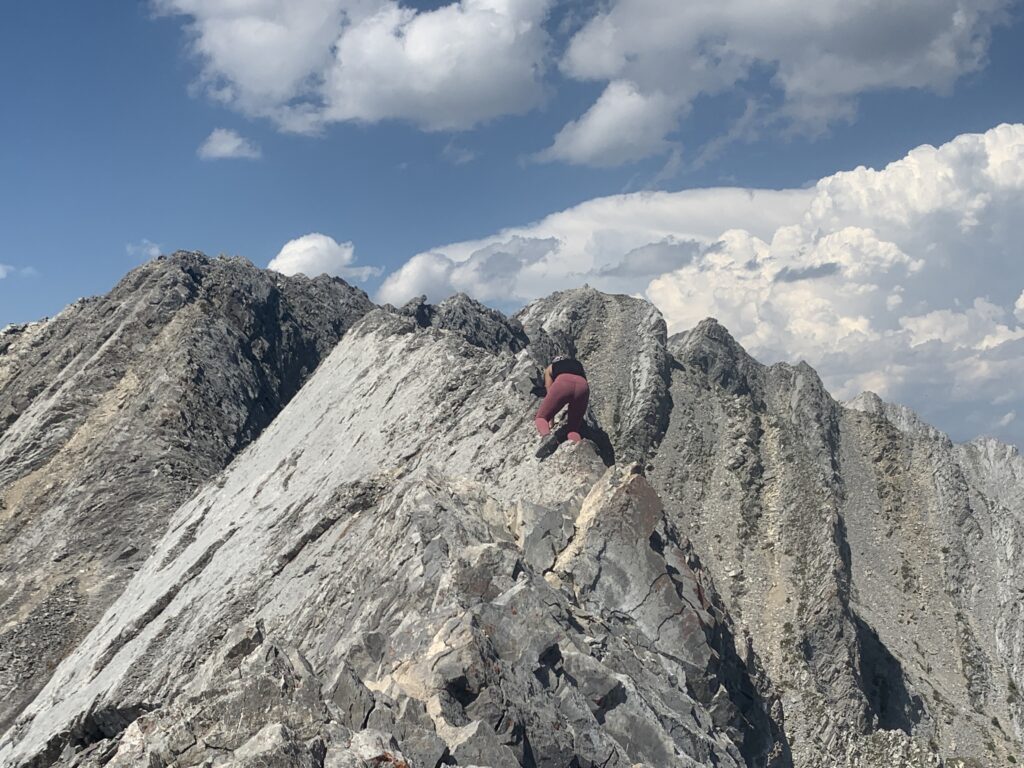
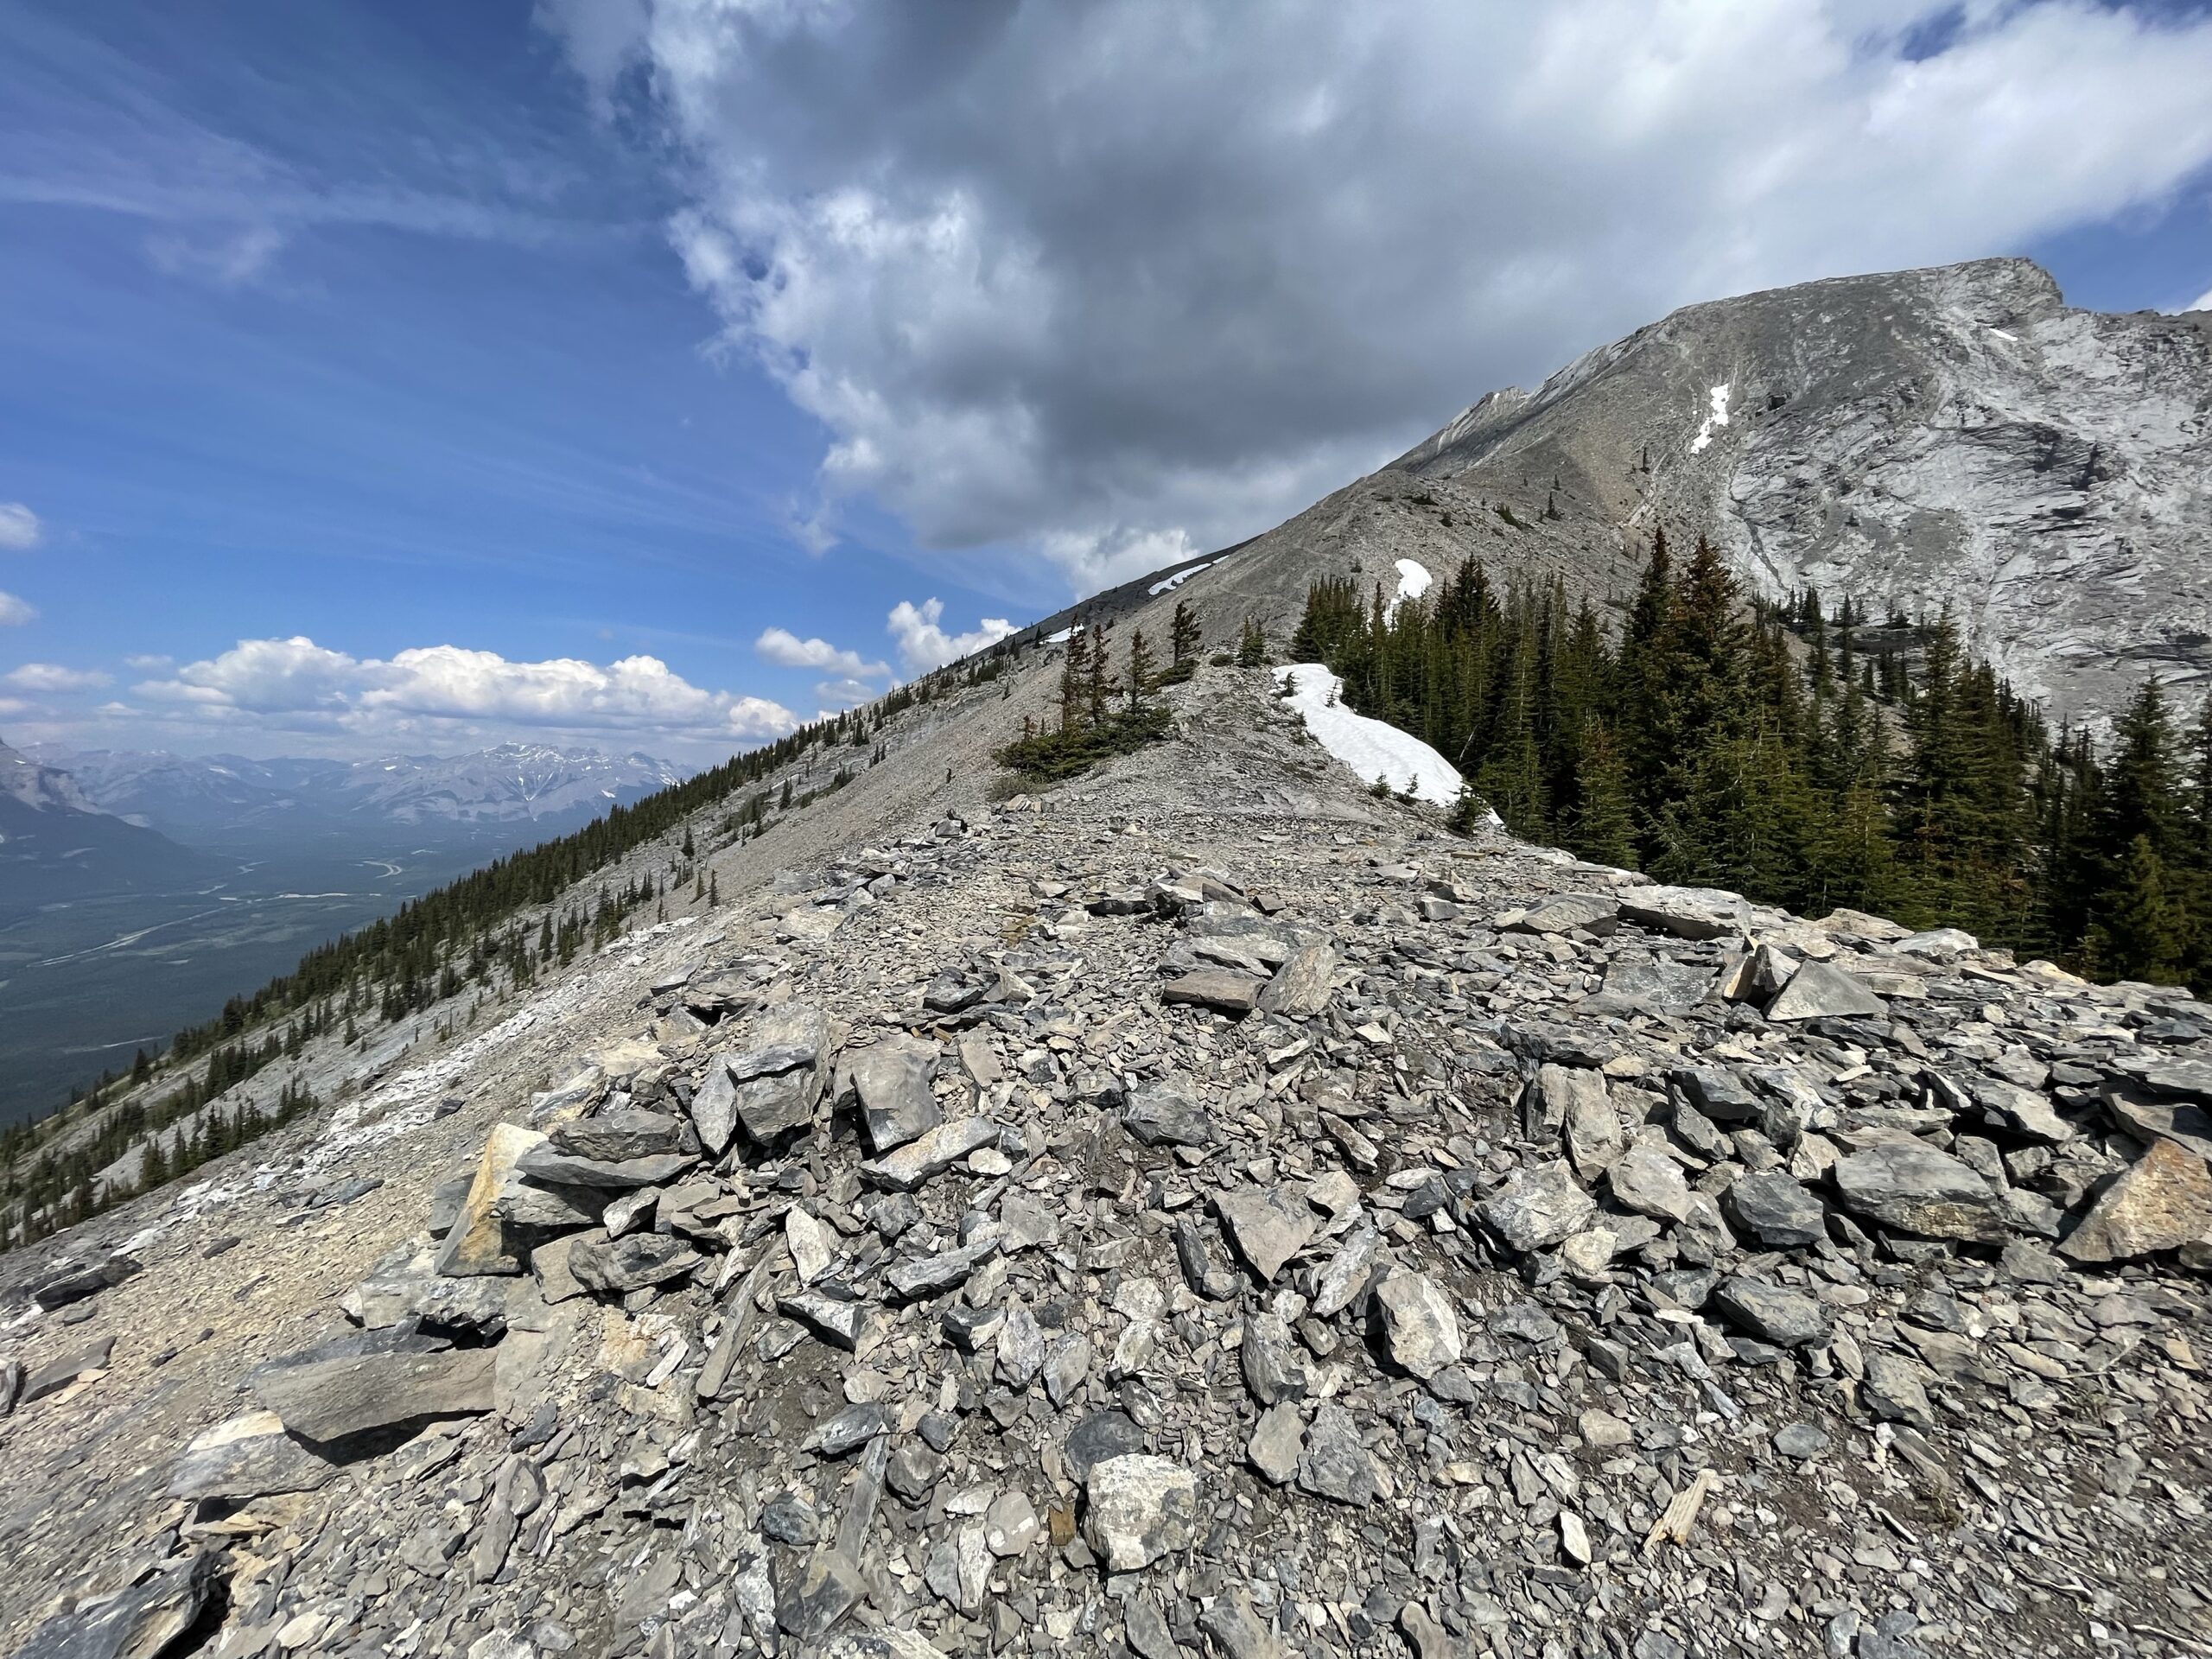
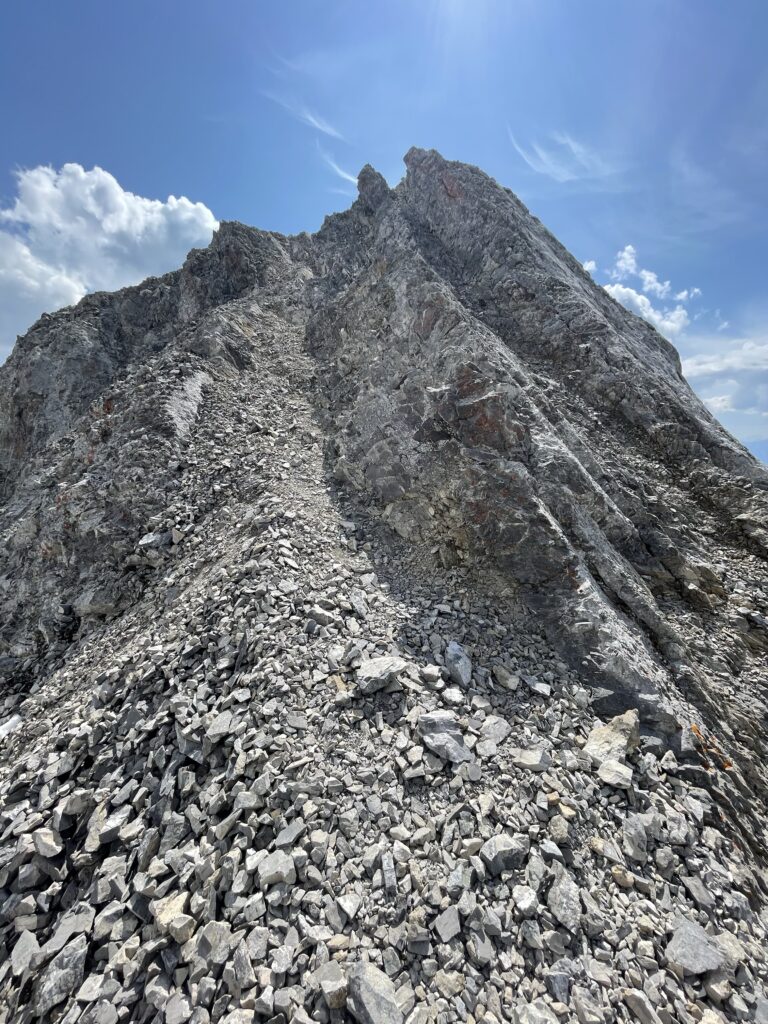
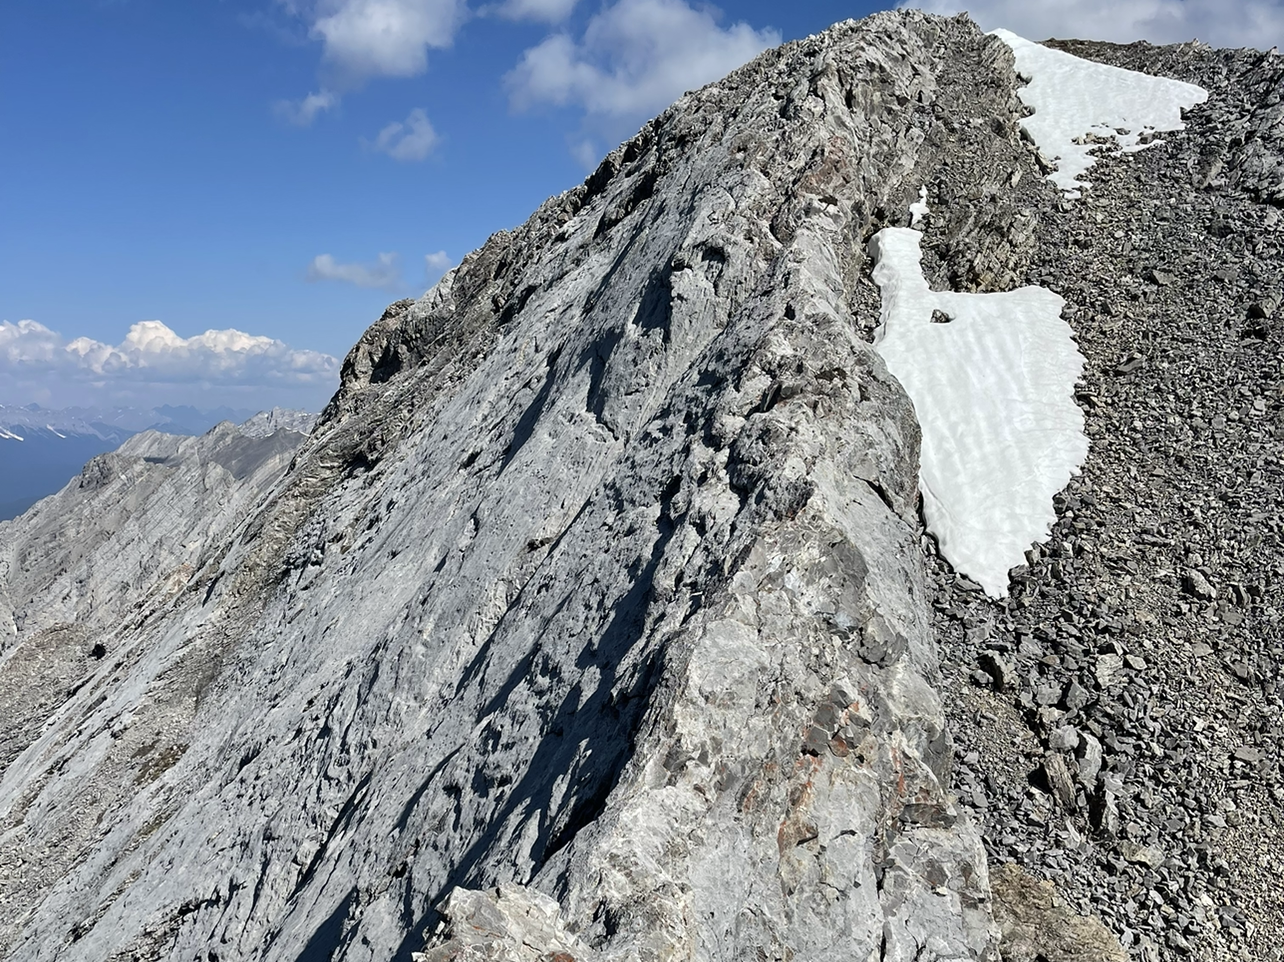
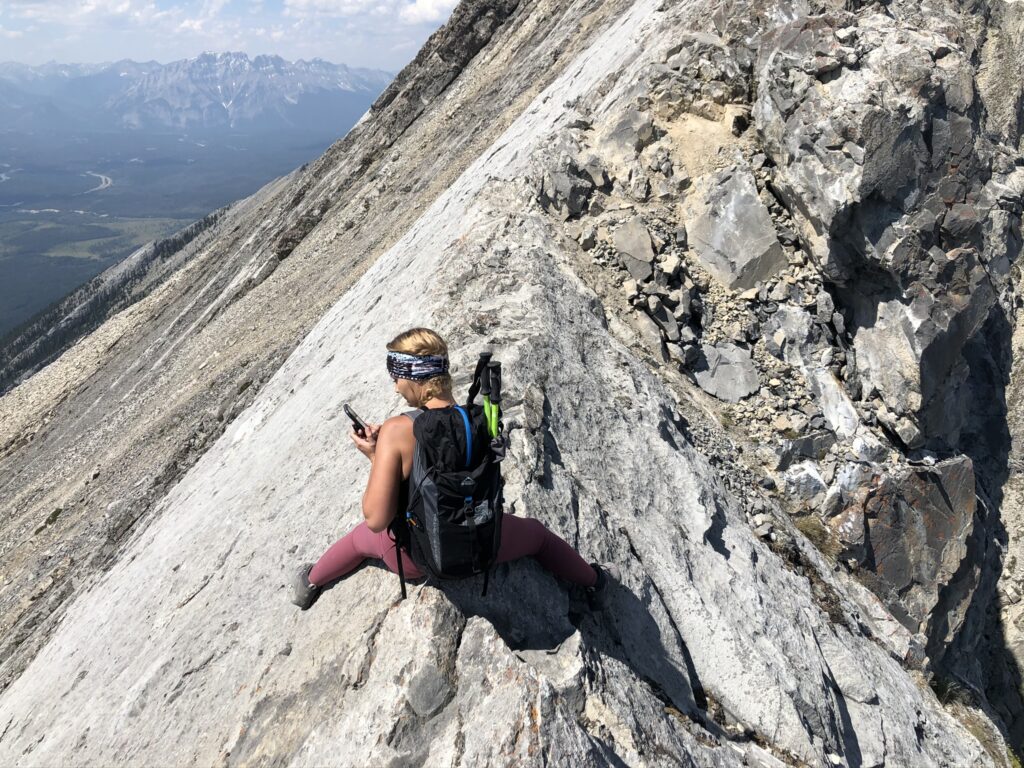
6. The Knife-Edge Ridge
Extreme caution should be used to traverse the knife-edge ridge to the true summit. Only experienced adventurers should attempt it.
From where the trail meets the ridge, continue along the rocky top of the mountain heading west. The ridge starts out fairly reasonable, with about a foot of space to walk before the drop on either side.
As you scramble along the ridge (meaning hand-use is required), the area where you place your feet becomes more and more narrow, until suddenly it seems like there isn’t space to safely place your feet at all.
There is a small downclimb section, which felt quite secure with a broader area for scrambling, followed by a gully back uphill to gain the ridge again.
The crux (hardest part) comes about 2 minutes before the summit. Here, the ridge is extremely sharp with very little texture to place your feet. It took me about 4 moves to get through it.
Traversing the entire ridge took me just shy of 30 minutes at a very slow and cautious pace.
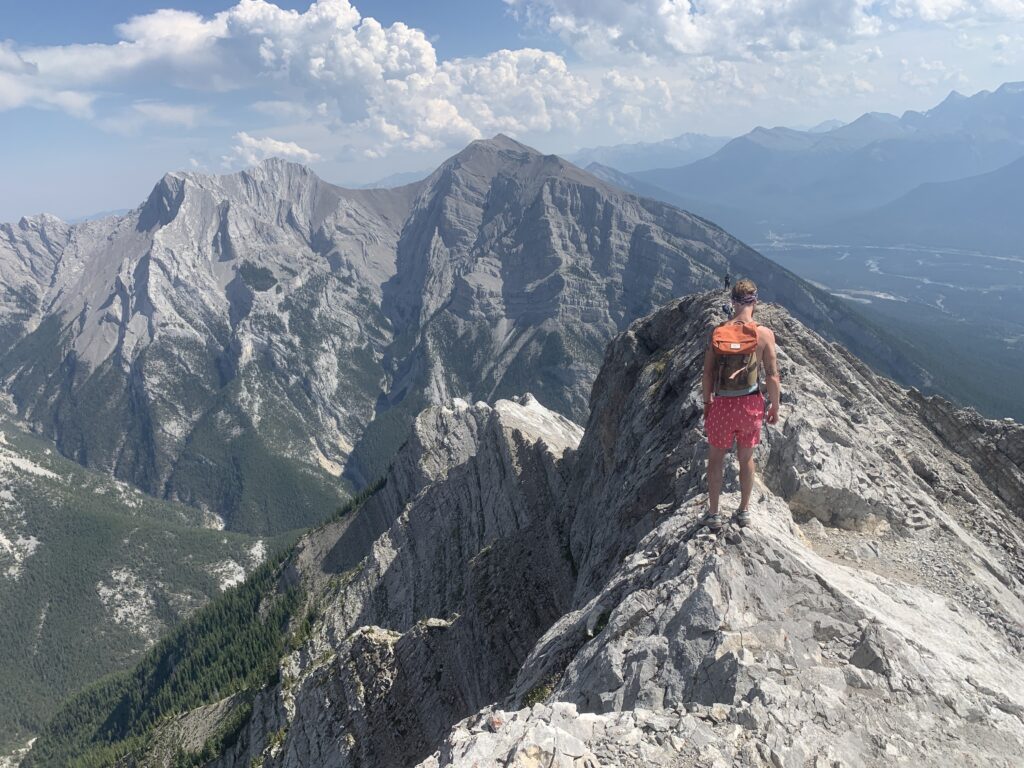
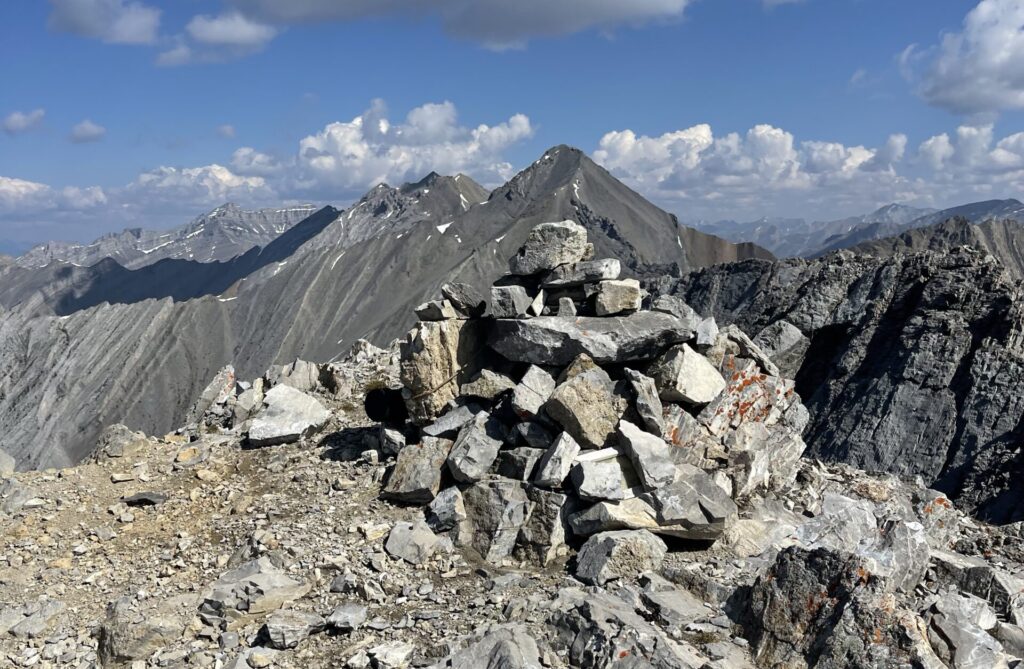
7. The Summit
The summit is beautiful and offers views of the town of Canmore. It is broad enough to sit down comfortably and enjoy a snack.
You likely will have the summit to yourself, as most parties stop at the helipad, and the majority of those who wander beyond the helipad turn around early along the ridge.
The summit often has a register (heavy plastic container) in which people leave their name or small memorabilia inside as a way to commemorate their accomplishment.
The views from the summit aren’t any different from the rest of the ridge, so if you don’t feel comfortable continuing along the exposed ridge, there is no shame in turning back.
Descending From Lady Mac
Lady MacDonald is an “out-and-back” trail, meaning you need to go back down the way you came up. Retrace your steps to return the way you ascended up the mountain.
Don’t rush along the ridge on the way back, even if you’re feeling more confident. Caution must always be exercised in exposed terrain!
What to Bring When Hiking Mount Lady MacDonald
I always bring the same essentials when doing day hikes. However, when hiking Mount Lady MacDonald, I always make sure to pack some essentials:
- Water – There are no water sources on the trail. Bring extra water, especially in the summer. I’d recommend 2L of water at a minimum.
- Poles – The trail is quite steep. Protect your joints and decrease the effort on your leg muscles by utilizing poles. Tuck the poles away when you need your hands to scramble. Either collapse them and carry them in your pack, or leave them at a safe spot along the ridge that you can return to.
- Scramble Gloves – Rocks can be quite sharp. Hand-use is required along the ridge. If you have gloves, they can often be beneficial by protecting your skin from both the rocks and the weather. Close-fitting durable gloves are recommended, but any gloves can be beneficial.
- Bear Spray – This trail crosses a wildlife corridor. Bear interactions have occurred here. You should always carry bear spray while hiking.
The Tea on the Lady MacDonald Teahouse
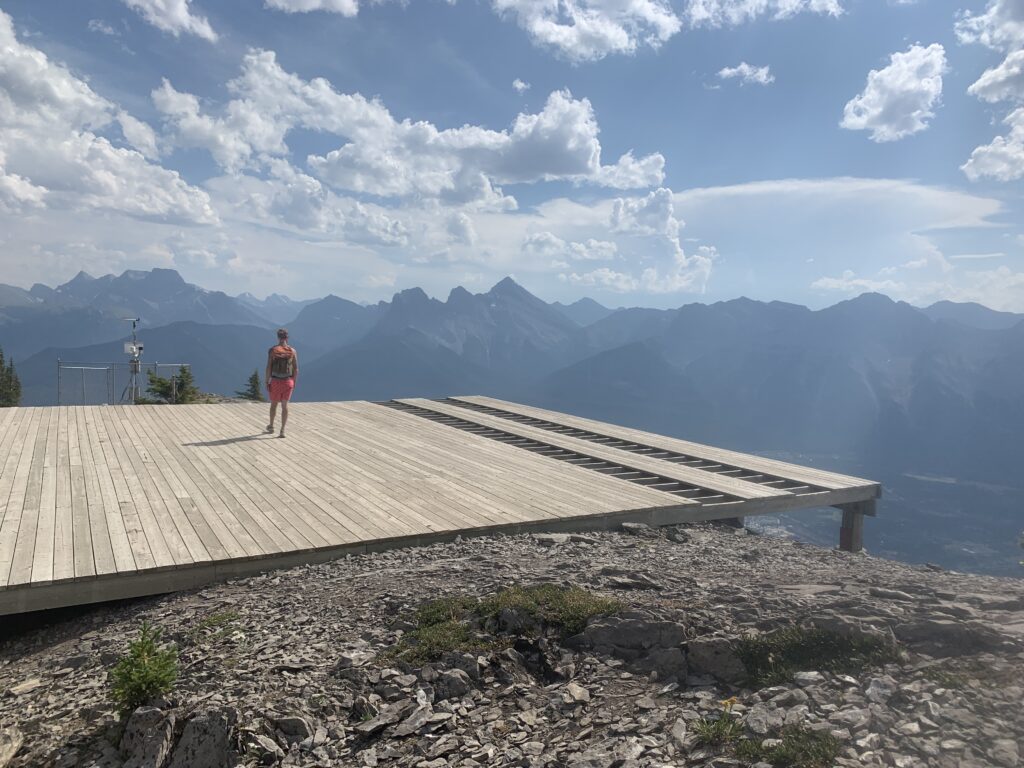
Someone unrememberable once decided Mount Lady Macdonald should have a helipad and a teahouse near the top to fly tourists up to the top of the mountain where they can enjoy a cup of tea and enjoy the views. Wild, right?
Turns out a venture like this is massively expensive and unrealistic, so the project essentially failed before it ever got a chance to really start. The remnants of the teahouse construction were torn down in 2013, and in 2022 the helipad was also torn down.
The town of Canmore is currently discussing whether to create a gondola to this location on Lady Mac, which they are hoping would increase tourism and revenue to the area.
Fun Fact! There is a small metal ramp in the scree near the former helipad site where parasailers and hang gliders can launch from!
Lady MacDonald by Comparison
If you’re wondering how Mount Lady MacDonald stacks up to other popular hikes in the area, it’s somewhat similar.
“Lady Mac” is an excellent option if you’re looking for something similar in terms of the trail maintenance, but want to decrease the crowds of the more popular routes.
| Distance (km) | Elevation Gain (m) | Dog Friendly? | Kid Friendly? | Scrambling Required | Difficulty | |
| Mount Lady MacDonald | 9.8 | 1303 | Yes | Yes | Minimal (but hard) | Moderate-Hard |
| Ha Ling Peak | 7.2 | 748 | Yes | Yes | Minimal (but easy) | Easy |
| East End of Rundle | 4.8 | 832 | No | No | Easy-to-Moderate throughout | Hard |
Although Lady MacDonald is longer and higher, it is a nice “next step” after Ha Ling (without traversing the ridge). There is no scrambling along the trail, and the trail itself is fairly straightforward to follow. Both hikes also have an easier option than hiking to the summit (saddle on Ha Ling, helipad on Lady MacDonald).
I would recommend hiking up Lady MacDonald to the helipad for hikers looking for a hard hike right from the town of Canmore, with the option to continue up to the ridge for more adventure. I would only recommend traversing the ridge to very experienced parties.
Frequently Asked Questions
How hard is the Mount Lady MacDonald hike?
The Lady MacDonald hike is hard. It is longer and taller than popular near-by peaks. There is only scrambling on the last portion to the summit, but the scrambling is very difficult. The hike to the helipad is considerably easy.
What is the Canmore Triple Crown?
The Canmore triple crown is when hikers summit Mount Lady MacDonald, East End of Rundle, and Ha Ling peaks – typically all within one day.
What is the Canmore Quad?
The Canmore quad is when hikers summit Grotto Mountain, Mount Lady MacDonald, East End of Rundle, and Ha Ling peaks – typically all within one day.
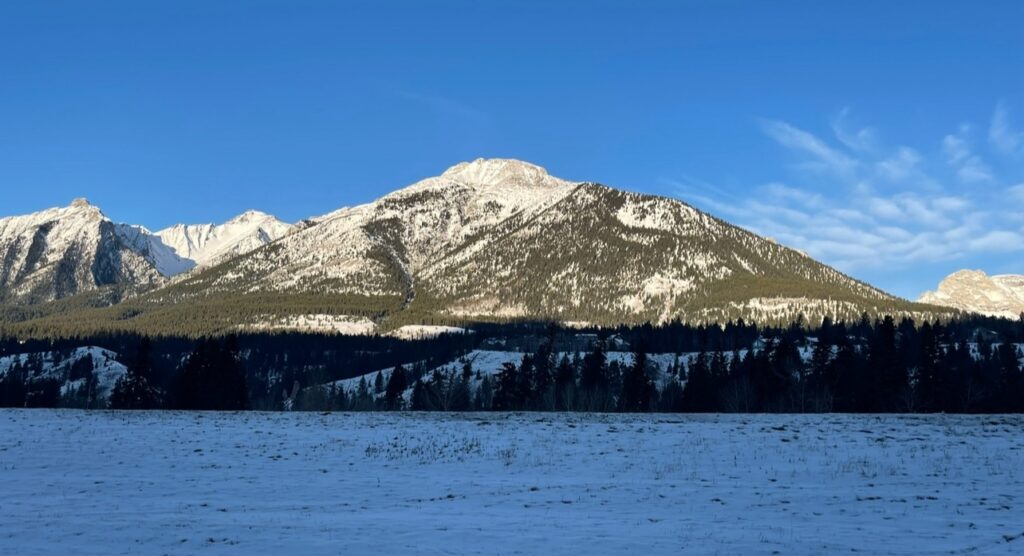
Can you hike Mount Lady MacDonald in the winter?
Yes, you can hike Mount Lady MacDonald in the winter, however, most people are only able to make it to the helipad or the ridge and not the true summit. Make sure you bring microspikes and warm layers!
Can you hike Mount Lady MacDonald as a sunrise/sunset hike?
Yes, Mount Lady MacDonald is an excellent sunrise or sunset hike. I recommend it as a sunrise hike, which ensures you have daylight near the top which can prove to be the most difficult part of the hike. Don’t forget your headlamp and some warm layers!
How long does it take to hike Lady MacDonald?
It will likely take the average hiker about 5-7 hours roundtrip to hike Mount Lady MacDonald, depending on if you go to the helipad or the summit. It is best to prepare for a full day on the mountain.
How busy is Mount Lady MacDonald?
Mount Lady MacDonald is moderately busy. It is considered well-trafficked, however, it is less popular than the near by Ha Ling and EEOR. You’re likely to run into multiple groups on the mountain, particularly on summer weekends.
Will I see bears on Mount Lady MacDonald?
It is possible that you will encounter a bear on the Mount Lady MacDonald hike, and has occurred before. Always carry bear spray in an accessible location, and know how to use it.
Is Mount Lady MacDonald dog friendly?
Mount Lady MacDonald is very dog friendly, particularly to the helipad. It is not recommended to bring dogs beyond the ridge. Dogs must be on leash to use the trails, however.
Is Mount Lady MacDonald kid friendly?
Mount Lady MacDonald can be hiked with kids, though it is a long and difficult hike. I would recommend a shorter hike with less elevation, but kids should be able to tackle this to the helipad if they are old enough and used to hiking mountains.
Can you do Mount Lady MacDonald as a first hike?
Yes, you can do Mount Lady MacDonald as your first hike, particularly to the helipad. If you’re feeling good after this point, I recommend hiking up to the ridge, but stopping before the traverse to the summit.
Do you need a Kananaskis Pass to hike Mount Lady MacDonald?
No, you do not need a Kananaskis Pass to hike Mount Lady MacDonald! Because the hike starts in the town of Canmore, it is exempt from needing a pass to park.
Other Questions?
Is there something I didn’t answer for you in this article? Drop a comment below and I’ll try to get back to you in a timely manner! Happy trails!