
Grassi Lakes is one of the best hikes in the Canmore area.
This hike is one of the most popular hikes around because it’s wide easy trail wanders up a hill beside a waterfall and leads you to 2 stunning bluey green mountainous lakes.
Although it can be crowded on a summer weekend, I can offer you tips to ensure you get the best experience!
If you’re looking for a hike that is family friendly, close to the town of Canmore, and offers stunning views, Grassi Lakes is truly a gem that you should consider.
What are Grassi Lakes?
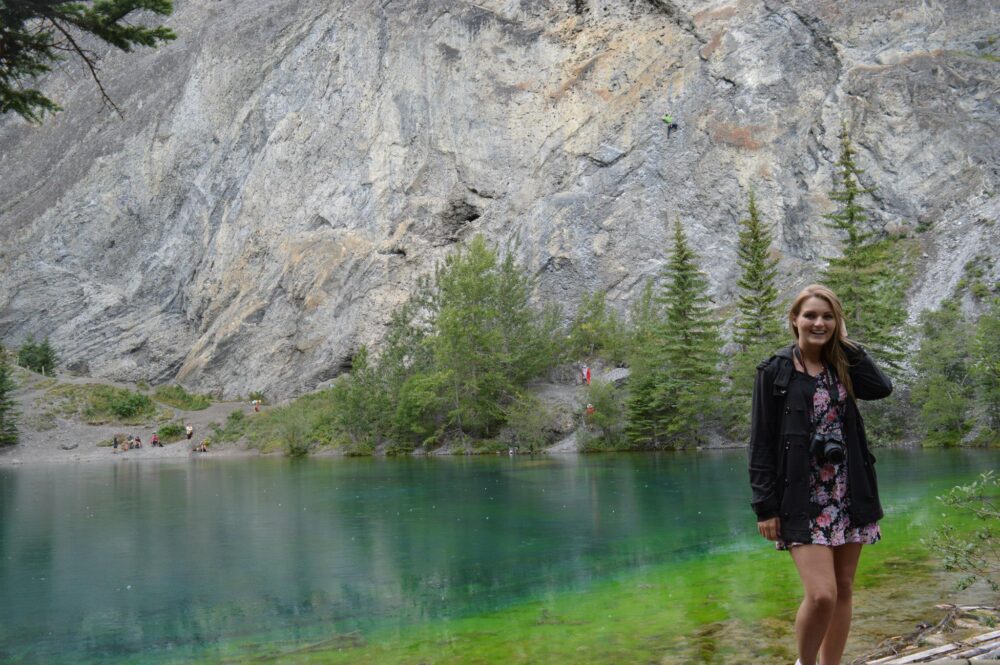
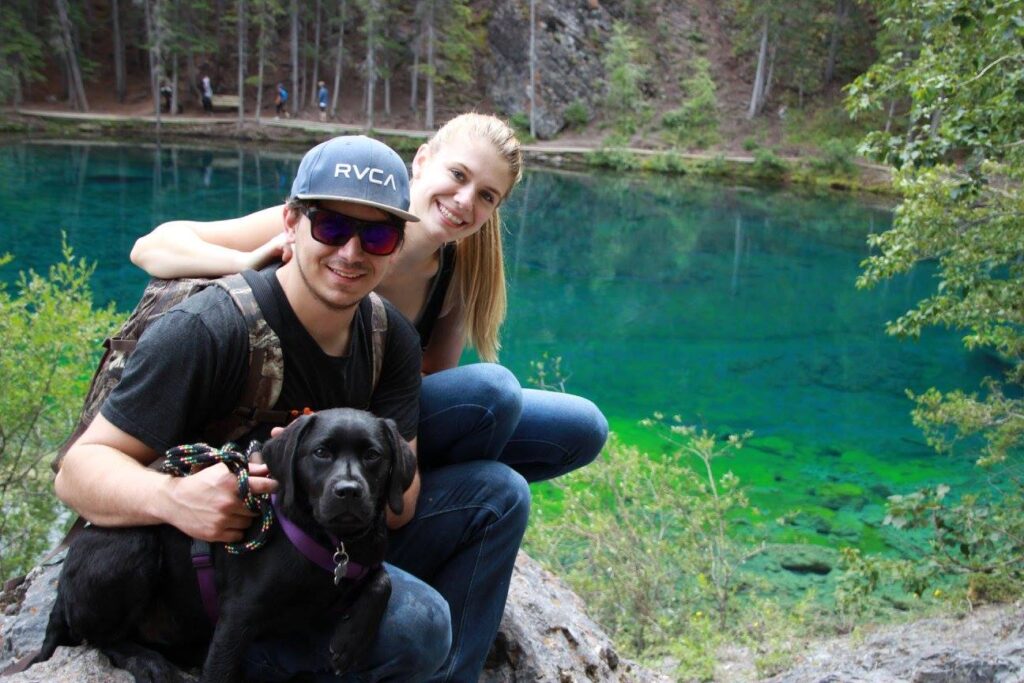
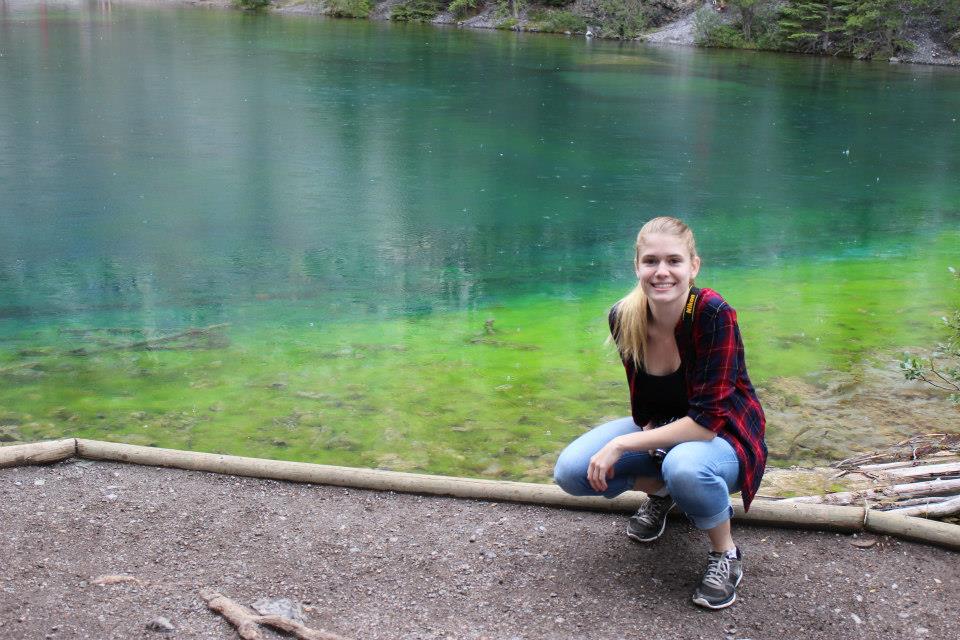
Grassi Lakes are two beautiful, emerald-colored lakes near the town of Canmore, that are reached by a short hike.
What makes them so spectacular is how deep they appear for such small lakes. This depth creates varying shades of blue near the edges of the lakes, making gorgeous photos and a lovely destination for a hike.
Because of their stunning colors, relative ease to reach, and proximity to town, Grassi Lakes are a popular destination from tourists and locals alike.
The Grassi Lakes area is also frequently used for rock and ice climbing by adventurous athletes. Keep your eyes open year-round for some cool feats of athleticism!

Is Grassi Lakes Closed?
No, Grassi Lakes is open for 2024 after a recent construction closure! You are able to hike up to the lakes on the “easy” trail.
Please be aware that the “more difficult” side of the trail is closed in the winter due to hazardous icy conditions. You will occasionally see ice climbers bypass the warnings, but they also have equipment to manage the hazards.
For more information on the closure and related updates, check out Alberta Parks.
Grassi Lake Quick Stats
- Distance – 3.4km / 2.11mi to the lakes and back
- Elevation Gain – 178m / 584ft
- Approximate Time – 1-4 hours
- All Season Hike? Yes
- Dog Friendly? Yes
- Kid Friendly? Yes
- Beginner Friendly? Yes
- Cell Service? No
- Wildlife Encounters? Possible deer and bears
- Access to Water? Yes, reservoir at the beginning, runoff on the “difficult” trail, lakes at the destination
- Bathrooms? Yes, outhouses at the trailhead
- Chance of getting lost? Minimal
Driving Directions & Where to Park for Grassi Lakes
Drive through the town of Canmore, heading up Spray Lakes Road towards the Nordic Centre. Drive past the Nordic Center and follow the road around the beautiful reservoir.
One minute past the Nordic Center, follow the paved road as it dips downhill to your left. If the road turns to gravel you have gone too far!
Once you drive down the hill, the parking lot takes up the entirety of the bottom of the hill and has one-way traffic. This is the best place you can park.
If this main lot is full, there is overflow parking back on the Spray Lakes Road before it dipped downhill. It is marked with a sign, but parking here is quite limited. You are not permitted to park along the roadway.
How to Get to the Grassi Lakes Trailhead
It might seem intuitive, but there are several different hiking trails surrounding the area of the Grassi Lakes parking lot. It is important to locate the correct one, as the others do not meet up with the Grassi Lakes trail.
Locate a large information signpost beside the outhouses. The Grassi Lakes trail begins directly behind this signpost. It starts with a small uphill section.
For a trail map, check out Alberta Park’s resource here. The map is also posted at the start of the hike on the large signpost.
Grassi Lakes Hike – Step By Step!
1. The Start
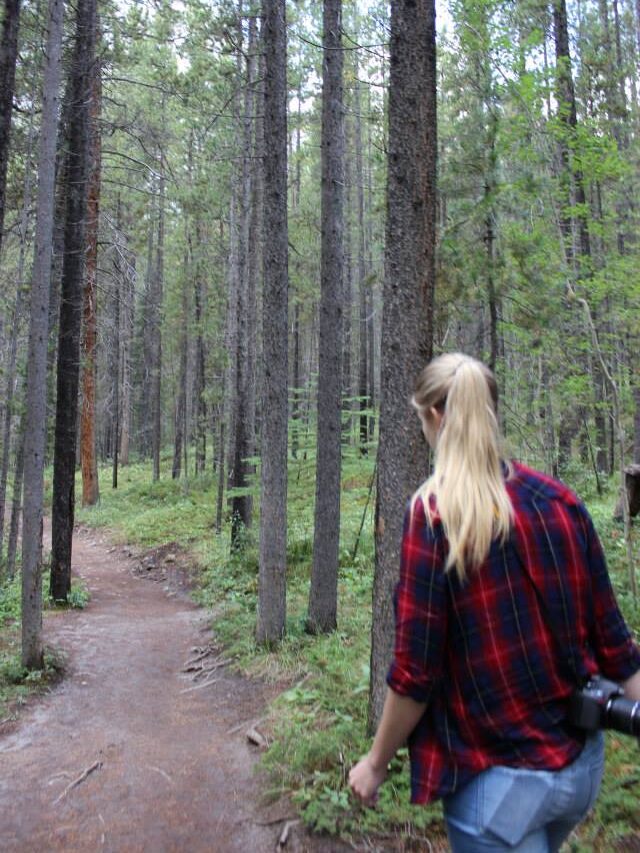
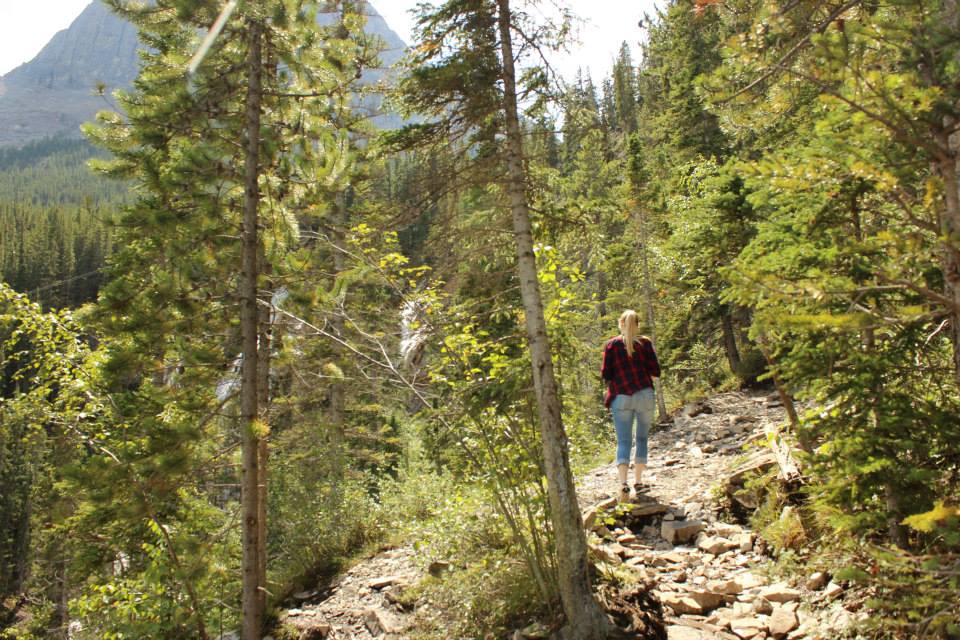
Hike up the small hill beside the outhouses, and follow the broad obvious trail into the trees.
The start of the trail is wide, maintained, and easy. The incline is very gradual. Follow the trail as it meanders along, being careful not to trip over large roots or rocks underfoot.
2. The Decision
5 minutes into the hike, the trail will split into 2 paths. One path is labeled “more difficult”, while the other is labeled “more easy”.
The “more easy” path is a simple wide path through the trees. There are no views and no obstacles. This path is family friendly, dog friendly, and stroller-friendly (if your stroller has large wheels capable of rolling over rocky ground).
The “more easy” path is still an incline, though it is quite gradual. Most parties should be able to complete the hike through this route, but I wouldn’t recommend this way as it’s less scenic!
The “more difficult” path is the scenic route, as it has several viewpoints throughout the journey. It is narrow at times and is not stroller-friendly due to flowing water and stairs. However, it is doable for determined kids, dogs, and beginner hikers! I recommend taking this route.
The rest of this section will describe the “more difficult” pathway since there’s nothing notable about the easier path. Consider hiking up the difficult route and down the easier route!
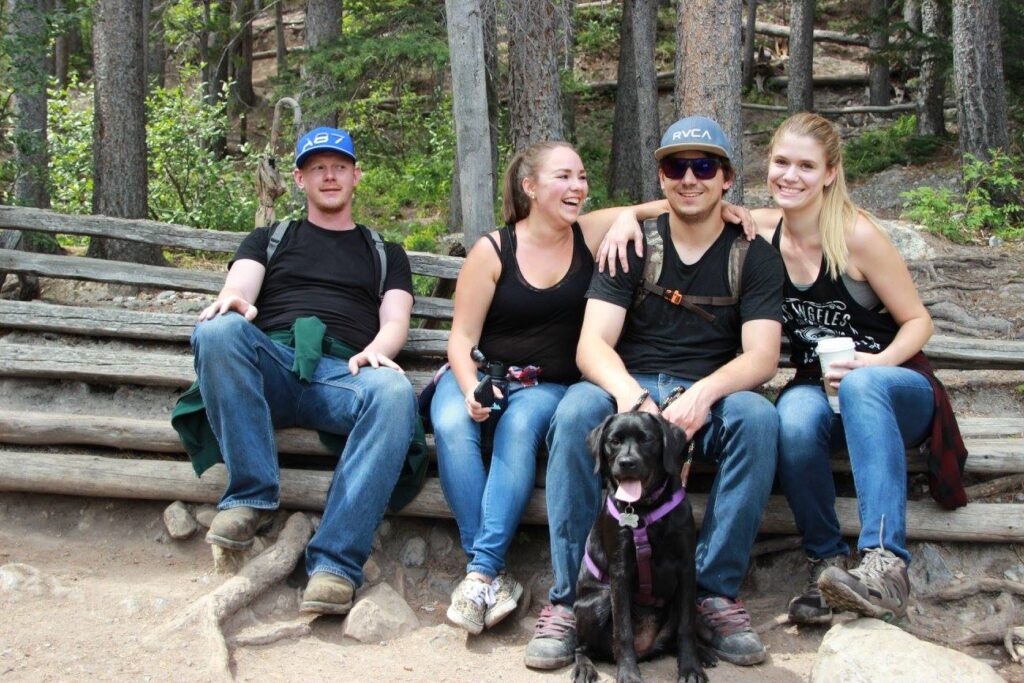
3. The Benches
Continuing along the “more difficult” pathway, there are a few benches to stop and take rests on along the way.
Utilize these benches for rest stops, opportunities to grab some food or water from your pack, or gather your group together for a photo moment.
4. The Waterfall
As the “more difficult” trail climbs uphill, you will first encounter a rocky section of the ground where water is actually flowing underneath your feet. During springtime, the water flow might even be heavy enough that you might get your shoes wet.
From this moment on, you should start to hear the rush of a waterfall.
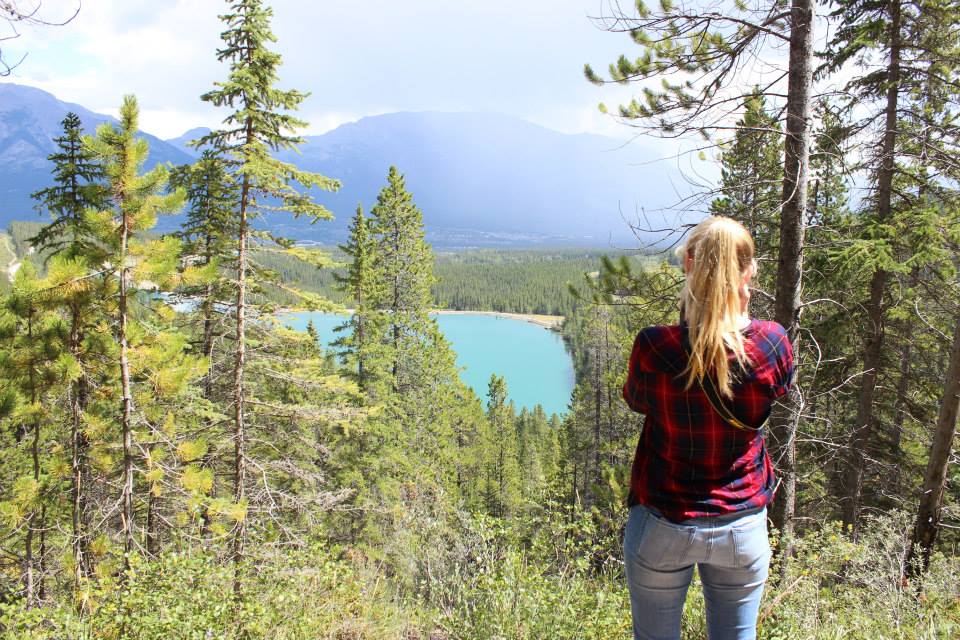
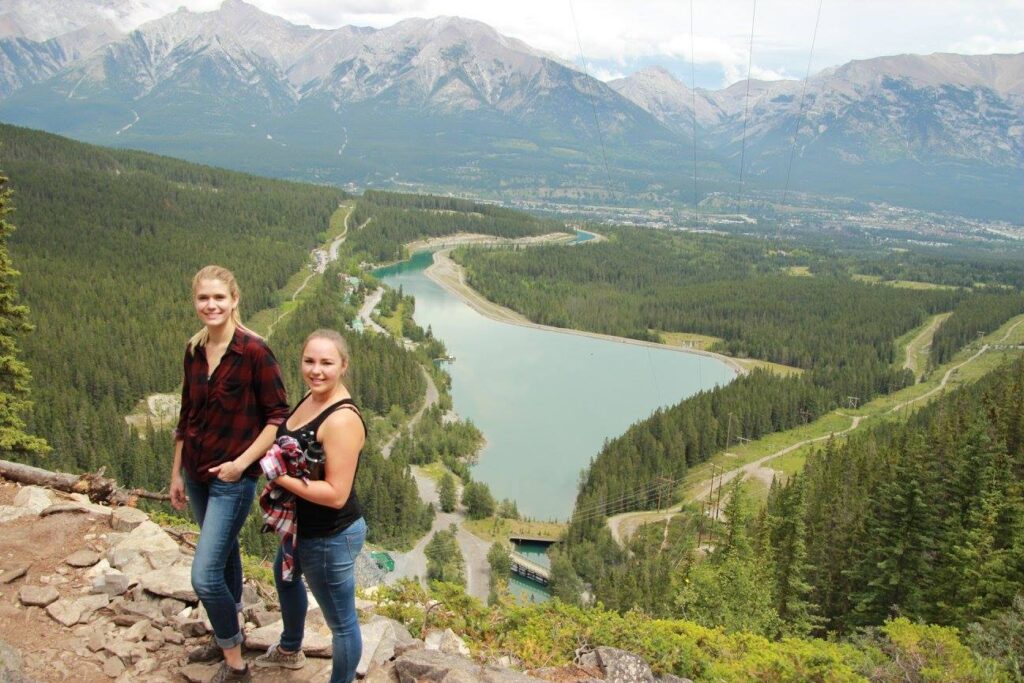
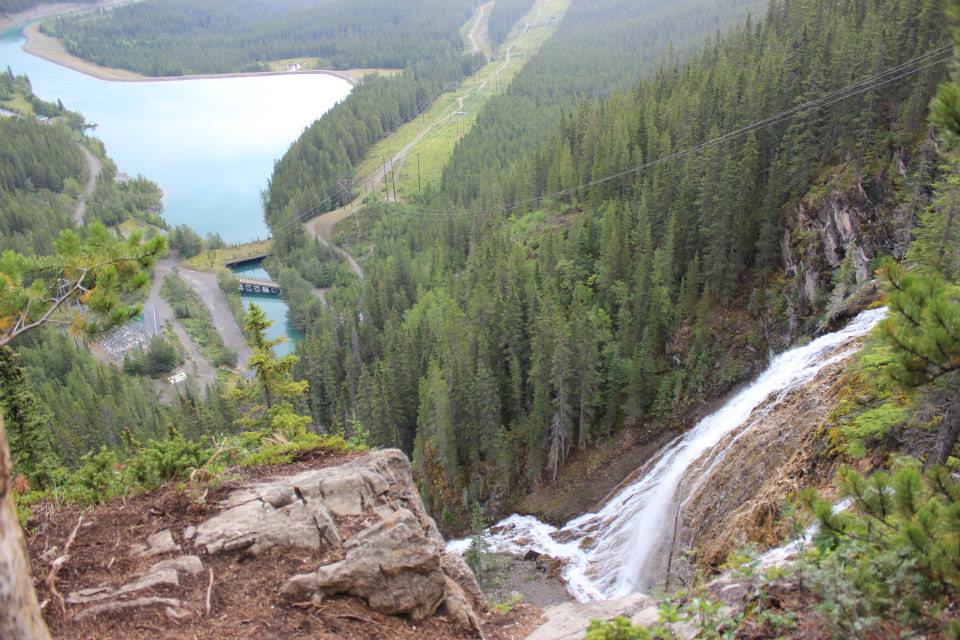
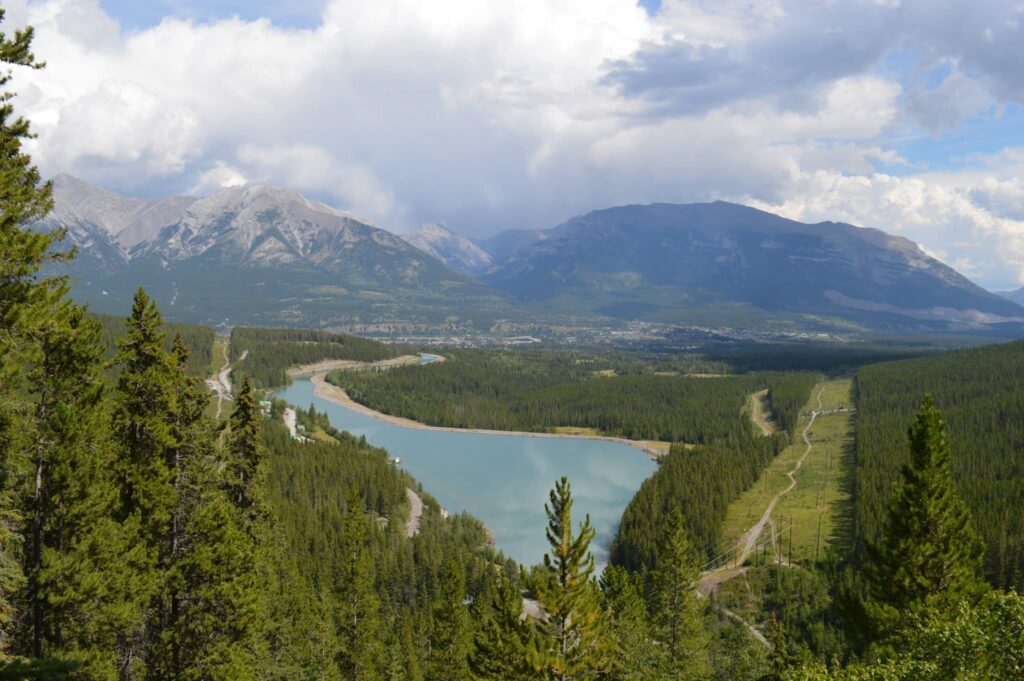
Continuing forward, the views open up towards the town of Canmore. You will see a large body of water (the Rundle Reservoir) below you, and ahead in the distance is the waterfall that feeds into the reservoir.
The trail continues closer and closer to the waterfall before coming to a nice lookout.
You will not be close enough to touch the waterfall or feel its spray, but the waterfall and the views of Canmore below are stunning nonetheless.
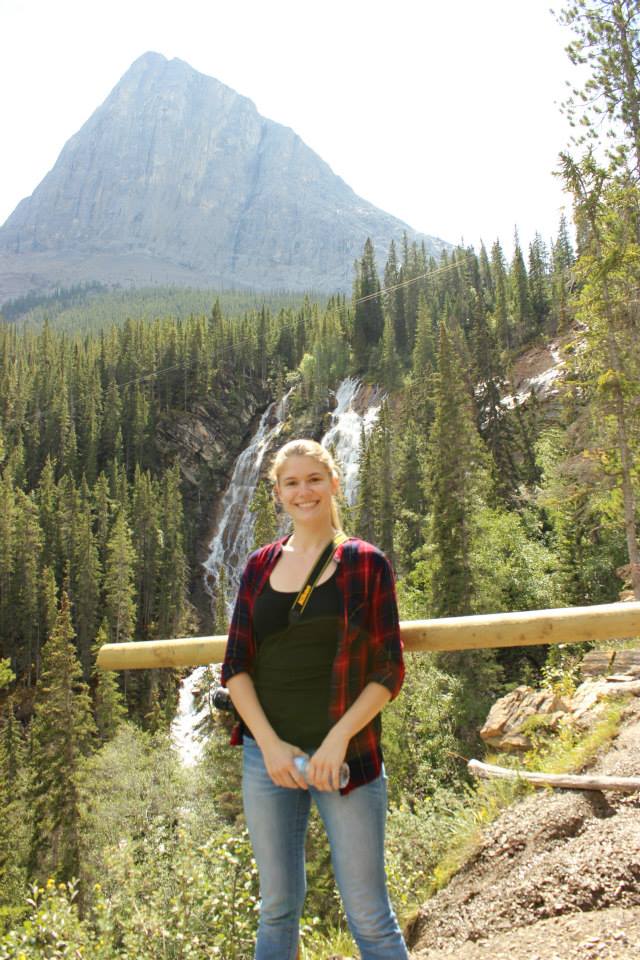
Ha Ling Peak in the background.
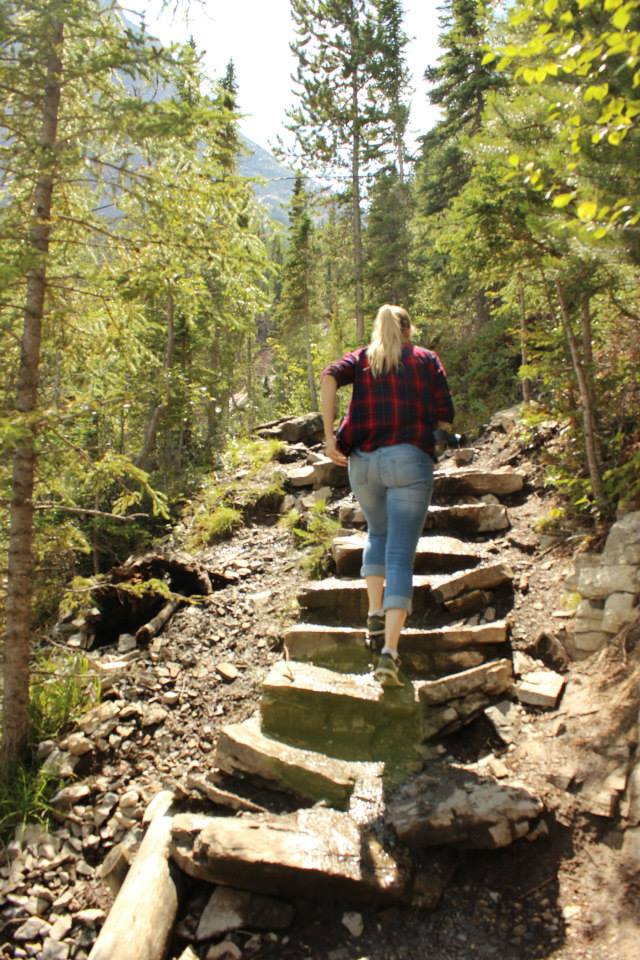
5. The Stairs
Almost immediately after the waterfall lookout, the trail turns back towards the trees and gains elevation quickly.
To help with this steep section, stone steps have been created which help you climb your way up to the Grassi Lakes, which are about 10 minutes away.
The steps are not evenly spaced, so watch your footing! Some of the steps up are quite large, but there is a wooden handrail to help you. Small children and those with physical limitations might have a tough time with this section.
Please note this section is very dangerous in the winter and is usually the reason for the trail closure.
6. The Lakes
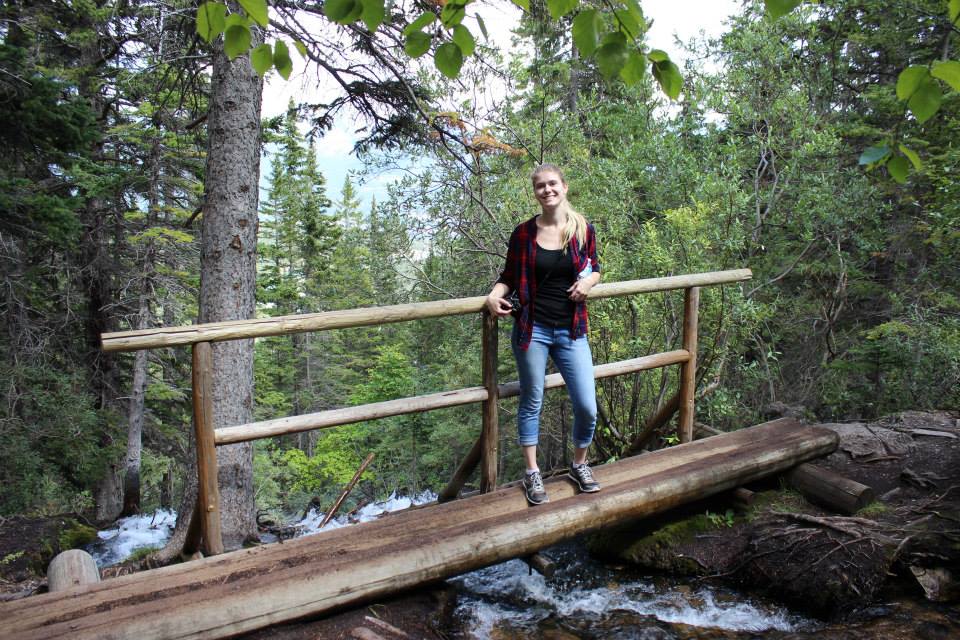
Once you’re done with the stairs, the lakes are a 2-minute walk away. You will encounter one lake first, and have to navigate around it to discover the second (larger) lake.
The first lake is the smaller of the two, and most people don’t spend much time admiring it, as the second lake is larger and makes for better pictures.
Use the small log bridge on your left to walk around the first lake to get to gain access to the second lake.
The second lake is the larger of the two, with benches to rest at, and a nice walking path all the way around the lake.
On the far side of the second lake is a rock wall where you might see some adventurous people climbing in peak summer hours. There is also a small concavity to the rock (lovingly called “the cave” by many tourists), which you’re able to climb up into.
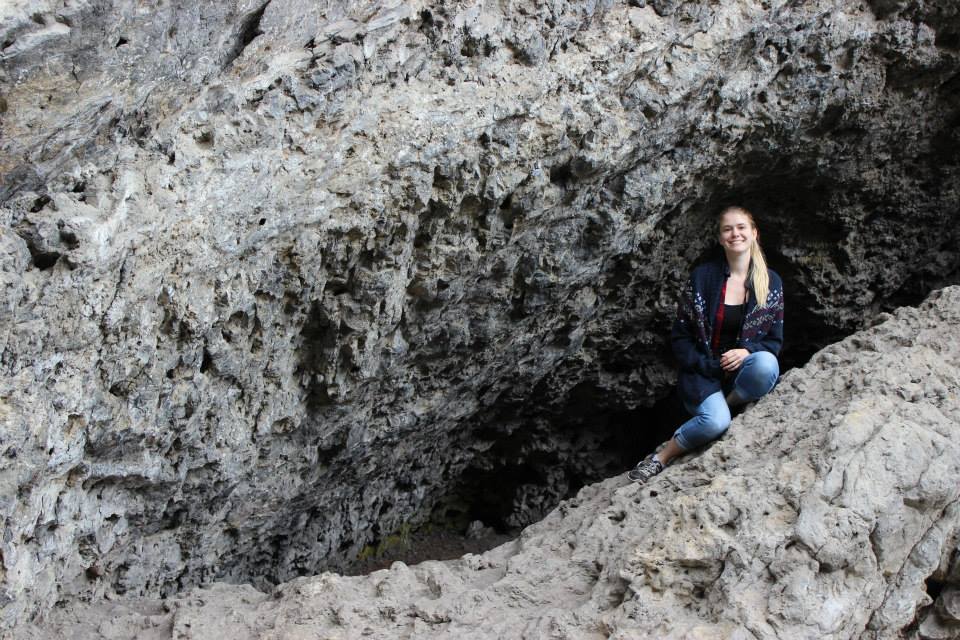
If you do venture towards the rock wall, be aware that there is a chance of falling rock from overhead! Climbers access this area and extend up the mountain above you. As well, Bighorn Sheep often knock rocks down from above.
Take your time walking around the lake and enjoying your accomplishment!

7. The “More Easy” Path
I recommend taking the “more difficult” path up, and the “easier” path down.
By doing this, it creates a natural loop so that groups aren’t trying to pass each other in opposite directions on the narrower portions of the “more difficult” trail.
The “more easy” path is very straightforward. The incline is gradual, the trail is wide and maintained, and you’re able to simply walk up or down in either direction.
If you have a stroller, small children, or are looking for more of an easier outing, then the “more easy” path is recommended for you, both up and down.
It is often the only option available in the winter as well, since the “more difficult” trail usually closes in the winter due to hazardous conditions from the flowing water on the trail freezing and turning to ice.

Pro Tip!
When you’re at the second Grassi Lake, wander around the backside of the lake and continue up the many, many stone steps. 20-30 minutes of effort will take you up to Whiteman’s Pond and offers beautiful views of Canmore in addition to a massive pond with alpine views behind.
You can also admire the rock climbers while you hike up this section!
This area is often busy with cars as it’s the access point for Ha Ling and EEOR trails. However, it might be the best alpine pond you see on your trip, so it’s worth the additional steps! Return the way you came.

What to Bring When Hiking Grassi Lakes
Luckily, you really don’t need much to successfully hike Grassi Lakes. In fact, if you’re fairly fit (and planning to hike quickly), you might not need anything at all.
Most parties should be able to complete Grassi Lakes in comfortable shoes (meaning hiking boots aren’t specifically required). I wouldn’t recommend hiking in sandals or Uggs per se, but it’s definitely been done, and if that’s what you find comfortable – all the power to you!
However, for the best experience, some things I’d consider bringing are:
- A fanny pack or small bag. For smaller hikes, I don’t like to be weighed down unnecessarily by a large pack. A fanny pack is light enough to not cause you any extra grief, but can be large enough to carry snacks and a water bottle – more than enough for this hike.
- A light jacket. This hike is fairly sheltered, so you shouldn’t expect too much variance in the weather. However, if rain is in the forecast or you get cold easily, tie a light jacket around your waist to avoid carrying a pack.
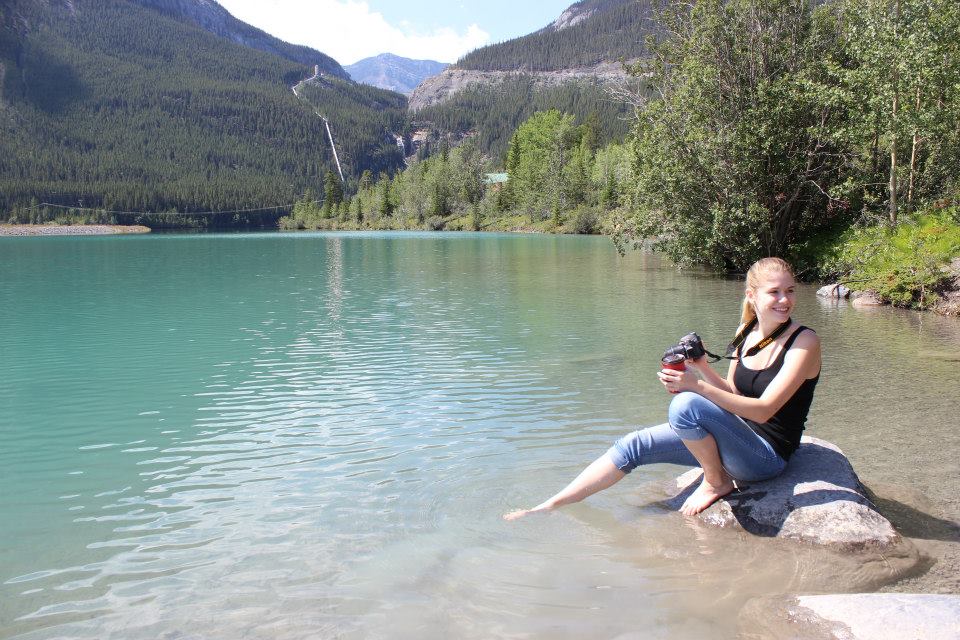
- The nice camera. Because this hike is on the shorter end, it’s not too much effort to haul a nicer SLR camera up to the lakes. You will be able to get some stunning photographs of your hiking crew and the lakes with the lens capabilities of a nicer camera.
- A towel. Swimming in Grassi Lakes themselves is quite controversial and you’d receive some mean comments, but I do recommend taking a dip in the Rundle Reservoir across from the parking lot when you’re done the hike. Just don’t forget the towel to dry off!
Grassi Lakes Tips To Get The Best Experience
- Hike Grassi Lakes in bad weather, during the off-season, or mid-week to decrease crowds. There is no bad time to hike Grassi Lakes, but the parking lots and trail space do fill up quickly, particularly on summer weekends.
- Consider e-biking up to the trailhead, utilizing a taxi, or even walking up from the town during summer weekends. This is another way to ensure you’ll get to experience the trail without worrying about a parking spot, and you won’t have to purchase a Kananaskis pass if you’re not bringing a vehicle.
- Make sure to use the outhouses before you hike, as the trail is often too busy to sneak off and relieve yourself.
- Consider taking the “more difficult” trail up, and the “easier” trail down. This way you get to enjoy the views as you go, and can end the hike as quickly as you need or want to on the way down.
- Dip your feet (or your whole body!) in the reservoir across from the parking lot when you’re finished your hike. Alternatively, go paddle boarding on the Rundle Forebay Reservoir after your hike, which is only a 2-minute drive back towards town!

Frequently Asked Questions
How long is Grassi Lakes hike?
Grassi Lakes is 3.4 kilometers long to hike to the lakes and back to the parking lot. It will take the average group 1-4 hours to complete the hike, depending on fitness.
Is Grassi Lakes open 2024?
Yes, Grassi Lakes is open in 2024! However, the scenic “difficult” trail is closed in the winter due to icy conditions. The “easy” trail stays open year-round.
Is Grassi Lakes a hard hike?
No, Grassi Lakes is considered an easy hike, though it might feel more moderate for some people. There are two trail options, with one being easier than the other.
Do I need a Kananaskis pass for Grassi Lakes?
Yes, a Kananaskis pass is needed to park at the parking lot for Grassi Lakes. A Kananaskis Pass is not required if you’re not parking a vehicle, though. For more information or to purchase a pass, click here.
Do you have to pay to go to Grassi Lakes?
No, you do not have to pay to go to Grassi Lakes. You only have to pay for a Kananaskis Pass if you bring a vehicle, but there is no fee to hike the trail.
Do you need bear spray for Grassi Lakes?
Yes, you need bear spray for Grassi Lakes. Bears have been spotted on the trail occasionally.
Can you swim in Grassi Lakes?
It is controversial if you can swim in Grassi Lakes, as there is no rule saying you can’t enter the water, but signs do recommend you stay on trail. The water is also very cold. Bring a bathing suit or floaty, a towel, and dry clothes to change into if you decide to go in the water.
Can you take a stroller to Grassi Lakes?
Yes, you can take a stroller to Grassi Lakes, though it will be easier if the stroller has large, durable wheels, as the trail is rocky and uneven. Ensure you take the “easier” trail, as the “more difficult” trail will not be doable with a stroller.
What mountain is Grassi Lakes on?
Grassi Lakes is not on a mountain, but is in a gully that is nestled between Ha Ling Peak and East End of Rundle Mountains.

Other Questions?
Is there something I missed? Do you have some unanswered questions about the trail? Drop a comment below and I’ll get back to you as soon as possible!